
When we moved to Chicago, I was a fresh-faced, glowing new bride. I had just graduated college, gotten married, and moved to the middle of the country to a big, shiny city. We were living 27 stories up in a high rise that overlooked the lake and the city. I was on top of the world.
Quickly picking up my new roles as “adult” and “wife,” I went to work, I cleaned house, and together Chris and I learned to cook.
About 6 weeks in to our new little life, I noticed the dishwasher was not working quite right.
I put things in, and either they didn’t come out entirely clean, or sometimes they would come out with dishwasher detergent still on them.
Was the detergent door releasing too late?
Was there not enough water?
Was there any water at all?
I emailed our land lady, and since she didn’t live in the same state, she asked us to find a repairman and have him come in, and she’d repay us for any work that he did. No problem!
I researched all over for just the right repairman. Good reviews, professional-looking website, handy at multiple home-repair tasks. I called, explained, booked. He was scheduled to come over the next Friday; I would even work from home to meet him and show him what the problem was.
We spent the rest of the week doing dishes by hand. No fun.
Finally, Friday rolled around. Hooray for fixing the dishwasher!
Mr. Repairman came in, a mid-30’s man with a bald head who looked remarkably like Mr. Clean. He was very nice, and I explained the issues.
“We put dishes in, run the cycle, and at the end, either there’s soap lying in there still as if there’s not enough water, or sometimes there’s even detergent lying on the dishes themselves!”
He put four glasses in the dishwasher, facing up, to test the dishwasher to see if there was any water getting up to the top rack and moving around the whole unit.
Of course, it worked just fine.
He asked me to give him a specific example of when it wasn’t working.
“Well, sometimes for example, we’ll open up the dishwasher, and there’s detergent sitting right there on top of a bowl in the bottom rack.”
“How big is the bowl?”
“Pretty big, like a mixing bowl.”
Now, what I haven’t yet mentioned is that this was a “special” dishwasher. Made for little spaces, this was an extra-small, super narrow dishwasher. The inside was maybe 18 inches wide. And that’s being generous.
He then proceeded to explain to me that if I put a big bowl the size of my dishwasher in the bottom rack, the water will just get trapped inside the bowl and never make it up to the top rack, or even get the detergent wet.
I sheepishly paid him the “diagnostic fee” of $60, and showed him out – with the diagnosis being my own stupidity. Then I emailed the land lady to let her know that the dishwasher *magically* started working again.
That’s right.
I paid the dishwasher repairman $60 to teach me how to load a dishwasher.
Saturday, January 29, 2011
Thursday, January 27, 2011
A Fish Tale: Whole Red Snapper
Last weekend, when we were cruising around Costco, I spotted something special in the seafood department:
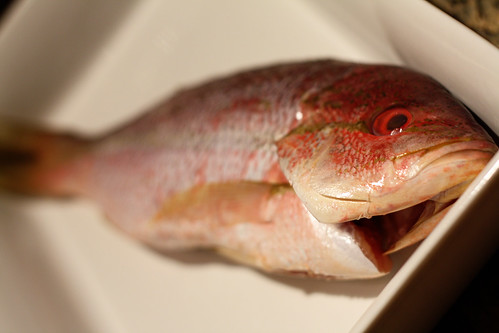
Well hello, gorgeous.
They had whole red snapper on hand! Wild, unfrozen, and positively enticing.
We brought this baby home, and quickly realized that we hadn't ever actually cooked a whole fish before. So we brought out the cooking bible.

Reading through The Basics of Whole Fish, we felt armed and ready.
One itty bitty problem.
Though the fish had been thoroughly cleaned, it still had scales.
"Use a spoon or dull knife to scrape the scales from the fish."
Yes, that is a fantastic way to make scales fly everywhere.
So to save my kitchen from being covered in fish scales, I opted to just run the fish under some water and remove the scales the old fashioned way: with my hands. Not the easiest way, but certainly better than the alternative!
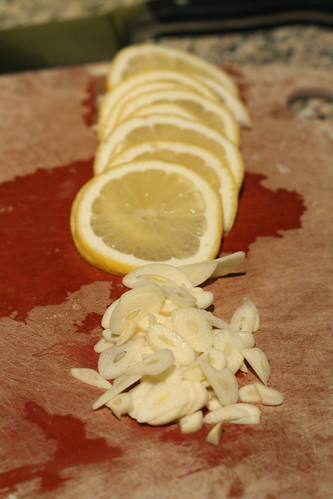
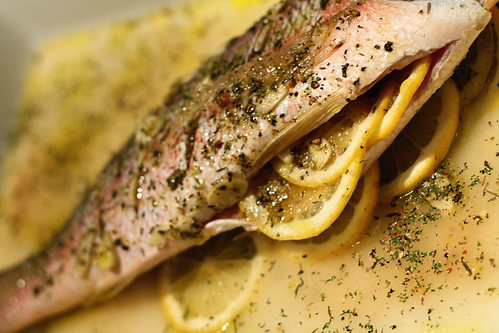
To dress this fish, the book recommended chopping up a lemon and a ton of garlic to start.
Then cut four large gashes in each side of the fish, and stuff with the garlic. Also stuff the cavity with the garlic and a few lemon slices.
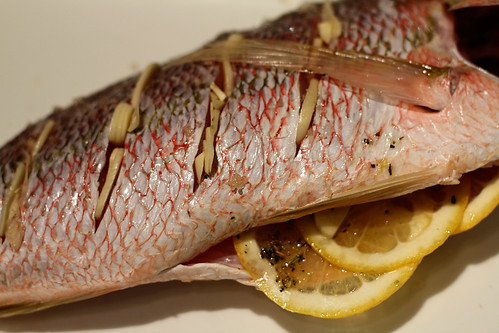
Lay the remaining slices of lemon down to create a bed for the fish, and set the fish on top. Pour over a mixture of 1/4 cup olive oil and dried herbs (such as italian seasoning, basil, oregano, etc).
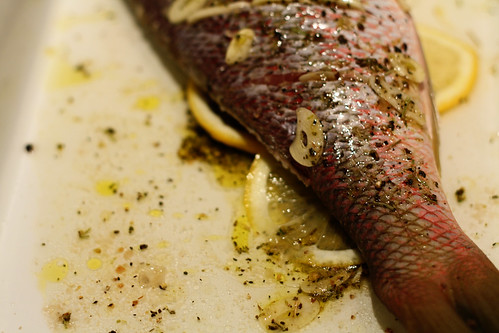
Next, pour 1 cup of chicken or vegetable stock (I used chicken) in the base of the dish, being sure not to pour directly on top of the fish.
Cover the dish with aluminum foil, and bake at 450 for 20 minutes. Then uncover and return to the oven for another 5-10 minutes.
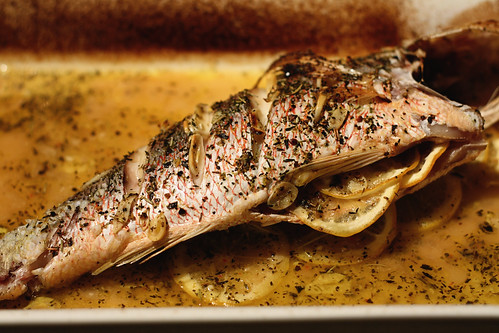
Beautiful!
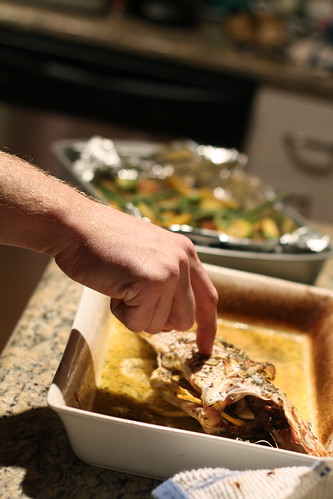
Chris couldn't help himself -- he just had to touch the crispiness of the skin.
And you know what?
The fish was divine.
Super soft and tender, and the remaining liquid in the dish made a delicious savory sauce. As Chris puts it, "It was a 10!"
They had whole red snapper on hand! Wild, unfrozen, and positively enticing.
We brought this baby home, and quickly realized that we hadn't ever actually cooked a whole fish before. So we brought out the cooking bible.
Reading through The Basics of Whole Fish, we felt armed and ready.
One itty bitty problem.
Though the fish had been thoroughly cleaned, it still had scales.
"Use a spoon or dull knife to scrape the scales from the fish."
Yes, that is a fantastic way to make scales fly everywhere.
So to save my kitchen from being covered in fish scales, I opted to just run the fish under some water and remove the scales the old fashioned way: with my hands. Not the easiest way, but certainly better than the alternative!
To dress this fish, the book recommended chopping up a lemon and a ton of garlic to start.
Then cut four large gashes in each side of the fish, and stuff with the garlic. Also stuff the cavity with the garlic and a few lemon slices.
Lay the remaining slices of lemon down to create a bed for the fish, and set the fish on top. Pour over a mixture of 1/4 cup olive oil and dried herbs (such as italian seasoning, basil, oregano, etc).
Next, pour 1 cup of chicken or vegetable stock (I used chicken) in the base of the dish, being sure not to pour directly on top of the fish.
Cover the dish with aluminum foil, and bake at 450 for 20 minutes. Then uncover and return to the oven for another 5-10 minutes.
Beautiful!
Chris couldn't help himself -- he just had to touch the crispiness of the skin.
And you know what?
The fish was divine.
Super soft and tender, and the remaining liquid in the dish made a delicious savory sauce. As Chris puts it, "It was a 10!"
Monday, January 24, 2011
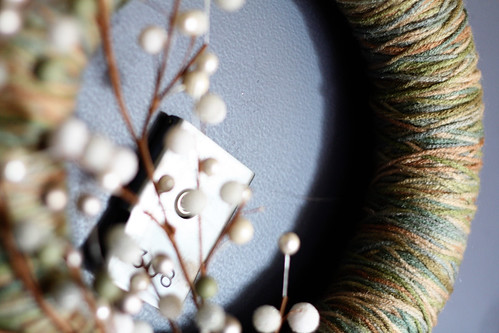
A Late Winter Yarn Wreath
I love the yarn wreath I made last summer, but have been itching to make a new one. So last weekend, I popped into Joann's to find some new wreath inspiration!
Ok, I didn't *pop* into Joann's. I walked a mile in the frigid cold and snow to get there. Gotta love living in downtown Chicago without a car!
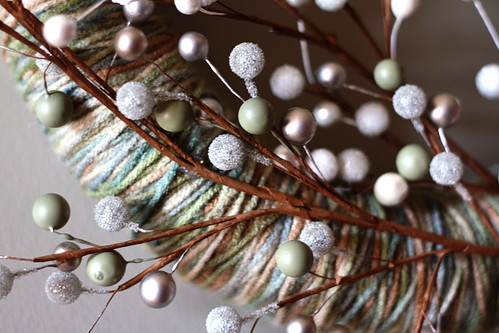
Immediately I was drawn to the floral section, and found these AWESOME green and white pearl/berry branches. Apparently they were from Christmas, though they hardly looked it, but I wasn't arguing because that meant they were 90% off!! Yes, the $2 branches were going to ring up for 20 cents. Score!
Once I had my pearl/berry branches in hand, it was easy to then find some great yarn to match and the styrofoam wreath form. I could hardly wait to get home!
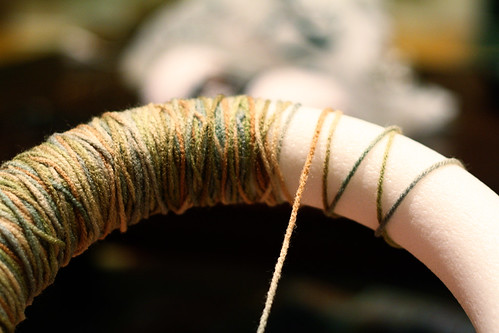
Unlike the last yarn wreath I made, where I perfectly wrapped the yarn in nice neat rows, I wanted this one to look more unkempt and natural. I specifically went back and forth at different angles with the yarn to create a layered, perfectly imperfect look.
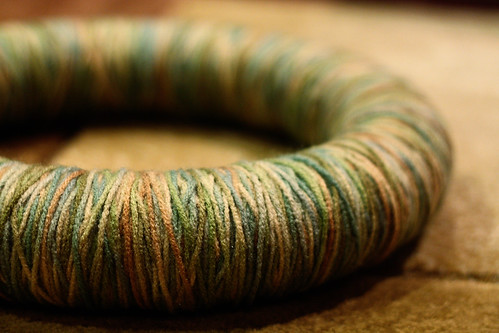
I'll be honest, it took a long time to wrap it this way, especially because I used all of the yarn so it would be a fuller wreath. But it was easy to do one night sitting in front of the TV!
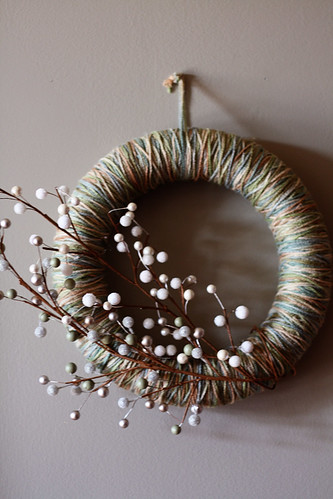
The next morning, I got up to finish this lovely. Using the two pearl/berry branches, I wrapped the wire ends around the wreath, and used just a spot of hot glue to keep the tops affixed to the upper side of the wreath.
I just love it! It's the perfect late-winter look for my door!


Immediately I was drawn to the floral section, and found these AWESOME green and white pearl/berry branches. Apparently they were from Christmas, though they hardly looked it, but I wasn't arguing because that meant they were 90% off!! Yes, the $2 branches were going to ring up for 20 cents. Score!
Once I had my pearl/berry branches in hand, it was easy to then find some great yarn to match and the styrofoam wreath form. I could hardly wait to get home!
Unlike the last yarn wreath I made, where I perfectly wrapped the yarn in nice neat rows, I wanted this one to look more unkempt and natural. I specifically went back and forth at different angles with the yarn to create a layered, perfectly imperfect look.
I'll be honest, it took a long time to wrap it this way, especially because I used all of the yarn so it would be a fuller wreath. But it was easy to do one night sitting in front of the TV!
The next morning, I got up to finish this lovely. Using the two pearl/berry branches, I wrapped the wire ends around the wreath, and used just a spot of hot glue to keep the tops affixed to the upper side of the wreath.
I just love it! It's the perfect late-winter look for my door!
Saturday, January 22, 2011
Project Preview, and a Short Story
When I'm making a yarn wreath,
...it takes me longer than most people.
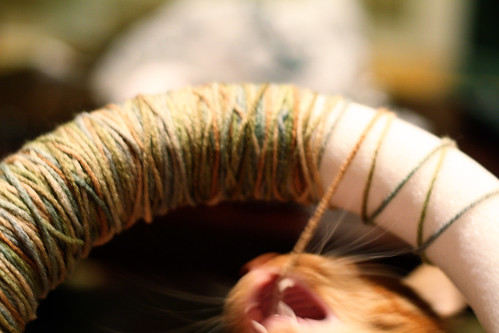
The end.
...it takes me longer than most people.
The end.
Thursday, January 20, 2011
My New Year's Blog Resolution
I've been doing a lot of thinking.
I love my blog. I love that it's a way to share my love of food, wine, and crafts. I love that I meet fellow bloggers, and that I've become a part of this wonderful blogging community.
But with the new year, I've been thinking about how I want to go forward with my blog.
This blog, like many blogs, started off back at the end of 2009 with a handful of posts per month, often with scattered topics and an inconsistent voice. Let’s face it, I didn’t know what I was doing.
Since then, I bought a DSLR and learned a little more about photography, and learned to center the voice of my blog mainly on crafting and food tutorials. It's been a nice safe little bubble that I've lived in, but I think it's time to grow a little.
I kicked off the new year with the blog redesign, and that got me thinking of other ways to change this year.
Here are my thoughts on how to grow my little blog:
{ Start sharing a little more of myself }
Looking back at my posts and the voice I was hoping to achieve, I see how little I shared about myself. Other than small anecdotes about my cat Simon or mentioning food likes and dislikes, I hardly have ventured out of my safe little food and craft tutorial bubble.
Still maintaining a storytelling voice (and never just posting on how my day went), I want to start sharing a little more. I should tell you the story of the time I got to pay a dishwasher repairman $60 to tell me that I'm a moron. Believe me, it's a good one.
The thing I began to recognize when I looked at the blogs I love to read is that I feel like I know the blogger. Through her stories and her writing style, I feel like I'm her friend. I'd like to share a little more of myself so you feel like you know me better. I'd like you to be excited when you see a new post from me, because it's like getting a letter in the mail from a friend.
{ A lil' bit of sponsor love }
I'm sure you've noticed that I just added a couple ad buttons on the sidebar of my blog. They could be yours!
Ok, I'm not going to do a hard sell or anything.
I just would really love to give some spotlight to those women out there that are fellow crafters who have taken the leap to start an Etsy shop. And the prices are more than reasonable.
I like how one of my favorite blogs has sponsors and they either do a rockin' discount or a giveaway when they become a sponsor. That drives business to them, and generates interest/excitement in my blog. Win-win.
{ Guest Posting }
This goes both ways. I want to be a guest blogger at sites I adore, and I would love the bloggers at sites I adore to hop over to my blog and host for a day!
How am I going to make this happen?
I just need to ask!
I need to reach out and ask someone to guest post. And I need to reach out and ask if I can do some guest postin'. I just need to put myself out there!
p.s. if you want to do a guest post, shoot me an email with some of your favorite projects/recipes!
{ Feature My Favorite Projects }
I know we all crawl through the blogosphere searching for inspiration. And when we find it, do we just file it away for ourselves?
I've started sharing these links that I love through my twitter feed throughout the day, but I would love to start rounding them up every other week or so and sharing them with all of you.
Also, I know when I was a wee little blogger (not that I'm so big now), I LOVED being featured! It meant so much when someone thought my little crafts were worth sharing. I want to pass on that same excitement to others!
For now, I've decided to stay away from adding a link party. I love participating in them, but there are probably enough out there already. And that list above is big enough to tackle for now!
Wish me luck!
Believe it or not, that was the Reader's Digest version. In case you're really interested in my rambling thoughts about growing this lil' ol' blog, you can read the full version here.
I love my blog. I love that it's a way to share my love of food, wine, and crafts. I love that I meet fellow bloggers, and that I've become a part of this wonderful blogging community.
But with the new year, I've been thinking about how I want to go forward with my blog.
This blog, like many blogs, started off back at the end of 2009 with a handful of posts per month, often with scattered topics and an inconsistent voice. Let’s face it, I didn’t know what I was doing.
Since then, I bought a DSLR and learned a little more about photography, and learned to center the voice of my blog mainly on crafting and food tutorials. It's been a nice safe little bubble that I've lived in, but I think it's time to grow a little.
I kicked off the new year with the blog redesign, and that got me thinking of other ways to change this year.
Here are my thoughts on how to grow my little blog:
{ Start sharing a little more of myself }
Looking back at my posts and the voice I was hoping to achieve, I see how little I shared about myself. Other than small anecdotes about my cat Simon or mentioning food likes and dislikes, I hardly have ventured out of my safe little food and craft tutorial bubble.
Still maintaining a storytelling voice (and never just posting on how my day went), I want to start sharing a little more. I should tell you the story of the time I got to pay a dishwasher repairman $60 to tell me that I'm a moron. Believe me, it's a good one.
The thing I began to recognize when I looked at the blogs I love to read is that I feel like I know the blogger. Through her stories and her writing style, I feel like I'm her friend. I'd like to share a little more of myself so you feel like you know me better. I'd like you to be excited when you see a new post from me, because it's like getting a letter in the mail from a friend.
{ A lil' bit of sponsor love }
I'm sure you've noticed that I just added a couple ad buttons on the sidebar of my blog. They could be yours!
Ok, I'm not going to do a hard sell or anything.
I just would really love to give some spotlight to those women out there that are fellow crafters who have taken the leap to start an Etsy shop. And the prices are more than reasonable.
I like how one of my favorite blogs has sponsors and they either do a rockin' discount or a giveaway when they become a sponsor. That drives business to them, and generates interest/excitement in my blog. Win-win.
{ Guest Posting }
This goes both ways. I want to be a guest blogger at sites I adore, and I would love the bloggers at sites I adore to hop over to my blog and host for a day!
How am I going to make this happen?
I just need to ask!
I need to reach out and ask someone to guest post. And I need to reach out and ask if I can do some guest postin'. I just need to put myself out there!
p.s. if you want to do a guest post, shoot me an email with some of your favorite projects/recipes!
{ Feature My Favorite Projects }
I know we all crawl through the blogosphere searching for inspiration. And when we find it, do we just file it away for ourselves?
I've started sharing these links that I love through my twitter feed throughout the day, but I would love to start rounding them up every other week or so and sharing them with all of you.
Also, I know when I was a wee little blogger (not that I'm so big now), I LOVED being featured! It meant so much when someone thought my little crafts were worth sharing. I want to pass on that same excitement to others!
For now, I've decided to stay away from adding a link party. I love participating in them, but there are probably enough out there already. And that list above is big enough to tackle for now!
Wish me luck!
Wednesday, January 19, 2011
Love It or Lose It, Week 3

Don't forget to pop over to Crazy Domestic today to join me for the Love It or Lose It closet challenge! We're at Week 3 today, but there's still time to join in the fun!
Monday, January 17, 2011
Portable Photo Studio
When I got back from AZ for the holidays, I had an exciting package awaiting my return:

My best friend sent me a portable photo studio!!
It's funny, I had actually planned to make a small photo studio using the tutorial I found here when I returned from the holidays, and now I don't have to!

And of course the fact that it's portable and thus easily flattened and stored definitely makes my husband happy. I'm sure he would've just loved having a DIY cardboard box studio hanging out around the house!
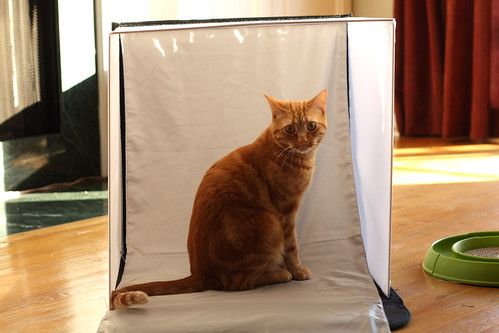
It pops up so easily, and is a good size to fit most things I would shoot (such as my model here, Simon.)

It also comes with two light sources and a small tripod.

And the gray background is reversible!
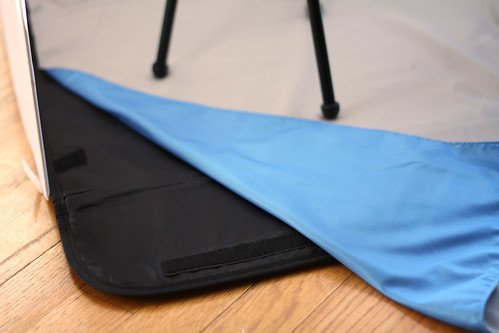
Of course, it's completely removable as well. For the shot below of the garlic dicer, I just attached some parchment paper from my kitchen to use as the background!
I just love that I now have an easily storable way to do some great shots. What a great gift!
My best friend sent me a portable photo studio!!
It's funny, I had actually planned to make a small photo studio using the tutorial I found here when I returned from the holidays, and now I don't have to!
And of course the fact that it's portable and thus easily flattened and stored definitely makes my husband happy. I'm sure he would've just loved having a DIY cardboard box studio hanging out around the house!
It pops up so easily, and is a good size to fit most things I would shoot (such as my model here, Simon.)
It also comes with two light sources and a small tripod.
And the gray background is reversible!
Of course, it's completely removable as well. For the shot below of the garlic dicer, I just attached some parchment paper from my kitchen to use as the background!
I just love that I now have an easily storable way to do some great shots. What a great gift!
Saturday, January 15, 2011
Granola Bars with Annie from Eat. Dream. Repeat.
Hi friends! I'm Annie from Eat. Dream. Repeat., and when Katie asked me to do a guest post on FW&MP I jumped at the chance! So thanks for having me :)
I love snacking. 10:30am rolls around, and I'm rummaging through my desk drawer for something to tide me over 'til lunchtime. 3:00pm hits, and I've got a cup of hot tea and a nibble of something to keep me going 'til the end of the work day. This recipe is the answer to my snacking prayers - packed with protein, full of fiber and empty of artificial sweeteners, it's a snack I don't have to feel guilty about eating! On its own or smeared with jam, almond butter or heck, even Nutella, it's perfectly satisfying.
Guilt-free Granola Bars
(Full disclosure: These actually have a fair amount of calories and fat from the nuts, but it's the good kind so don't sweat it!)
3 cups rolled oats
2 cups mix-ins (I used pistachios, pumpkin seeds, dried apples, sesame seeds, ground flaxseed - but you can use literally any mix of chopped nuts, dried fruits, seeds, baking chips, etc)
1 cup peanut or other nut butter (I used homemade roasted cashew butter - pop over to my blog to see the method!)
1/2 cup honey, maple syrup or brown rice syrup
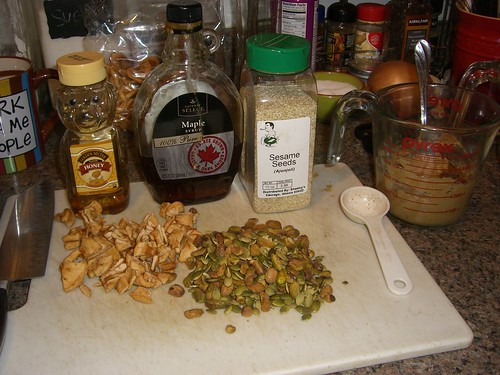
First, gather your ingredients in a somewhat organized manner and preheat your oven to 300 degrees.
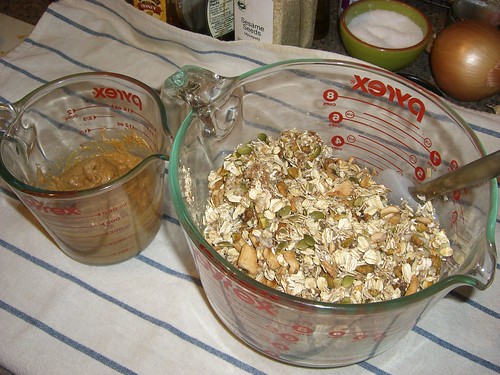
In a large bowl, combine the oats and the mix-ins (I roasted the nuts and seeds for a deeper flavor - about 5ish minutes on a foil-lined sheet pan in the oven at 300 degrees). In a smaller, microwave-safe bowl, add the nut butter, sweetener of choice (honey/maple syrup/brown rice syrup), and microwave in 20 second intervals, removing and stirring, until the mixture is fully combined and melted together.
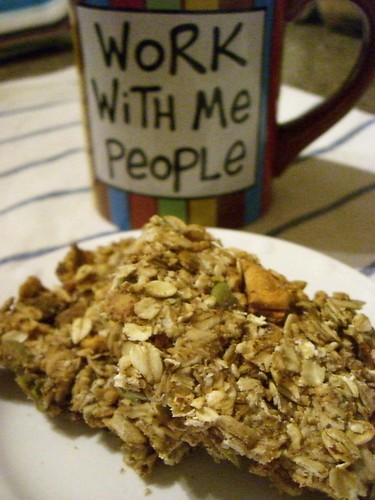
Add the liquid to the oat mixture, and stir well. Make sure all the oats/nuts/etc are fully incorporated and coated with the liquid, and if it seems too dry to you, add in another tablespoon of honey. Dump everything into a paper-lined, greased 9x13 pan and spread it out, pushing down till it's in one even layer.

Bake at 300 degrees for 30 minutes, and cut into squares immediately after removing from the oven, then let cool completely in the pan. Enjoy with some tea!
Interested in being featured on FW&MP? Email Katie P at foodwineandmodpodge at gmail dot com!
I love snacking. 10:30am rolls around, and I'm rummaging through my desk drawer for something to tide me over 'til lunchtime. 3:00pm hits, and I've got a cup of hot tea and a nibble of something to keep me going 'til the end of the work day. This recipe is the answer to my snacking prayers - packed with protein, full of fiber and empty of artificial sweeteners, it's a snack I don't have to feel guilty about eating! On its own or smeared with jam, almond butter or heck, even Nutella, it's perfectly satisfying.
Guilt-free Granola Bars
(Full disclosure: These actually have a fair amount of calories and fat from the nuts, but it's the good kind so don't sweat it!)
3 cups rolled oats
2 cups mix-ins (I used pistachios, pumpkin seeds, dried apples, sesame seeds, ground flaxseed - but you can use literally any mix of chopped nuts, dried fruits, seeds, baking chips, etc)
1 cup peanut or other nut butter (I used homemade roasted cashew butter - pop over to my blog to see the method!)
1/2 cup honey, maple syrup or brown rice syrup
First, gather your ingredients in a somewhat organized manner and preheat your oven to 300 degrees.
In a large bowl, combine the oats and the mix-ins (I roasted the nuts and seeds for a deeper flavor - about 5ish minutes on a foil-lined sheet pan in the oven at 300 degrees). In a smaller, microwave-safe bowl, add the nut butter, sweetener of choice (honey/maple syrup/brown rice syrup), and microwave in 20 second intervals, removing and stirring, until the mixture is fully combined and melted together.
Add the liquid to the oat mixture, and stir well. Make sure all the oats/nuts/etc are fully incorporated and coated with the liquid, and if it seems too dry to you, add in another tablespoon of honey. Dump everything into a paper-lined, greased 9x13 pan and spread it out, pushing down till it's in one even layer.
Bake at 300 degrees for 30 minutes, and cut into squares immediately after removing from the oven, then let cool completely in the pan. Enjoy with some tea!
Wednesday, January 12, 2011
Creative Estates: I'm movin' in!

I cannot even begin to tell you how excited I am to be going to the Creative Estates crafty bloggin' conference!
Located right in my hometown of Chandler, Arizona, the Creative Estates conference will be a whole weekend full of meeting fellow crafty bloggers, learning about photography, PR, and more at their many breakout sessions, and really just kick-starting my creative mojo!
Not to mention I get to go home and visit my mama :)
They also have a handmade market available where little shop owners can buy a booth to sell their goods. Perfect for Etsy shops!

If you live in the area, or just have a hankering to fly to AZ in April, you should come!
Tuesday, January 11, 2011
Gushing Over a Garlic Dicer
Even though we have plenty of chopping, slicing, mincing, dicing, and crushing tools in our kitchen, I generally prefer to do things by hand. There's something just so satisfying about using your trusty chef's knife to make a whole meal. A sense of ownership.
But there's one little guy that has a tendency to trump my knife.
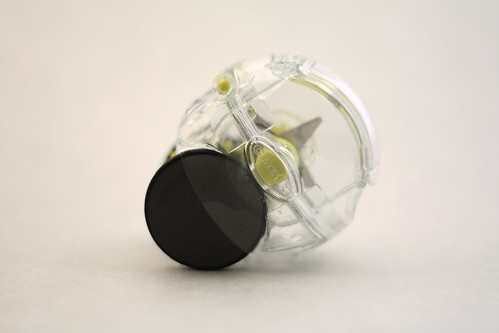
This is a "Garlic Zoom." I got this as a gift about a year ago, and let me tell you, it's awesome.
I should take a step back and point out that I have no affiliation with Chef'n (the creator of the Garlic Zoom), nor have I been approached to write this post or compensated in any way. I just want to share it with you!
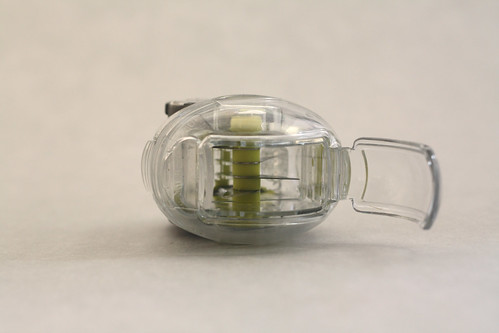
Drop the garlic cloves in the top, and inside is there a spool of little blades. Then just close it up, roll the black wheels along the countertop a couple of times, and the garlic is perfectly chopped up! And of course, even though it's only recommended for garlic, it works wonders on fresh ginger root. The other day, we made a marinade for some flank steak, and in addition to garlic pepper and salt, we added chopped garlic and ginger from our Garlic Zoom:
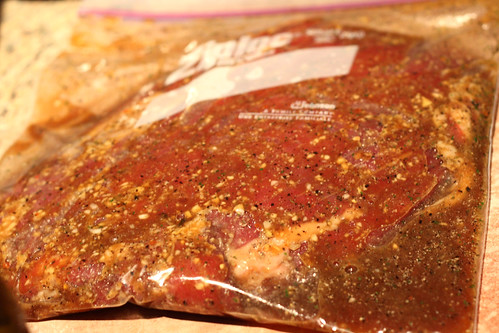
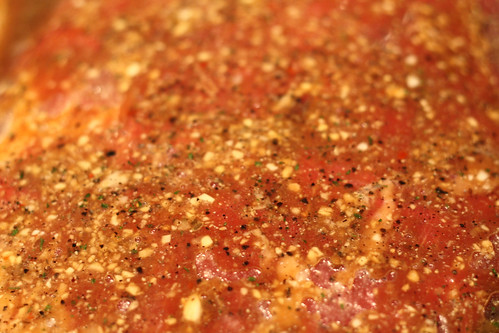
Fresh garlic and ginger, fast! And no knife cleaning.
Speaking of cleaning...
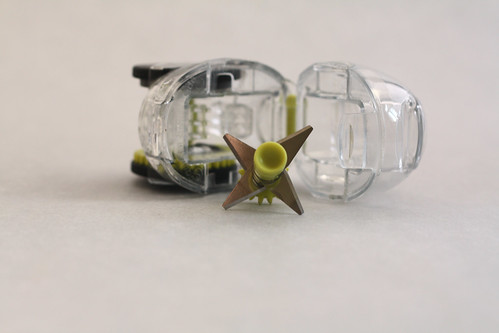
...the whole thing comes apart, and is dishwasher safe. Anything that makes my life easier and is dishwasher safe is a winner in my book.
You can pick one up at most kitchen-y stores, like Bed, Bath, & Beyond and Williams-Sonoma. You can also find it online here at Amazon.com. And most places they're $10 or less!
What's your favorite little kitchen tool?
But there's one little guy that has a tendency to trump my knife.
This is a "Garlic Zoom." I got this as a gift about a year ago, and let me tell you, it's awesome.
I should take a step back and point out that I have no affiliation with Chef'n (the creator of the Garlic Zoom), nor have I been approached to write this post or compensated in any way. I just want to share it with you!
Drop the garlic cloves in the top, and inside is there a spool of little blades. Then just close it up, roll the black wheels along the countertop a couple of times, and the garlic is perfectly chopped up! And of course, even though it's only recommended for garlic, it works wonders on fresh ginger root. The other day, we made a marinade for some flank steak, and in addition to garlic pepper and salt, we added chopped garlic and ginger from our Garlic Zoom:
Fresh garlic and ginger, fast! And no knife cleaning.
Speaking of cleaning...
...the whole thing comes apart, and is dishwasher safe. Anything that makes my life easier and is dishwasher safe is a winner in my book.
You can pick one up at most kitchen-y stores, like Bed, Bath, & Beyond and Williams-Sonoma. You can also find it online here at Amazon.com. And most places they're $10 or less!
Saturday, January 8, 2011
Minestrone-Inspired Veggie Soup
Soup rocks.
Seriously.
It's warm, hearty, filling, tasty, and best of all, it's healthy. And for those of us in frigid locations, or those who are looking for some low-cal options to make that New Year's Resolution a reality, those are some really good adjectives.
Chris and I make soup all the time. It's the best way to use up random stuff in the fridge, and if you make a big pot on Sunday, it'll last you through Monday and Tuesday as well.
Though neither of us have a "lose weight" New Year's Resolution, we did decide it would be good to try to eat more vegetarian meals. We already are pretty good about including veggies in everything we cook, but it all is still so meat-centric that it seemed like it would be good for us to switch it up now and then with a meatless dish. And what easier veggie dish is there than vegetable soup?
Minestrone-Inspired Veggie Soup
I say this is "minestrone-inspired" because it is vegetables in a tomato and beef stock broth. But you'll soon see that I'm not using your traditional Minestrone vegetables...
Start by cutting up any veggies you have in your fridge.
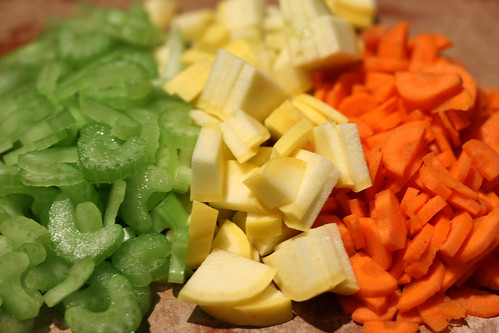
I started with celery, carrots, and yellow squash.
Next, I chopped up some onion and quartered some brussels sprouts.
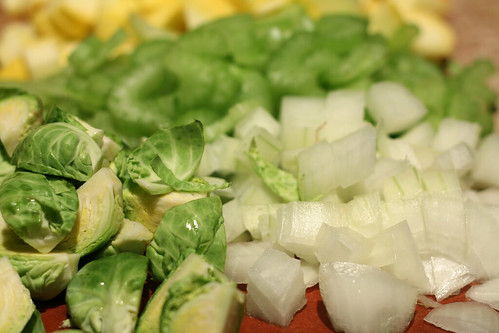
Yes, you heard me. Brussels sprouts.
Brussels sprouts are actually wonderfully tasty in soups, and because they're a cabbage relative, they really hold some of their texture and mass when cooked, unlike things like spinach which wilt.
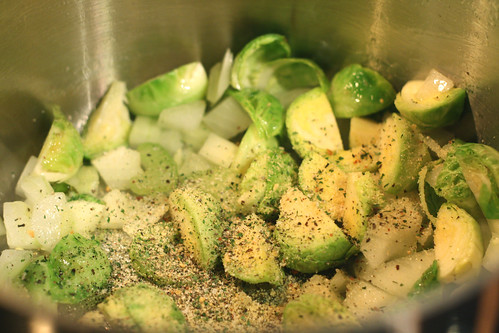
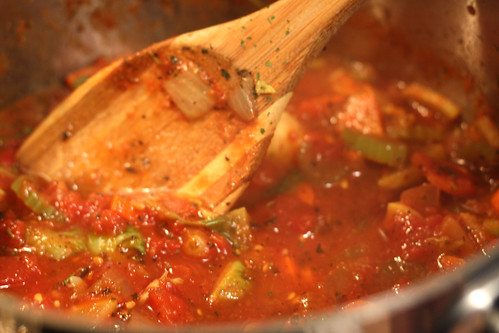
Start browning the onions and brussels sprouts in a pot with olive oil, and make sure to add plenty of spices (such as garlic powder, pepper, Italian seasoning, dried basil, etc).
After a couple minutes, add the remaining veggies. Cook for 2-3 minutes.
During this time, grab some whole canned tomatoes.
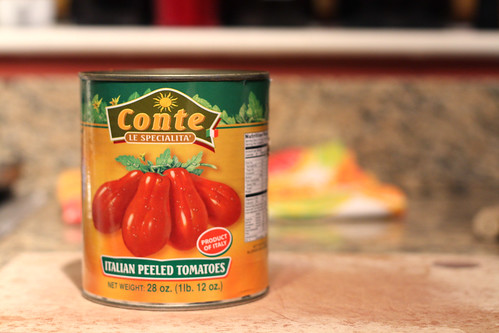
...and slice them up.
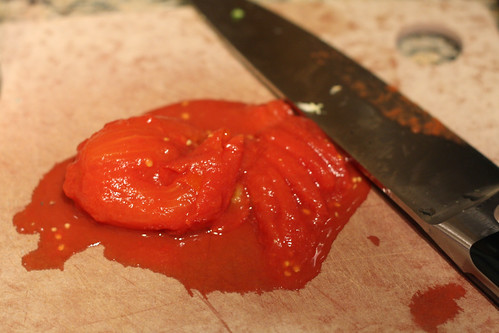
Pour all the tomato liquid from the can along with the chopped tomatoes into the soup pot with the veggies.
Next, add beef stock. Since you are making this for yourself, I'll let you decide how much soup you want to make, and thus how much stock you want to add. If after adding, it tastes too salty, just add a little water.
And yes, I know I said "meat-less" but just added beef stock... but it's a necessary flavor component. There still is no actual meat in this dish!
Bring it all to a simmer and cover for 15 minutes, or however long it takes the veggies to cook but not overcook (depending on which veggies you decided to use).
When you're pretty much ready to eat, add some noodles.
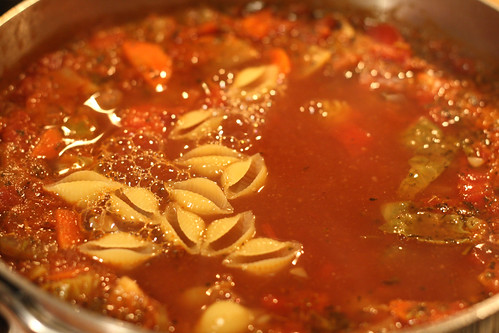
I say this because have you ever noticed that noodles in soup tend to be mushy and overcooked? That's one battle I'm out to fight -- no overcooked noodles in soup! So set the table, toast the bread, and then put the noodles in. Read the box label to see the "al dente" cooking time. For my medium shells, it said 11-12 minutes. So I set the timer for 10 minutes. Why? Well, unlike when you cook pasta, you don't drain these noodles when they're done. They sit there in the soup, continuing to cook, even if it's not boiling anymore. So to get an al dente noodle in a soup, you actually have to kill the heat a minute or two before the noodles are done. Then by the time you get bowls out and dish up, the noodles will be perfect!
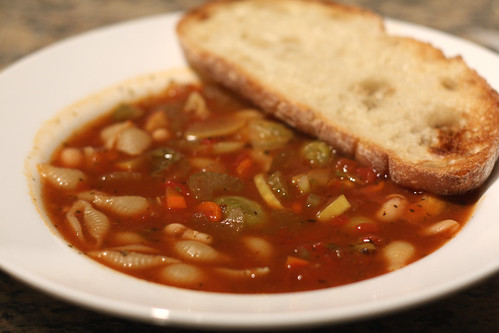
There you have it -- a low cal, practically no fat, hot and hearty meal. And because it didn't come from a can, it's not loaded with preservatives and sodium! High five to that!
Seriously.
It's warm, hearty, filling, tasty, and best of all, it's healthy. And for those of us in frigid locations, or those who are looking for some low-cal options to make that New Year's Resolution a reality, those are some really good adjectives.
Chris and I make soup all the time. It's the best way to use up random stuff in the fridge, and if you make a big pot on Sunday, it'll last you through Monday and Tuesday as well.
Though neither of us have a "lose weight" New Year's Resolution, we did decide it would be good to try to eat more vegetarian meals. We already are pretty good about including veggies in everything we cook, but it all is still so meat-centric that it seemed like it would be good for us to switch it up now and then with a meatless dish. And what easier veggie dish is there than vegetable soup?
Minestrone-Inspired Veggie Soup
I say this is "minestrone-inspired" because it is vegetables in a tomato and beef stock broth. But you'll soon see that I'm not using your traditional Minestrone vegetables...
Start by cutting up any veggies you have in your fridge.
I started with celery, carrots, and yellow squash.
Next, I chopped up some onion and quartered some brussels sprouts.
Yes, you heard me. Brussels sprouts.
Brussels sprouts are actually wonderfully tasty in soups, and because they're a cabbage relative, they really hold some of their texture and mass when cooked, unlike things like spinach which wilt.
Start browning the onions and brussels sprouts in a pot with olive oil, and make sure to add plenty of spices (such as garlic powder, pepper, Italian seasoning, dried basil, etc).
After a couple minutes, add the remaining veggies. Cook for 2-3 minutes.
During this time, grab some whole canned tomatoes.
...and slice them up.
Pour all the tomato liquid from the can along with the chopped tomatoes into the soup pot with the veggies.
Next, add beef stock. Since you are making this for yourself, I'll let you decide how much soup you want to make, and thus how much stock you want to add. If after adding, it tastes too salty, just add a little water.
And yes, I know I said "meat-less" but just added beef stock... but it's a necessary flavor component. There still is no actual meat in this dish!
Bring it all to a simmer and cover for 15 minutes, or however long it takes the veggies to cook but not overcook (depending on which veggies you decided to use).
When you're pretty much ready to eat, add some noodles.
I say this because have you ever noticed that noodles in soup tend to be mushy and overcooked? That's one battle I'm out to fight -- no overcooked noodles in soup! So set the table, toast the bread, and then put the noodles in. Read the box label to see the "al dente" cooking time. For my medium shells, it said 11-12 minutes. So I set the timer for 10 minutes. Why? Well, unlike when you cook pasta, you don't drain these noodles when they're done. They sit there in the soup, continuing to cook, even if it's not boiling anymore. So to get an al dente noodle in a soup, you actually have to kill the heat a minute or two before the noodles are done. Then by the time you get bowls out and dish up, the noodles will be perfect!
There you have it -- a low cal, practically no fat, hot and hearty meal. And because it didn't come from a can, it's not loaded with preservatives and sodium! High five to that!
Wednesday, January 5, 2011
New Camera Strap!
Getting packages in the mail is always exciting, but when this package arrived, I was particularly giddy:
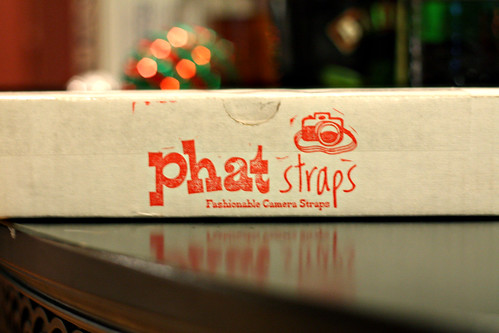
I've been ogling at cute camera straps on Etsy for quite some time, but when I found the lovebirds fabric camera straps from PhatStraps, I knew it was the one for me!

They carry neck straps and wrist straps, but since I was looking to use this as more of a hand strap, the lovely lady made a custom shorter strap that fits just great on my camera!
And not to mention, it has a soft, fuzzy black lining so it's super comfortable.

I just love it!
Do you have a camera strap you love? Where did you find it?
I've been ogling at cute camera straps on Etsy for quite some time, but when I found the lovebirds fabric camera straps from PhatStraps, I knew it was the one for me!
They carry neck straps and wrist straps, but since I was looking to use this as more of a hand strap, the lovely lady made a custom shorter strap that fits just great on my camera!
And not to mention, it has a soft, fuzzy black lining so it's super comfortable.
I just love it!
Tuesday, January 4, 2011
Wine Label Collage, Take Two
For my father-in-law's birthday this year, I decided to make him a wine label collage. Being a huge wino, he has always commented on our wine label collage and said how much he would love one.
But of course, in true wine label collage fashion, the gift comes WAY after the date.
I sent a card to my father-in-law asking him to start saving his own wine labels that would mean a lot to him, so over the past six months, he and my mother-in-law have been saving, saving, saving. Go here for easy wine label removal directions!
Then, for Thanksgiving, they came with plenty of wine labels in tow!
Since it had been so long, I worked quickly to get it done before flying home to visit so we could give it to him then.
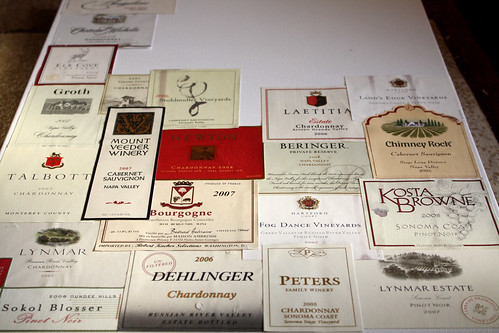
I started by laying out all my wine labels to get an idea of placement.

Then, using the good ol' Mod Podge, I glued each label down, and pressed very carefully to get all edges and corners down perfectly.
Since this was a gift, and I really wanted it to be perfect, I took a detour from the usual next step of topcoat with Mod Podge to first press the collage to flatten any potential bubbles.
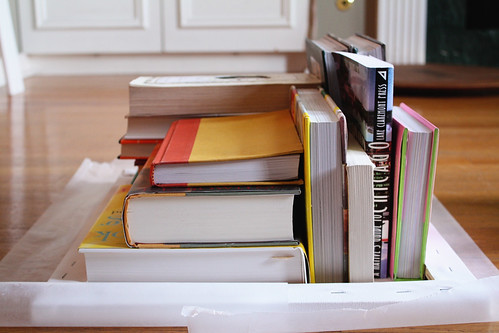
I then did three coats of Mod Podge on top to seal, pressing with books between each coat for a full day to ensure it was as flat and smooth as possible. I used wax paper to lay the collage face down on to make sure it wouldn't stick but would have a nice clean surface to press on.
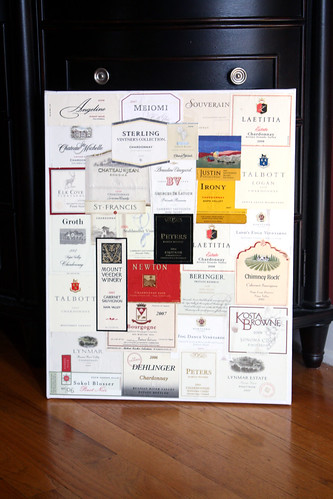
Unlike the one we did for our home, I did this collage in a regular stretched canvas (not a gallery wrap) and just adhered the labels to the edge instead of wrapping around the sides because my father-in-law wants to frame it.
Then, we wrapped it up for it's plane flight!
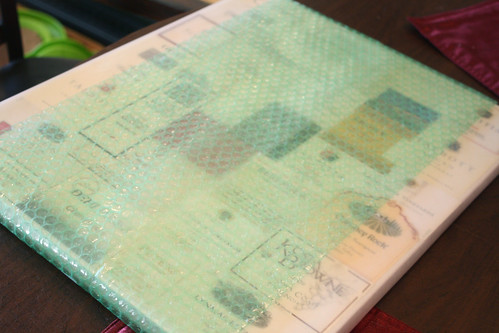
And yes, this was my carry on. There was no way I was going to dare to stick it in luggage!
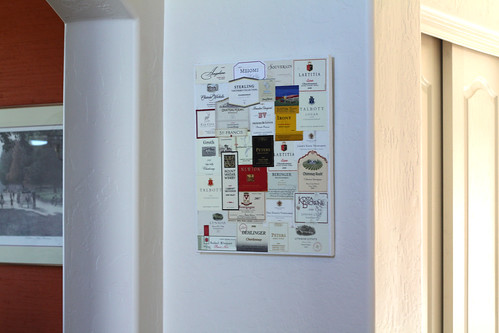
Looks great in its new home! And I can't wait to see it framed!
But of course, in true wine label collage fashion, the gift comes WAY after the date.
I sent a card to my father-in-law asking him to start saving his own wine labels that would mean a lot to him, so over the past six months, he and my mother-in-law have been saving, saving, saving. Go here for easy wine label removal directions!
Then, for Thanksgiving, they came with plenty of wine labels in tow!
Since it had been so long, I worked quickly to get it done before flying home to visit so we could give it to him then.
I started by laying out all my wine labels to get an idea of placement.
Then, using the good ol' Mod Podge, I glued each label down, and pressed very carefully to get all edges and corners down perfectly.
Since this was a gift, and I really wanted it to be perfect, I took a detour from the usual next step of topcoat with Mod Podge to first press the collage to flatten any potential bubbles.
I then did three coats of Mod Podge on top to seal, pressing with books between each coat for a full day to ensure it was as flat and smooth as possible. I used wax paper to lay the collage face down on to make sure it wouldn't stick but would have a nice clean surface to press on.
Unlike the one we did for our home, I did this collage in a regular stretched canvas (not a gallery wrap) and just adhered the labels to the edge instead of wrapping around the sides because my father-in-law wants to frame it.
Then, we wrapped it up for it's plane flight!
And yes, this was my carry on. There was no way I was going to dare to stick it in luggage!
Looks great in its new home! And I can't wait to see it framed!
Subscribe to:
Posts (Atom)