Showing posts with label Food. Show all posts

Monday, August 1, 2016

Buffalo Caramel Corn

Buffalo Caramel Corn


Back in February of this year, we were invited to a Super Bowl party with some friends, and their invite said to bring some drinks and a snack to share.  I was tired of the usual chips and dips that I knew everyone else would bring, so I started searching for something else.  That's when a search for the term "buffalo" brought me to this recipe.  I decided to give it a try.

Turns out it's one of the most delicious and addicting snacks I've ever made in my life.  Everyone at the party was raving about it and couldn't stop eating it.  They all kept asking for the recipe.  It was a hit!

We made another batch last weekend because we were craving a sweet, spicy, salty snack, and it did not disappoint.  We ate the whole batch that weekend, just the two of us!

Buffalo Caramel Corn
adapted from Bon Appetit

Nonstick cooking spray
1/2 cup popcorn kernels
3/4 cup sugar
1/4 cup Frank's Red Hot Buffalo Sauce
3 tbs butter, cut into pieces
1 tsp salt
1/2 tsp baking soda
1/4 tsp cayenne pepper

Pop the fresh popcorn on the stove using your preferred stovetop popping method.  If you've never tried popping your own kernels, start here.

Preheat oven to 300 degrees. Line a rimmed baking sheet with parchment paper. Lightly coat parchment and a large bowl with nonstick spray; add popcorn to bowl. Set baking sheet aside.

Bring sugar and ¼ cup water to a boil in a medium saucepan over medium-high heat, stirring to dissolve sugar. Boil, swirling pan occasionally, until caramel is a deep amber color, 10–12 minutes.

Remove from heat; stir in buffalo sauce and butter (mixture will bubble vigorously). Return to a boil and cook another 3 minutes. Remove from heat; stir in salt, baking soda, and cayenne. Working quickly (and carefully—caramel will be very hot), pour caramel mixture over popcorn and toss to coat.

Spread out popcorn on prepared baking sheet and bake, tossing once, until dry, 15–20 minutes. Let cool.

Best if eaten same-day, but can be stored in an airtight container for a few days.  As if it could last that long!

Buffalo Caramel Corn

Tuesday, February 2, 2016

Silky Lemon Orzo

Sometimes the simplest recipes can blow you away.  This orzo recipe is just that - it's so perfect given how uncomplicated it is.  And moreover, I knew I had to put it on the blog ASAP since so many orzo recipes are cooked very, very differently.

For a little background, the other night we were cooking steak and I was combing my cupboard to figure out side dishes.  I noticed we had some orzo, which I probably haven't cooked with in a year or more, but I decided to use it since I was getting tired of our usual sides.  I googled the orzo to water ratio, and to my surprise, the vast majority of the recipes call for you to cook orzo in a large pot of boiling water, then strain it, then use the cooked orzo in whatever preparation you're looking for.

But in my mind, I really felt like I wanted to cook it more like rice than like pasta.  I wanted the orzo to soak up all the water and keep all the starch that is often lost when tossing out pasta water.

I found a lone recipe that finally gave me what I wanted (1 cup orzo to 2.5 cups water, but we'll get to that in a bit) - but the recipe itself was incredibly basic.  It was just orzo, water, butter.  Since we were having steaks, I decided I wanted more acid in a side dish to compliment the fat of the steak.  And so using only the orzo:water ratio as a guide, I made the dish using the flavors I was looking for.

My husband and I both took a bite and realized it was something truly special.

By cooking the orzo with a specific ratio of water to pasta, all the starch that usually transfers into the pasta water is retained and creates this incredibly silky, almost creamy, texture on the dish.  The lemon was just enough, but not too much, to bring some brightness to the pasta, and the chicken stock I used brought just enough salt and depth of flavor.  And finally, using fresh herbs to finish really brought the whole dish together.

Needless to say, we absolutely could not get enough.  The pasta was al dente, the mouthfeel of the starchy "sauce" that remained after cooking was incredible, and the flavor was a perfect balance.  This is going to be a mainstay in our household going forward for sure.


Silky Lemon Orzo


Silky Lemon Orzo

1 tbs olive oil
1 cup orzo
2.5 cups chicken broth
Pepper to taste
Juice from 1/2 lemon
1/4 cup chopped fresh Italian parsley
1 tsp chopped fresh thyme

Heat the olive oil in a small stockpot on medium-high heat.  Add the orzo and stir continuously, toasting the orzo until about 50% of the "grains" have browned.

Remove from heat and carefully add the chicken broth.  Return to heat and bring to a boil.  Boil on medium heat for 10 minutes, uncovered, stirring occasionally.  Stir in pepper and lemon juice.  Cover and remove from heat and let sit undisturbed for 7 minutes.

Uncover and add the fresh herbs and stir until all the herbs are incorporated and they begin to brighten/wilt a little from the heat.

Serve immediately and enjoy!

Monday, September 21, 2015

Yogurt-marinated chicken

We recently decided to branch out of our usual chicken marinades, and try a yogurt-based marinade.  I was familiar with this type of marinade, and certainly know that the yogurt can be great at tenderizing the chicken.

When searching for recipes, I found myself drawn to those that had good herb impact and lots of flavor from more than just the yogurt.  As always, I drew inspiration from a few different recipes, and made it my own.

We have done it with chicken tenders and with chicken thighs, and I must say, I was a huge fan of the thighs!  They get so tender and even when grilled and charred, they retained wonderful flavor and texture without toughening up.  That said, the chicken tenders were great as well, and I think you could use this marinade on just about any type of cut!

Yogurt-Marinated Chicken

1 17.5oz (500g) tub of full fat Greek yogurt (I used Fage)
1 small bunch cilantro, including stems
1/2 large onion, quartered
1/2 cup olive oil
6 garlic cloves
Juice of half a lemon
1 1-inch knob of ginger, peeled
1 tbs garam masala
2 tsp turmeric powder
2 tsp salt
1 tsp pepper

Throw everything in a food processor or blender and puree it all into a creamy marinade.  Pour over chicken cuts of your choice and cover and chill in the fridge for 12-24 hours.

When you're ready to begin cooking, take the chicken out of the fridge and let warm up for 15 minuts on the counter.  Then, using your hands, take each chicken piece out of the marinade and scrape off some of the excess marinade to avoid unnecessary mess and burning.

Grill the chicken on a grill on medium-high heat.  Turn the chicken a few times and cook through.  Ideally, get a little bit of char on the chicken to enhance the grilled flavor.  Serve with sides of your choice - I loved some fresh grilled tomatoes and turmeric-spiced rice.


IMG_8430

IMG_8471

IMG_8507

Tuesday, April 7, 2015

Popovers

Popovers

This past weekend, my parents were in town visiting for Easter, and we decided to make some popovers.  I went through a brief popover phase a few years ago, but then they fell out of my rotation.  I had a hankering for them again recently, and remembered how I used to make them in muffin tins, but always wanted to try them properly in a popover pan.  I quickly ordered one off of Amazon, and I must say it makes a big difference!

We decided to make two versions - one plain, and one topped with parmesan and fresh thyme.  The plain popovers are great with some jam, and the savory popovers are perfect with just a little butter.


Basic Popovers

1 1/2 cups whole milk
1/2 cup heavy cream
4 eggs
2 cups flour
1/2 tsp salt

Pre-heat the oven to 450 degrees.  Put the popover pan in the oven (if it sits awkwardly on the rack, set it on a baking sheet) to warm the pan with the oven.

Whisk the eggs in a large bowl and set aside.

Warm the milk, cream, and salt slowly on the stove until the temperature reaches approximately 125 degrees.

Slowly pour the milk mixture into the eggs while continuing to whisk.  Don't incorporate too quickly or the eggs will begin to scramble.

Sift the 2 cups of flour into the egg/milk mixture, and gently incorporate just until there are no large lumps left.  Do not over-whisk or the popovers will be dense and flat.

Remove the popover pan from the oven.  At this point, I used a good non-stick popover pan, so I didn't need to grease/butter the cups.  However if you don't have a non-stick, definitely generously butter or spray your cups.  Then use a small pitcher or a turkey baster (I'm telling you, this works!) to fill each cup half-full with batter, and no more.  Work quickly to avoid the pan cooling too much.

If you are topping the popovers with any savory items such as cheese and herbs, add them now to the top of the batter in each cup.

Bake at 450 degrees for 15 minutes, then turn down to 350 and bake for another ~10 minutes, or until the outside is brown.  Make sure not to open the oven during the cooking process, or the popovers will begin to deflate.  

Remove the pan from the oven and serve popovers immediately.

Monday, February 16, 2015

Sausage and Kale Stew

IMG_7773


Chris and I recently started an 8-week whole food / paleo-ish diet as part of his crossfit gym's challenge, and really it's been a great cooking challenge for us.  Due to various personal reasons, we haven't been great about cooking adventurously in the past year, hence the lack of posts here.  Although we didn't go so far as to stop cooking altogether and live off of takeout (don't get me wrong, I was tempted), we did rely too heavily on starches, and our meals consistently were 70% starch, 20% meat, 10% veggie, and the veggie was really out of sheer obligation.

Taking the eating challenge seriously has been a fantastic way to catapult us outside of our food rut, and it's exactly what we needed.

Today we made a sausage and kale stew that was so satisfying, so flavorful, and so following the new eating rules, that I couldn't help but share it.  And moreover, we completely made it up based on flavors that we knew would go well together and recipes we had read in the past, so it was a great exercise of getting us back into the fun and adventure of cooking.

Sausage and Kale Stew

Serves 4-6

1.5 lbs ground Italian pork sausage (find a paleo-friendly brand if you're eating that way)
1 tsp chopped fresh rosemary
1/2 tsp red pepper flakes
1 medium yellow onion, chopped
2 shallots, diced
3 cloves garlic, chopped finely
1 large red bell pepper, largely diced
1 28oz can whole tomatoes
5 cups water
1 bunch curly kale, ribs removed, coarsely chopped

To taste:
Salt
Pepper
Italian seasoning
Red pepper flakes


Cook the sausage, breaking it up as much as possible.  As it is cooking, add the chopped fresh rosemary and red pepper flakes and incorporate.  When the sausage is nearly cooked through, add the onion, shallots, and garlic.  Cook over medium heat for 5-10 minutes, until the onions are softened.  Add the bell pepper and cook for another 5 minutes, stirring regularly.

Pour the liquid from the can of whole tomatoes to the pot, and then separately squeeze the juice from the tomatoes and lightly chop the flesh.  Put the remaining flesh and juice from the tomatoes into the stew and stir.  Add the water, salt, and pepper, and bring to a light boil.  The amount of salt and pepper you need will depend on the strength of seasoning already in your sausage of choice.  Add more italian seasoning to taste as well.  Put a top on the stew and let it lightly simmer for 1 hour.

After an hour, add the chopped kale to the pot, and stir.  Return the lid and let the kale cook down slightly for 10 minutes.

Serve in a large bowl and enjoy, especially on a snowy day like we're having today!

IMG_7780

Saturday, February 1, 2014

Salt Block Sliders

A couple weekends ago, my sister-in-law and soon-to-be brother-in-law came to visit us in Denver, and we had a blast.  Since they love to cook as much as we do, we spent one whole day staying in, playing games, and experimenting in the kitchen.  They had given us a salt block and the book Salt Block Cooking by Mark Bitterman for Christmas, so we knew that was definitely something we had to try out!

We opted for sliders cooked on the salt block on the grill, topped with aged cheddar and sweet caramelized beer onions.  They were absolutely incredible!  The salt block definitely did impart some deep flavor in the patties, but by no means were they salty.  If you have a salt block at your disposal, definitely give them a try!


Salt block sliders

Salt Block Sliders

Burgers (recipe adapted from Salt Block Cooking):
   - 2 pounds fresh ground beef, preferably from a butcher, 80-85% fat
   - 1/4 cup milk, 2% or whole
   - 3 tablespoons ketchup
   - 1 1/2 tablespoon dijon mustard
   - 1 teaspoon black pepper
   - Vegetable or avocado oil for the salt block
   - Aged cheddar, or cheese of choice
   - Slider buns, preferably fresh from a bakery

Caramelized beer onions:
   - 2 sweet onions (Vidalia or Spanish)
   - 1 brown or amber ale
   - 2 tablespoons butter
   - Pinch of salt

Slowly heat your salt block on the grill by bumping up the temperature in 10 minute increments at low, medium, medium-high, and high temperatures, in order to heat the block to 500 degrees.


Salt block sliders

While the salt block is warming, begin preparing the onions.  Cut the onions in half, and slice it very thinly.  Warm your butter in a non-stick pan, and when it's hot, put the onions in the pan.  Stir to coat the onions with butter, and sprinkle a pinch of salt.  After about 2-3 minutes of sauteeing the onions, add the full beer to the pan.  Settle the onions, get the beer to a simmer, and cover.  Cook at medium to medium-low heat for 10 minutes.  Remove the lid after 10 minutes, stir, and keep covering and stirring them every 5 minutes until the onions get a deep brown color and all the liquid is gone.

Just before the salt block is up to temperature, mix the ground beef, milk, ketchup, mustard, and black pepper.  Form into 12 patties, pinching the center of each patty to create a small divot to keep the burgers from rounding in the middle while they cook.

Carefully brush the hot salt block with oil.  Grill the burgers on both sides, about 3 minutes per side.

Salt block sliders

Sprinkle with a little pepper as they cook.  Add the cheese to each burger, and let melt for about 30 seconds.


Salt block sliders

Warm the buns briefly cut-side down on the grill to lightly toast them, approximately 1 minute.  Put the burger on the bun and top with the caramelized onions.  Enjoy!

Salt block sliders

Monday, January 6, 2014

Thai Red Curry

Hands down, my favorite Thai dish is red curry.  Salty, sweet, with just enough heat, I think it's a great way to spice up the average weeknight.  After a lot of tweaking and plenty of mediocre curries, we've finally got the recipe just right that yields a great curry time after time.  And best of all, it ends up being pretty quick!

You'll notice that I use prepared red curry paste as part of this recipe.  Though I'm very much a from-scratch type of girl, I did some research and quickly learned that making my own curry paste was not an easy thing to tackle.  

Thai Red Curry

Thai Red Curry
serves 4-6

Ingredients:
1 tablespoon avocado oil or olive oil
1 small chopped onion
1 teaspoon fresh finely chopped ginger
2 cloves garlic, diced
2.5 tablespoons jarred red curry paste (Thai Kitchen brand is the most accessible)
1 can regular coconut milk
1 can light coconut milk
1 cup chicken stock
2 tablespoons brown sugar
2 tablespoons fish sauce
2 tablespoons red chile-garlic paste (adjust to your heat preference)
1-2 pounds raw meat of choice, cubed or sliced (optional - omit for a vegetarian or Meatless Monday meal)
1-2 tablespoons cornstarch
Assorted vegetables, cut to your preference, such as bell peppers, carrots, snap peas, etc
1/2 cup rough chopped basil (Thai basil, if available)

Directions:
Heat oil in a large wok or skillet.  When hot, add chopped onion and ginger, and stir until onions soften, about 2-3 minutes.  Add the diced garlic and the red curry paste.  If you're using heartier vegetables that need time to soften, such as carrots, add them now.  Stir fry 1-2 minutes.

Add the light and regular coconut milks to the wok.  Stir to incorporate the red curry paste.  Add chicken stock, and bring to a very light simmer (do not boil).

Stir in the brown sugar, fish sauce, and chile-garlic paste.  Keeping the mixture at a low simmer, add the raw meat and cook for 6-8 minutes, or until meat is fully cooked.

Sift the cornstarch lightly into the curry, stirring constantly to ensure the cornstarch gets fully incorporated into the sauce without clumping.

Add any remaining vegetables that have a quick cook time or should remain slightly crunchy ("tender-crisp"), such as bell peppers or pea pods.  Also add the basil.  Simmer for another 3-5 minutes.

Serve with freshly cooked rice, and enjoy!

Tuesday, October 29, 2013

Eat Your Greens: Broccoli Slaw

Many of you who follow me on Instagram surely know that the past few months have been just a wee bit crazy for me.  At the beginning of August, we moved from our beloved Chicago to start a new adventure in Denver.  It's been great getting settled into a new home (it's a house! with a yard! and we had to buy a car!), but my job is still back in Chicago, so I've been splitting time between here and there.  With one foot in Denver and one foot in Chicago, grocery shopping and cooking anything even mildly interesting has sadly fallen to the bottom of our priority list.

But this past weekend, we were actually both home in Denver, we didn't have any visitors, and we actually had time to catch our breath.  And of course, all we wanted to do was cook.

Saturday night we just wanted comfort food - it was cold outside, and we snuggled up on the couch catching up on our huge DVR backlog while a yummy coq au vin was cooking in the oven.  Exactly what we needed.

Then Sunday night, we opted for grilling.  Chris brined two thick-cut bone-in pork chops, and then coated them in a sweet and smoky mesquite dry rub.  We grilled them up, and decided on crispy oven potatoes for a side.  Since the rub on the pork had a slightly bbq/southern flavor profile, I decided we needed something acidic to cut through all the fat and smokiness.

In came the most perfect and perfectly simple broccoli slaw.

Riffing off of an idea in my head combined with some input from various recipes I looked up for the purposes of dressing ratio, the result was crunchy, bright, acidic, and the perfect compliment to an awesome meal.  And best of all, it uses the entire head of broccoli, including the stalk.

I had a full bowl of it, and ate every last bite.


Broccoli Slaw

1 head of broccoli (including stalk)
1/4 cup rice wine vinegar
1 tablespoon dijon mustard
2 tablespoons sugar
1/2 teaspoon salt
1/4 teaspoon celery salt
Dried cranberries
Sunflower seeds

Cut off the top florets from the broccoli, and chop them finely.  Transfer to bowl.

Grate the stalk of the broccoli on a box grater (the largest holes you have).  If you don't have a box grater, chop up the broccoli stalk into small matchsticks.  Add to bowl.

In a separate bowl, whisk together the vinegar, mustard, sugar, salt, and celery salt.

Pour the dressing over the broccoli - be careful not to over-dress.  Add dried cranberries and sunflower seeds to your liking.


Tuesday, August 27, 2013

Simple Crusty Homemade Bread

As someone who doesn't love to bake, I must say that baking bread seemed pretty scary to me.  I always assumed I had to knead it just right, for just the amount of time, have exactly the right mixture of ingredients, and then if I did all that and the stars aligned and I practiced with a few dozen loaves, I might finally get a good loaf of bread.

While that may be true for some types of bread, I've discovered a pretty fool-proof bread that consistently turns out absolutely wonderful.  And best of all, it's no-knead.  Fair warning, you will need to mix it up a day before you plan to make the bread, but it's pretty easy to remember to mix 4 ingredients briefly and let it sit on the counter for a day just to have amazing homemade bread.

Crusty Homemade Bread
There are many versions of this bread out there.  I use a little bit more yeast than some just because I like a light, airy bread.  Feel free to adapt to your liking.

3 cups flour
3/4 tsp yeast
1 3/4 tsp salt
1 1/2 cup water

Mix the dry ingredients together to incorporate.  Add the water, and mix with a silicone spatula until the mixture becomes sticky throughout.  It'll look very sticky and scraggly, and that's what we're going for.  Cover with plastic wrap, set on the counter and let sit for 18-24 hours.

Bread Dough Day 1


The next day, it will look like this:

Bread Dough Day 2


When you're ready to bake the bread, place a dutch oven (or a large stock pot) with lid in oven and heat to 450 degrees, and leave in there for 30 minutes to fully heat the dutch oven.

While the dutch oven is heating, remove dough from bowl onto a heavily floured surface.  Sprinkle flour over top (you may need a decent amount, this is super sticky) and shape into a ball or oval (depending on size/shape of your dutch oven).  Cover loosely with more plastic wrap and let rest for 30 min.

Bread Dough Loaf


After the heating and resting 30 min is up, remove dutch oven from oven, remove lid, and drop dough (it will be tricky to pick up, make sure you flour your hands) into the pot.  There is no need to grease the pot, just a dry pot is fine.  Put the lid on and stick it in the oven for 30 min.

When 30 min is up, remove the lid and leave in the oven for another 10-15 min.  If it's a round loaf it will need more like 15 min, if it's oblong it may only need 10-12.  Then remove it from the oven, take the bread out (I use tongs) and place on a cooling rack.  Enjoy!


Bread Dough Sliced

Monday, July 22, 2013

Strawberry Lemon Ice Cream

It's the best time of year to make homemade ice cream, and with such amazing produce this time of year, fresh strawberries make some of the best ice cream there is.  With a hint of lemon, this ice cream was super creamy and delicious, perfect for summer!


Strawberry Lemon Ice Cream by FWMP


Strawberry Lemon Ice Cream
adapted from Epicurious

1 3/4 cups heavy cream
3 (3- by 1-inch) strips fresh lemon zest
1/8 teaspoon salt
2 large eggs
1/2 cup sugar
1 lb strawberries (3 cups), trimmed and quartered
1 tsp grated fresh lemon zest
1 tablespoon fresh lemon juice
1/4 cup sugar

Combine cream, zest strips, and salt in a heavy saucepan and bring just to a light simmer. Remove from heat and discard zest.

Whisk eggs with 1/2 cup sugar in a bowl, then add hot cream in a slow stream, whisking. Pour back into the saucepan and cook over moderately low heat, whisking constantly, until slightly thickened and a candy thermometer registers 170°F (do not let boil or you will have creamy scrambled eggs!).

Immediately pour custard through a fine sieve into a metal bowl, scraping along the inside of the sieve to strain all the liquid.  Discard any solids that remain. Cool to room temperature, stirring occasionally. Chill, covered, at least until cold, about 2 hours, and up to 1 day.  (I did this step the day before)

While custard is chilling, chop the strawberries and sprinkle the remaining 1/4 cup sugar over in a bowl, stirring occasionally so the strawberries release some juice.  When you're ready to make the ice cream and the cream mixture has fully chilled, purée strawberries with sugar syrup with grated lemon zest and fresh lemon juice in a blender until smooth. Stir purée into custard.

Freeze in ice-cream maker, then transfer to an airtight container and put in freezer to harden, about 3-4 hours.

-----------------------------------------------------

Don't forget to update your reader to follow me on BlogLovin'

Thursday, July 11, 2013

Cool Salad on a Hot Day

I don't know about your summer, but here in Chicago it's been downright steamy and sticky the past few days.  You know, the kind of steamy where you step outside and your glasses fog up.  When I get home at night after work and peel off my work clothes, the last thing I want to do is use heat of any kind to cook my dinner.  Lately we've been enjoying the beautiful produce and just making quick and delicious salads, and I must say that I'm becoming obsessed with them!


Shaved Brussels sprout salad FWMP

Shaved Brussels Sprouts Salad
serves 2
12-15 large Brussels sprouts
3 radishes
1/8 cup of dried currants
Cheese of choice - I recommend a hard, nutty sheep's milk cheese or a more common hard cheese like Pecorino Romano or Parmesan
Olive oil
Balsamic Vinegar
Fresh ground pepper

With such a simple salad, the key is the freshness and quality of ingredients.  You want to shave the Brussels sprouts on a mandoline so they are reduced to pretty ribbons of sprout leaves, and julienne the radishes.  Also make sure to use a good high quality balsamic vinegar (usually a little thicker than some of the watery versions we see today).  If you only have a thin balsamic, quickly reduce it in a pan on the stove to intensify the flavor and thicken in slightly.

Toss all the ingredients together, and enjoy the cool salad on a hot day!

Wednesday, May 22, 2013

Grilled Corn and Pepper Salad on Cilantro Lime Rice


Every year, as soon as spring hits, I'm constantly amazed at how amazing the fresh produce can be.  You'd think I'd get used to it, but after a dreary winter of eating soups and stews, a fresh meal on a warm day is absolute bliss.  And of course, anytime I can also fire up the grill, I'm even happier.

photo
follow my food (and life) adventures on instagram


Grilled Corn and Pepper Salad on Cilantro Lime Rice
serves 2-3

2 small red/orange/yellow bell peppers (I used 1 red and 1 orange), chopped
1 medium ripe tomato, chopped
1 poblano pepper
2 ears of corn, shucked
1/4 red onion, finely diced
1/2 cup of cilantro, chopped
1 large lime
1 cup rice

Cook the rice according to its instructions, preferably in a rice cooker.

While it's cooking, rub the corn and the poblano in olive oil and season with salt and pepper.  Grill them, turning often, until the corn caramelizes slightly on the outside and the poblano skin is charred.  Let them cool off the grill for 5-10 minutes, and then peel the charred skin off the poblano and discard, and chop up the flesh (removing seeds and stem).  Carve the kernels off the corn cob (alliteration, for the win!).  Combine the chopped poblano flesh and corn kernels with the fresh chopped bell peppers, finely diced red onion, chopped tomato, and half of the cilantro.  Juice 1/2 of the lime on the mixture, and season with salt and pepper.  Toss to mix, and set aside.

When the rice is finished cooking, add the remaining cilantro and juice from the other half of the lime to the rice, add a pinch of salt, and fluff to combine.

Serve the corn and pepper salad over the cilantro lime rice, and enjoy!


_ _ _ _ _ _ _ _ _ _ _ _ _ _ _ _ _ _ _ _ _ _ _ _ _ _ _ _


Don't forget, Google Friend Connect will be going away soon, so update your reader to follow me on Bloglovin'!

Friday, May 10, 2013

Grilled Red Snapper with Warm Grilled Salad and Herb Dressing

When the weather begins to warm up in the springtime, there's nothing more wonderful than grilling.  Don't get me wrong, I still grill all winter long so long as there isn't measurable snow covering my grill.  But that's just a method of cooking - grilling in warmer weather is an experience.  You invite people over, crack open a beer, leave the windows open, and throw anything and everything on a big grill.  There's really nothing like it.

This past weekend, a friend came over to grill up some whole red snapper.  We had been aching to grill and it was finally warm enough, and she also had recently mentioned that she had never prepared a whole fish, so what better time than now!


Grilled Red Snapper prep


Grilled Red Snapper with Warm Grilled Salad and Herb Dressing

Ok, that's a terrible title - I used "grilled" twice.  I make good food, I'm not a copywriter.

Herb Dressing
Dill
Italian Parsley
Capers
Garlic cloves
Lemon Juice (1 lemon - fresh)
Olive Oil
Salt & Pepper

I realize I didn't use any measurements here, because you'll want to do this to taste.  Stuff a ton of dill and Italian parsley into a blender (or magic bullet, which I used), a few capers, 2-3 cloves of garlic, salt and pepper, lemon juice, and olive oil.  You'll want to keep adding olive oil as you blend until you get a thick creamy/smooth consistency.  Don't add too much oil, or it will turn into an herb oil not a thick herb dressing.


Preparing the Red Snapper
When buying your snapper, have the butcher remove the gills, and if the scales are still on, might as well have them scale it too.  Scaling a fish is no picnic, and those little buggers get everywhere.

Stuff the cavity of the red snapper with thin lemon slices, fresh dill, and Italian parsley. Score the flesh of the fish 2-3 times per side, and rub the outside with a Tbs or so of your herb dressing (be careful to not contaminate the remaining herb dressing with raw fish spoon or something - you'll want to use this cool and uncooked on the fish and salad later).  Set these aside to come to room temperature.  Fight off circling cats.


Grilled Salad
3 ears of corn, unhusked (pull off silks though)
3 large potatoes, sliced into 1" thick slices
1/2 yellow onion
1 small head napa cabbage, sliced in half

The ingredients are listed in order of how long they need to be on the grill.  The corn should be put on the grill first, and will take 15-20 minutes, rotating every 5 minutes.  Cook the potatoes until they're fully cooked throughout.  Grill the onion, cut side down, for 7-10 minutes.  And finally, oil (and salt & pepper) the cut side of the cabbage halves, and place them on the hot grill for 5 minutes.  Remove all the veggies, and let them cool.  Set aside.

Now it's time to come back to the fish.

Place the fish on the hot grill and close the lid; let cook for 6-8 minutes.  Then flip the fish, and let cook for another 6-8 minutes on the other side.


Grilled Red Snapper on grill whole

The goal of course is to preserve that wonderful skin, which will get nice and crispy.  The key to this is using enough of the herb dressing to oil the fish and help keep it from sticking.  You'll notice one of my fish got a little stuck, so I could have used a little more dressing/oil on the fish to avoid that.

After the 6-8 minutes are up, remove the fish from the grill.

Grilled Red Snapper off grill


As your fish rest for a couple minutes, roughly chop up the grilled veggies, which now should be warm enough to handle.  Toss with some of the herb dressing to coat.


Grilled Red Snapper meal

Serve the fish family style with the warm grilled salad and a side of extra herb dressing.


Grilled Red Snapper composed plate

Wednesday, May 1, 2013

Pasta Salad with Avocado-Lemon Dressing


When the weather starts to warm up and the produce is flourishing, I get so excited to make fresh dinners highlighting the beautiful raw ingredients.  Since it actually reached into the 80's this week, I decided to make a nice cool pasta salad one night.

Pasta salads are great because you get to use up whatever veggies you have on hand, maybe some cheese and some meat if you prefer - basically, there's no way to go wrong.  And while I have made pasta salad with bottled dressing plenty of times in the past, I've recently been drawn to making my own dressings, especially on a pasta salad where the dish is a meal in itself.

The other night, I had an avocado on hand, perfectly ripe.  At first I was going to just chop it up with the other veggies, and then I had one of those eureka! moments...


avocado pasta salad 1


Pasta Salad with Avocado-Lemon Dressing
serves 3-4

For the dressing:
1 large avocado, ripe
2-3 Tbs olive oil
The juice of 1 small fresh lemon
A pinch of salt & pepper, to taste

In a small food processor (I used my magic bullet), puree the dressing ingredients together.  Adjust the amount of olive oil as you puree if you need more to make it combine into a nice thick creamy dressing.  Also, feel free to back off on the lemon juice if you prefer your dressing less acidic.

Pasta salad:
2 cups of pasta (I prefer small shells or rotini for pasta salad)
Any chopped veggies you like (I used broccoli, red pepper, and tomatoes, since I had that on hand)
Optional: meat (I threw in some leftover crumbled bacon, but leftover grilled chicken would be great as well)
*I wouldn't include cheese in this, since I think the cheese texture/flavor would get overpowered by the creamy avocado dressing

Cook the pasta to al dente, immediately drain and rinse with cold water to cool the pasta.  Put the pasta in a fridge for 20-30 minutes to cool completely.  Meanwhile, chop up your veggies, and the meat if you're including any.  Toss the chopped ingredients with the cooled pasta, and top with the dressing.  Stir to combine, and top with freshly cracked pepper.  Serve, and ideally enjoy outside with some beautiful weather!


avocado pasta salad 2

Thursday, April 25, 2013

A Day in Chianti


A month ago, Chris and I had the wonderful opportunity to take a trip through Italy and the Swiss Alps.  It was a two-week trip of a lifetime, and I can't even begin to wrap my head around sorting through the 1000+ gorgeous pictures I came home with, let alone narrow it down to make a keepsake photo album.


boboli gardens 1

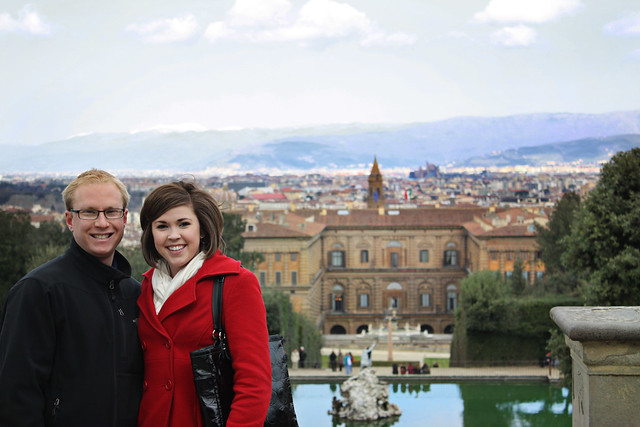
One of our longest stops was in Florence, where we rented a charming little apartment for a week and spent time both enjoying the sights in Florence, as well as getting outside of the city to enjoy a few day trips.  But since this is a food and wine (and craft, but come on, I wasn't crafting in Italy!) blog, it's only fitting that the highlight of this post is the culinary highlight of our trip.

And for that, I must take you to Chianti.


We researched and hired a local driver to take us around the Chianti region of Tuscany on our second day in Florence, which was definitely a good decision.  Come on - renting a car and driving around those winding roads in a country where we don't know the language?  While drinking wine?  Let's just not go there.

Our driver showed up and she was lovely, and my goodness she was good at weaving in and out of the crazy traffic/randomly parked cars!  Also, and most importantly, she was very familiar with the various wineries and had great rapport with the wineries where we stopped.


chianti winery


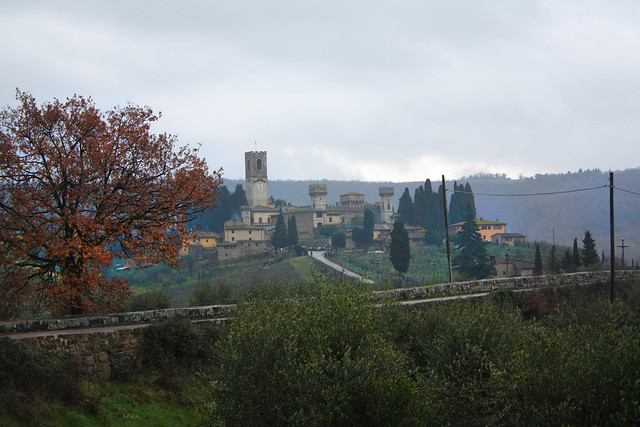
Even though it was a dreary, rainy day, I still got some great photos, and my loving husband was so kind to hold the umbrella over my head as I snapped away!

But now we reach the part of the story where we talk about the food.

Around lunchtime, we stopped at a winery called 
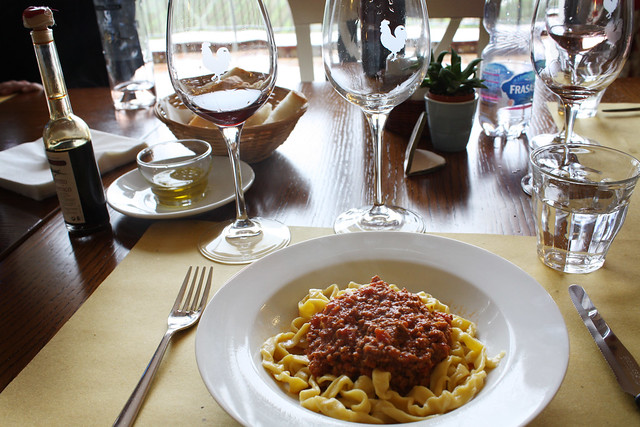
Casa Emma.  At this point in the day, the rain was coming down in sheets, and as soon as we stepped inside, it started hailing.  We were happy to be inside and be warm, and the winery manager was happy that someone actually braved the weather to come in.  He immediately sat us down, rolled the heater over, and shared the story of his winery with us.  He prepared a light cheese and prosciutto platter, and we tasted all of the winery's wines, as well as the best olive oil and balsamic vinegar (both also products of the winery) I have ever had.

Once we were done with the tasting, he asked if we wanted to stay for lunch.  They had a full dining room that was recently built in the back of the building, overlooking their vines, so of course we obliged.  Since we were the only ones there, I think they were also thrilled to have someone to enjoy the food they had been lovingly preparing.


chianti wine

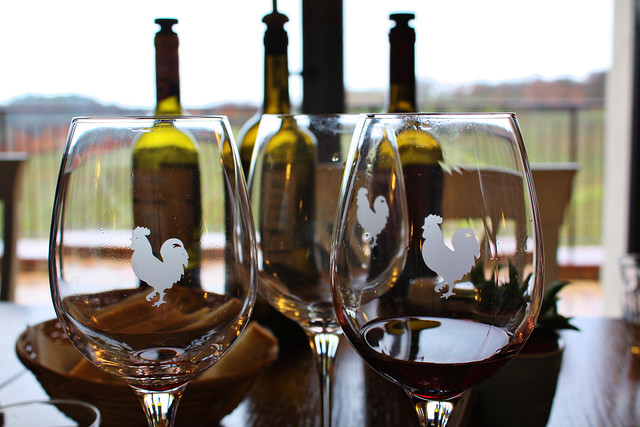
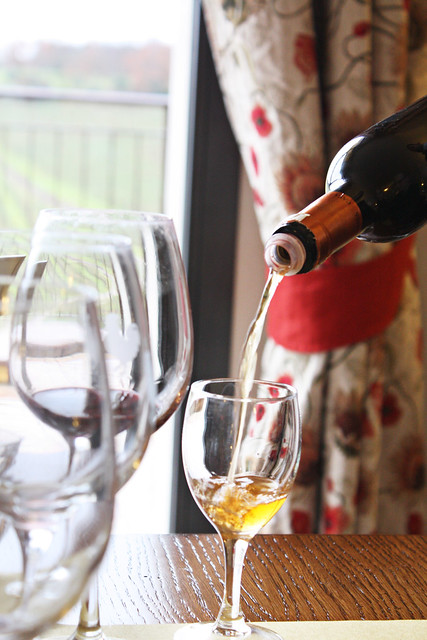
We were treated to a wonderful four-course meal, all specialties of the region.  And of course, we had plenty of wine.

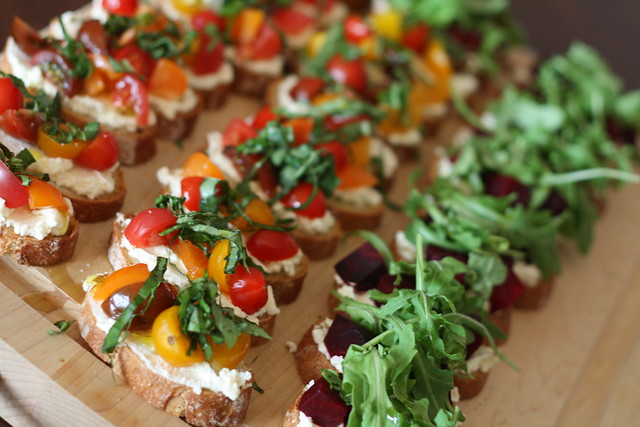
We started with a selection of light starters, including a liver pate that is very traditional for the area.

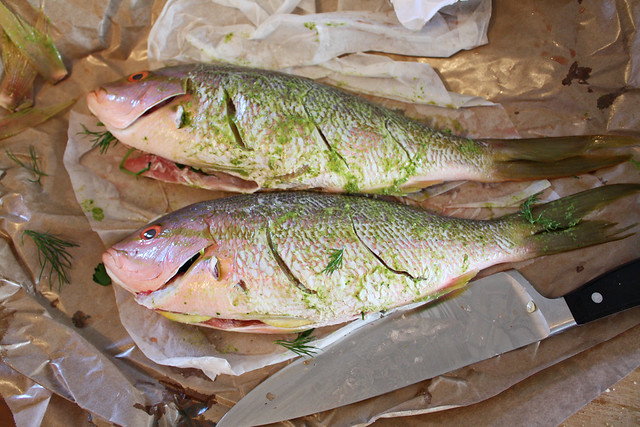
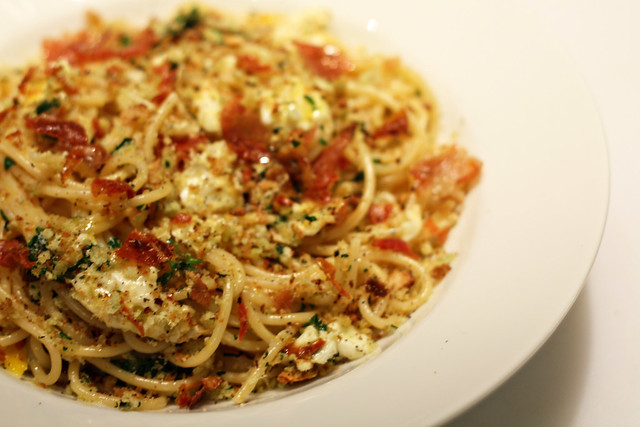
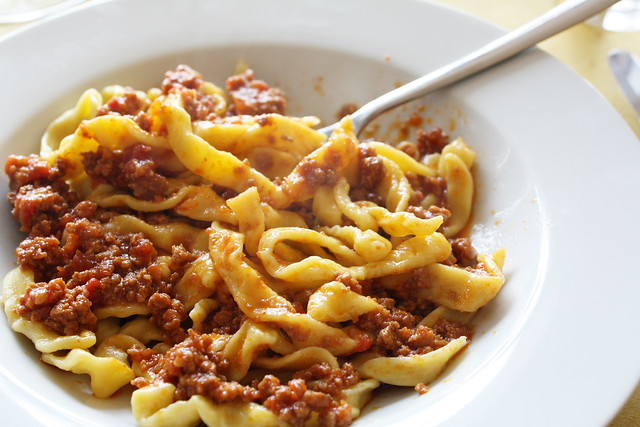
Of all the amazing food in that meal, the absolute most memorable dish for me was the pasta.


chianti lunch


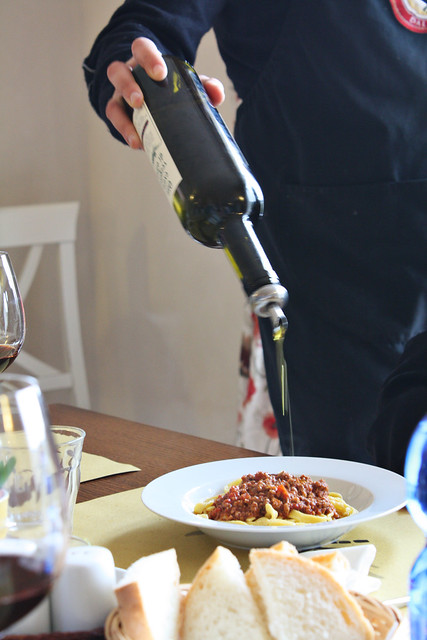
The pasta dish was a simple homemade pasta bolognese, but there was nothing simple about the complexity of flavor and the texture of the pasta.  That was the day where I finally fully understood the concept of al dente.  It's not just making sure not to overcook the pasta; a true homemade pasta, made perfectly, has the most incredible texture.  Then paired with a deep, rich sauce, and of course finished with some of the winery's olive oil, the experience was ethereal.


chianti lunch 2


chianti lunch 3


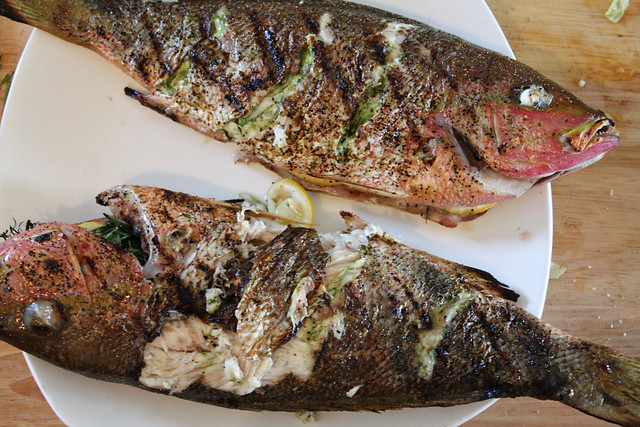
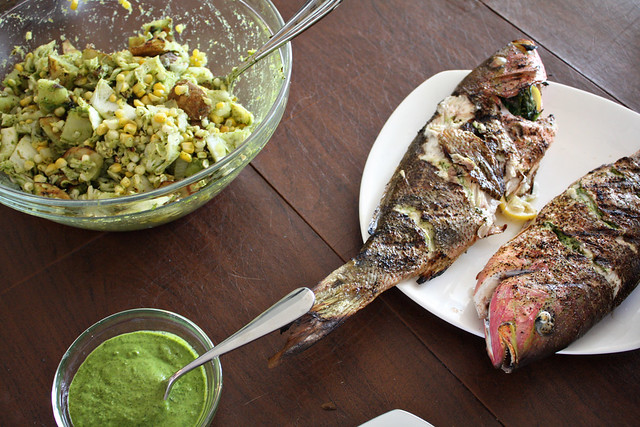
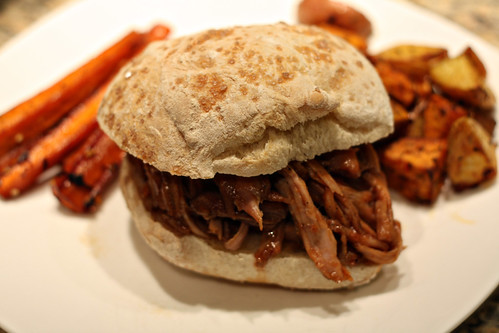
We then had a pork dish that blew my husband's mind, including a 2-day red wine sauce that had outrageous depth of flavor.  Though I will admit it wasn't a pretty dish, it was certainly something special to taste.  Chris even asked them how they made the sauce, and the winery manager went back and asked the chef, then came back out and dictated a full list of instructions.  You can find the recipe at the bottom of the post, but I warn you, it is a very quick list of steps, and involves what I assume to be absurd amounts of olive oil and wine.


chianti lunch 4

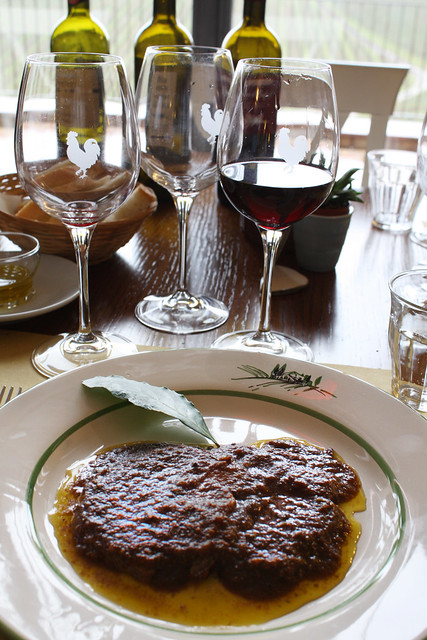
And of course, you also finish it with even more olive oil.  Eeesh.


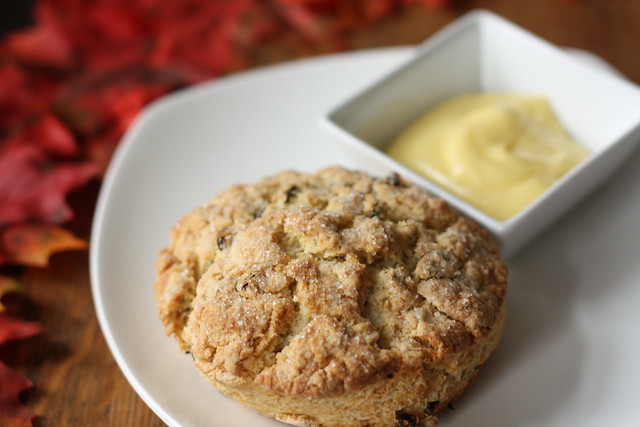
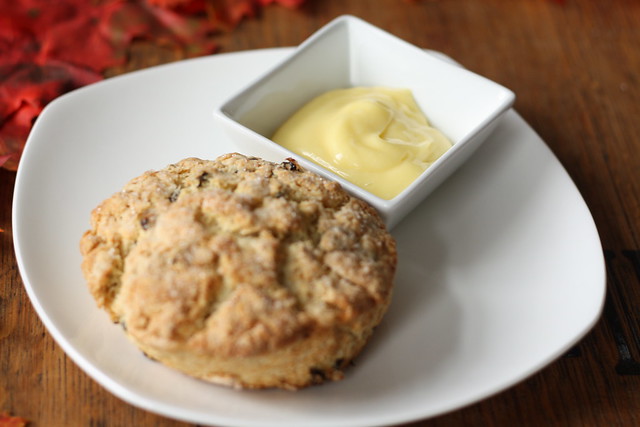
Finally, no meal would be complete without a little dessert.

chianti dessert


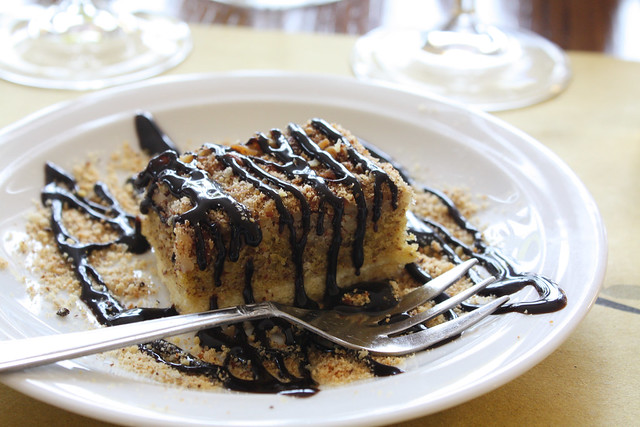
...and a little dessert wine.


chianti dessert 2

Even with the cold and rainy weather, our day and this meal experience in Chianti was one of the most incredible memories of the whole trip.


---------------------------------------------------------------------------------------------------------

Pork Loin in 2-day Red Wine Sauce
That's what I'm going to call it since they didn't actually tell us its name.  Also, the instructions are fairly crude since the winery manager was just talking us through how they make it.  You take what you can get!

1. Start with a good amount of olive oil in a big roasting pan (after what I saw with the abundance of olive oil at this winery, I'd say "good amount" probably means a whole lot of olive oil.  Hey - maybe that's why it was so good!)
2. Add one carrot, half an onion, and lots of garlic to the pan.
3. Heat the pan, and add a large pork loin when the oil is hot.  Turn to sear on all sides.
4. Kill the heat.
5. Add enough red wine to cover 3/4 of the loin (oh right - the other reason why this tasted so good.)
6. Cook in an oven at 350F/180C until the wine is fully reduced (sorry, he didn't tell me how long this takes, but I'm guessing quite a while)
7. Remove from heat, let it cool, and put in the refrigerator overnight.
8. The next day, remove the pork, and stir the sauce over heat by hand until everything breaks down.
9. Slice the pork thinly, sear quickly in a pan to heat, and top with the sauce and serve.

Friday, December 14, 2012

Tartine's Currant Scones and Lemon Cream

IMG_3780

The weekend of Thanksgiving, we had 5 family members visiting us in chilly Chicago.  Thus, there was a lot of cooking, eating, and drinking.  I was in a menu-planning flurry the week before the big holiday, not just for the Thanksgiving meal, but also for every other meal that weekend.  And it was that planning week that one of my favorite blogs, Alexandra's Kitchen, posted the recipe for Tartine Bakery's Current Scones and Lemon Cream.  

Upon reading the recipe and looking through the pictures, I was hooked.  I sent it to my husband's sister to get her thoughts, and she immediately responded that we must make them that weekend. 
 
So Saturday morning of Thanksgiving weekend, she and I made the scones for everyone, and boy were they delicious.  Warm and both soft and crunchy, bright pops of currants, just delicious.

But oh, that lemon cream.

IMG_3784

I would like to bathe in that lemon cream.  In fact, I'm pretty sure I could find an excuse to eat that with almost anything.  Posted originally on Food52 (my new obsession), this lemon cream is so bright, so rich, so creamy.  The lemon flavor is so robust, the first bite catches you off guard.  And after that first bite, it's hard to stop.  You'll find yourself wanting to lick the dish, to get every last bit of goodness.

Since I didn't deviate from the recipe at all, I'm going to point you over to Alexandra's Kitchen for the full rundown, paired with her beautiful photography.

Alexandra's Kitchen: Tartine Bakery's Currant Scones with Lemon Cream

Friday, December 7, 2012

The Best Thing I Ever Made

You know that show on The Food Network "The Best Thing I Ever Ate?"  Well, they also have a cooking version, "The Best Thing I Ever Made."  And if I was ever invited to contribute to that show, I would make this pasta.

I'm being completely serious, this is the best thing I've ever made, it is so incredibly, outrageously delicious.

It's blowing my mind just thinking of it.

If there's one thing I can say about this pasta, is do not skip any part of this recipe.  I know you'll be tempted to just omit the breadcrumbs, or maybe you don't have any lemons for zesting lying around.  Then wait to make the pasta.  Wait until you have the time, and the ingredients, and the love, to make this pasta the thing of beauty that it is.


Spaghetti with Soft Eggs and Speck
adapted from Food52
*note: this recipe makes one serving.  Why?  Well, the original recipe author was a military wife who often had to make meals for one while her husband was deployed, and in my case, my husband won't eat eggs or pecorino romano so I made this on a night when he was out of town.  I suggest you increase the recipe accordingly.

Pangritata (a word not in my vocabulary previously, this is the seasoned breadcrumbs part of the recipe)

2 tablespoons olive oil
1/3 cup fresh or stale coarse breadcrumbs (I pulsed an old part of a baguette in the food processor)
2 teaspoons minced fresh Italian parsley
zest from half a lemon

Heat 2 T olive oil in a large skillet over medium-high heat.  Add the breadcrumbs and sauté until beginning to brown, about 3 to 4 minutes.  Add the parsley and the lemon zest, and toast for another minute until the mixture is crispy and golden brown.  Set aside.


Spaghetti with Soft Eggs and Speck

4 ounces spaghetti
1 tablespoon olive oil
1 tablespoon unsalted butter
3 cloves garlic, minced
2 large eggs
2 tablespoons chopped Italian parsley
4 paper-thin slices of speck (speck is a smoked prosciutto)
freshly ground black pepper, to taste
1/4 cup grated Pecorino Romano cheese

Lay out the slices of speck on a baking sheet and either toast them in a toaster oven or in a broiler.  Because the slices are so thin, they will cook very, very quickly, so keep an eye on them to make sure they crisp but don't burn.  This will likely take 1 minute, maybe 2 if you're starting from a cool toaster oven.  Remove and set aside to cool.

Bring a large pot of well-salted water to a boil and cook pasta to al dente according to directions on box.

After adding the pasta to the boiling water, wipe out the skillet from the pangritata, add 1 T olive oil and 1 T butter and melt together over medium heat.  When the oil/butter mixture is hot, add the garlic and immediately break the eggs into the skillet.  If need be, lower the heat a bit. You want the garlic to cook without burning and the egg whites to set, but the yolks to remain runny.

Reserve 1/2 cup of the starchy cooking liquid from the pasta before draining when al dente.

Add pasta back to the pot, pour the eggs and all the fat from the skillet onto the pasta, add the parsley and half the cheese, and toss well, breaking up the eggs as you do. If it is looking a little dry, add some of the reserved cooking liquid (for mine, I ended up adding about 2 T).

Break up the toasted speck (it will be thin and crisp) and toss with the pasta.

Plate the pasta and eggs, season well with freshly ground black pepper and a pinch of salt, sprinkle with the remaining grated cheese and then top with the pangritata.

Eat immediately, with a nice glass of wine.


Final egg pasta

Friday, November 30, 2012

Homemade Ricotta

The concept of making my own cheese always made me uneasy.  Cheese is aged in dark caves in France, not made on my kitchen counter!  However, recently I've seen a few references to "house-made ricotta" on restaurant menus, and even heard a chef reference how she always makes her own ricotta at home.

When I was planning my Thanksgiving weekend food extravaganza, I suddenly seemed inspired to at least look into making my own creamy delicious ricotta, if it was really as easy as it sounded.  And you know what I found?  It's is easier than it sounds.  In fact, I'm still blown away that I made something so creamy and delicious with such little effort.


IMG_3771

Rich Homemade Ricotta
recipe from Smitten Kitchen

Ingredients:

3 cups whole milk
1 cup heavy cream
1/2 teaspoon coarse sea salt
3 tablespoons freshly squeezed lemon juice

Equipment:

Candy or deep-fry thermometer
Cheesecloth
Large mesh strainer
(I ended up buying the cheesecloth and strainers online through Amazon as linked to above).


Pour the milk, cream and salt into a 3-quart nonreactive saucepan. Attach a candy or deep-fry thermometer. Heat the milk to 190°F, stirring it frequently to keep it from scorching on the bottom. Remove from heat and add the lemon juice, then stir it once or twice, gently and slowly. Let the pot sit undisturbed for 5 minutes.

Line a large mesh strainer with 3 layers of cheesecloth and place it over a large bowl (to catch the whey). Pour the curds and whey into the mesh strainer and let the curds strain for two hours.  Discard the whey (liquid in the bowl), or, if you’re one of those crafty people who use it for other things, of course, save it.

Eat the ricotta right away or transfer it to an airtight container and refrigerate until ready to use.

-------------------------------------------------------------

For my Thanksgiving appetizers, I decided to make two types of crostinis: ricotta with roasted beets and arugula, and ricotta with tomatoes and basil.  In both cases, I toasted some fresh baguette slices, then rubbed them with garlic cloves before spreading the ricotta on top.  With the roasted beet crostinis, I roasted the beets ahead of time, diced and chilled them in the fridge, and then assembled and finished with a sprinkle of black pepper and a light drizzle of olive oil.  For the tomato crositinis, I simply halved some beautiful multi-colored small tomatoes and finished with a pinch of coarse sea salt and of course another drizzle of olive oil.

What I loved about this ricotta recipe, compared with others I looked up, is that it uses lemon juice instead of other acids like vinegar.  You could definitely taste a very, very faint touch of lemon, which I thought really took the flavor to a whole different level.

Give it a try!

IMG_3777
Served with Caramelized Onion Dip (and veggies) and Crunchy Roasted Chickpeas.

Thursday, October 18, 2012

Homemade Ciabatta Rolls

Last weekend, as Chris and I were thinking of something new to try in the kitchen, an idea came to mind: how about trying our hand at some homemade bread?  We don't have a breadmaker so we've never gone that route, but we love fresh bread (always drop by our local bread shop each week) and we generally have yeast lying around, so hey, why not?

Sifting through ideas for a type of bread to make, we stumbled upon a wonderful ciabatta recipe, with the most amazing pictures, I just knew we had to try it.  It wasn't going to be easy - it was going to be a two-day affair involving making a "biga" on day one and then completing the actual bread on day two.  But I could tell already how it was going to be all worth it.


IMG_3729

Homemade Ciabatta Rolls
recipe from TheKitchn.com

Biga - Day 1
4 ounce (1/2 cup) water
1/2 teaspoon active-dry yeast
1 cup all-purpose flour
Dissolve the yeast in the water. Add the flour and stir to form a thick, gloppy paste. Give it a good fifty or so brisk stirs to build up the gluten. Cover and let sit at room temperature eight hours or overnight.
By the next day, the biga will look soupy with many big bubbles dotting the surface.
Ciabatta - Day 2
17 ounces (2 cups + 2 tablespoons) water
1 teaspoon active-dry yeast
Biga
4 cups all-purpose flour
2 teaspoons kosher salt
Dissolve the yeast in the water in the bowl of a standing mixer. Scrape the biga into the water and break it up with your spatula or squeeze it between your hands. You don't need to completely dissolve the biga; just loosen it up and break it into stringy blobs.
Add all of the flour and the salt. Stir to form a thick, very wet dough. Let this rest for 10-20 minutes to give the flour time to absorb the water.
Fit your standing mixer with a dough hook and knead at medium speed for 15-18 minutes (Level 5 or 6 on a KitchnAid). Keep a close eye on your mixer as it has a tendency to "walk" on the counter at this speed.
The dough will start off sticking to the bottom and sides of the bowl. Around the 7-minute mark, it will start to pull away from the sides of the bowl, collect around the dough hook, and regularly slap the sides of the bowl. If it doesn't, nudge your mixer speed up a notch. Also, if the dough starts climbing the dough hook, stop the mixer and scrape it down again. By the end of kneading, the dough will look smooth and creamy with a glossy shine. It will puddle back into the bowl once you turn off the mixer, and this is fine.
Cover the bowl and let the dough rise at 70° - 75° for 2-3 hours, until tripled in bulk.
Dust your work surface heavily with flour. Set two sheets of parchment near your work surface. Scrape the dough out of the bowl onto the flour, taking care not to deflate it too much. Dust the top of the dough with more flour. Using a pastry scraper or pizza wheel, cut the dough in two pieces for loaves or into 16 pieces for rolls.
Brush your hands with flour. Working gently but swiftly, scoop the the loaves (or the rolls) one at a time from the work surface to the parchment. Press your fingertips about halfway into the dough to dimple the surface and slightly flatten the loaves (or rolls). Let the loaves (or rolls) rise, uncovered, for 30-40 minutes. When ready to bake, they should look pillowy with many big bubbles just beneath the surface.  We decided at this point to sprinkle them with a little flaky sea salt, as the ciabattas made at our local bakery are made this way and the salt crystals on top are absolutely divine.
Preheat the oven to 475°F while the loaves are rising. If you have a baking stone, put it in the oven now.
When ready to bake, slide the loaves, still on the parchment, onto a pizza peel or baking sheet. Transfer them to the oven to cook, either on the baking stone or directly on the baking sheet if you don't have a stone. Bake for 20-30 minutes, until puffed and golden brown. Slip the parchment out from under the loaves and cool completely before eating.

To be honest, we didn't wait for them to cool completely at all.  It took every ounce of our willpower to avoid steam burns and wait maybe 5 minutes before breaking through the crusty exterior to expose the airy soft center.  Even though we had planned to use the rolls for barbecue pork sandwiches, we couldn't help but eat one right away to just enjoy the delicious fresh hot ciabatta.

IMG_3713

04 Finished Pulled Pork Sandwich

Sunday, September 16, 2012

Roasted Cauliflower, Potato, and Red Bell Pepper Soup

Nice to see you again! It's been a while!

...ok. A long while.

You know how it is, life gets in the way. I've still been cooking, but the past few hectic months, the food hasn't really been inspired, not worth posting. Just not special.

Well, yesterday, that all changed. Looking through my fridge, I had a sudden epiphany: I was going to make roasted cauliflower soup. The weather is starting to turn cool, which means pureed soups are making their reappearance. The problem was that I had only a quarter of a head of cauliflower, which wouldn't make very much soup.

And in a moment of eureka, my roasted cauliflower, potato, and red bell pepper soup was born.


Roasted Cauliflower, Potato, and Red Bell Pepper Soup
with homemade croutons

Recipe below is double what I made, since I was making it for two and we ate ALL of it, easily. Feel free to even double again if you're making for more than 4 people.

1-2 tbs olive oil
1/2 head of cauliflower
2 red bell peppers
10 small red potatoes, peeled
6 cloves of garlic
2 tbs butter
1 yellow onion, diced finely
4 cups of chicken stock
2/3 cup milk
Salt & Pepper
Homemade Croutons (optional)
Chopped Basil (optional)

Pre-heat the oven to 450 degrees.

To prepare the vegetables, cut the cauliflower into thick slices to get as much flat surface as possible; quarter the potatoes; cut the peppers into large chunks. Toss the three veggies with the peeled garlic cloves, olive oil, salt, and pepper.


Soup 1

Spread out the veggies on a baking sheet, turning them with a flat, cut side down. Bake for 15 minutes, then flip the veggies, and bake for another 15 minutes. Look for a dark, caramelized color on the veggies. Remove and let cool for 5 minutes.

Soup 2

While the veggies cool, warm the butter in a large pot until melted. Add the onion and sautee until the onion starts to brown. Once the onion is slightly brown, add the chicken stock to de-glaze. Bring the onions and stock to a light simmer, then turn off the heat and let cool for 5 min.

Next, put all the veggies into a blender, and add the stock/onion mixture. Because I made such a small batch of soup, I was able to do this all in one step, but if you make the full recipe (or especially a double recipe) you may need to do this in batches.

Soup 3

Puree the mixture completely until smooth. Pour the puree back into the pot used for the stock/onions, and put the heat on low to get warm again. Add the milk and stir to incorporate. If you feel the soup is too thick at this point (it may be depending on the size of your potatoes or cauliflower), add a little more milk or stock.

Serve topped with homemade croutons and chopped basil.

Soup 4