Tuesday, August 31, 2010

On my wish list: Dutch Oven

Thanks to my wedding, I have just about everything a girl could hope for in the kitchen. Food processor, immersion blender, crock pot... even a tiny little salad dressing mixer.

But there's one thing I don't have.

One thing that I've been longing, yearning for.


Yeah baby! A Le Creuset dutch oven!

This is at the very top of my stuff-to-buy-for-the-new-place list. I've paid my dues, I've waited long enough! My goal is to get this beauty by the end of the year.

What's on your kitchen wish list?

Monday, August 23, 2010

Eric Ripert: Perfect Pairings


Eric Ripert is more than just a guy with a cute accent and a smile that will make you melt. He also is a fantastic chef. Just how fantastic, you ask? Well, Wikipedia has this as the very first sentence on his page:

Eric Ripert (rih-pair') (born 1965 in Antibes) is a French chef, widely considered to be the greatest living seafood chef.

That's right ladies and gentlemen: he's the real deal.

So I was so excited when I found out that he was starting a short webseries of films through his website, Avec Eric.

In these short films, Eric dispels wine myths, walks us through perfect pairings, and introduces new food and wine concepts. I love that he wants to share his love for food and wine with the world, and believes you don't have to stick to old standard pairings for food. Food and wine should be fun! We should play with the flavors!

In addition to the Perfect Pairings series of short films, Eric also has a full TV show called Avec Eric, where you really get to know where he comes from as a chef and a lover of food.

To see all the past episodes, click here.

My favorite is Episode 9: Oil and Wine. I learned so much! But then again, you also can't go wrong with Mission Figs Wrapped in Bacon.

I haven't made it all the way through the videos yet, there are so many to choose from, but I'm working on it! I feel like I'm learning so much!

I hope you enjoy these too! Let me know which episodes you like so I can put them on my list of next ones to watch!

Sunday, August 15, 2010

Ragu with Homemade Noodles

Every once in a while, instead of going out to dinner on a Friday or Saturday night, Chris and I decide to instead go buy a really good bottle of wine and stay in to cook an amazing meal that goes well beyond anything we could do during the week.

This past weekend was just such a weekend.

Chris was combing through Hart Davis Hart’s website - a favorite pastime of his. Hart Davis Hart is a Chicago wine auction house, and 4 times a year they host the most amazing wine auctions. We get the catalogues, and let me tell you, this is stuff most of us will only hear about in our lives, not even ever see in person, let alone drink. The lots go for 5, 10, 20+ thousand dollars. It’s crazy! However, Hart Davis Hart also sells wine, and they have surprisingly reasonable prices for their retail stuff. This still isn’t the kind of place that will sell Columbia Crest Two Vines, but you can find a pretty darn good bottle for $30 that would maybe be $40+ elsewhere. And when you’re doing this in lieu of spending money going out to a fancy dinner, it’s a pretty great deal!

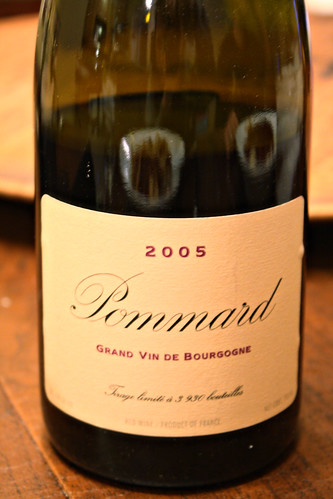
So Chris found a bottle he was very excited about - a 2005 Burgundy from Pommard. Now we just had to build a meal to go with it!

edited Full meal (5)


We knew it had to be a rich meal, something that would go well with a full-bodied red. Then Chris suggested we make a ragu. A thick, hearty, meaty sauce would go perfectly! We decided to go for it. But then my two cents - let’s make our own noodles! I had never made my own noodles before, but my aunt and cousins make them all the time, so I’ve seen them made. We also had never made a ragu before, but that’s at least related to other sauces we’ve made, so it wasn’t too daunting. This was going to be a fun night!
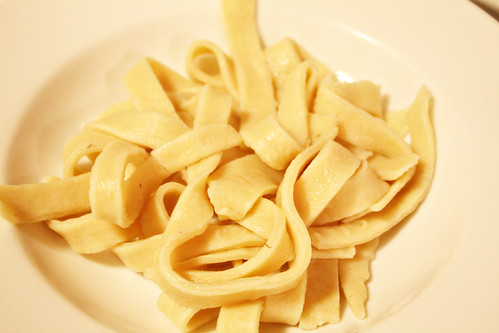
Homemade Noodles

I looked up a few recipes online, and they all pretty much looked the same:

1 beaten egg
1/2 t salt
2 T milk
1 cup sifted flour

edited Noodles (2)


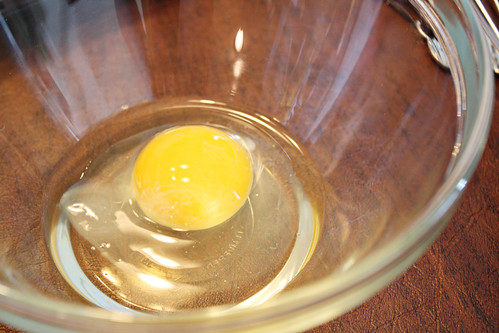
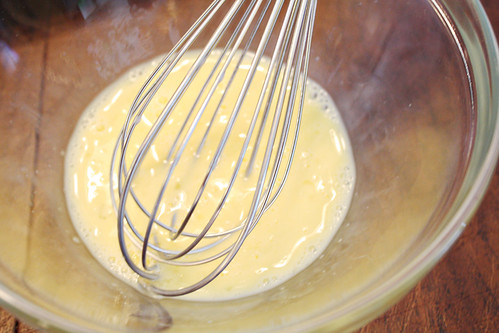
Beat the egg, and add the milk and whisk in.

edited Noodles (3)


In a separate bowl, sift the flour and salt together.

edited Noodles (4)


Pour the egg/milk mixture into the flour and salt, and mix until a dough forms. Knead well.

edited Noodles (5)


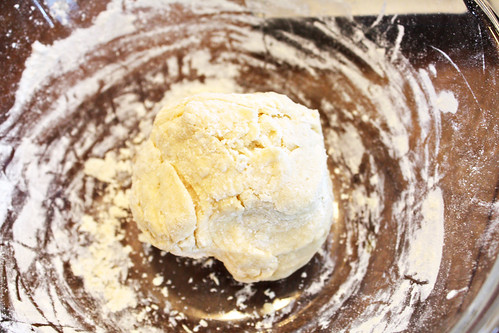
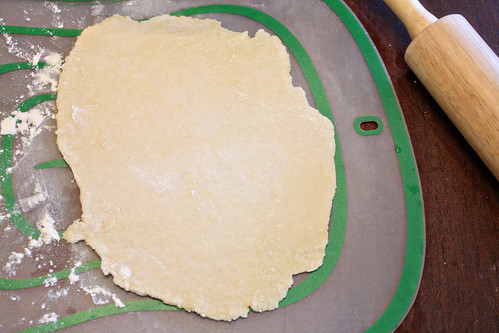
Now, take your dough and split it in two. This will make the dough easier to manage. Roll each dough ball out as thin as you like. Since this was going to be a thick, hearty sauce, I didn’t roll them too thin because I wanted a noodle that could stand up to it. But I definitely could’ve rolled it thinner if that’s the type I was going for.

edited Noodles (6)


Let the dough sit for 30 minutes to dry a little.

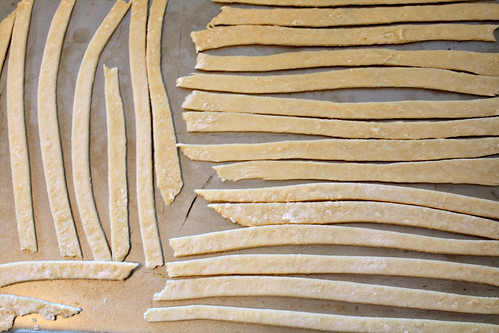
Using a pizza cutter, cut the noodles to the length/width that you want them. Then arrange them on a lightly floured baking sheet or some other surface so they aren’t touching. Allow them to dry for 1 1/2 hours on one side, then flip the noodles over and allow to dry for another 1 1/2 hours on the other side.

edited Noodles (8)


Ok, now while these dry, let’s move on to the ragu!

Our ragu was an adaptation based off of Bobby Flay’s Short Rib Ragu. But it strays pretty significantly, so I’m not even going to show you the original recipe.

2-3 lbs flank steak
2 T canola oil
2 carrots
2 celery stalks
2 shallots
1 onion
2 cups red wine
2 cups beef stock
1 large can whole peeled tomatoes
10-15 shiitake mushrooms
2 T flour
Seasonings: Italian seasoning, dried basil, dried oregano, salt, pepper, etc.
Oven: 325 degrees F

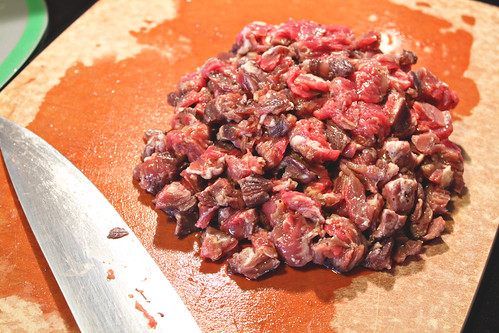
Chop the flank steak into half inch cubes.

edited Ragu (1)


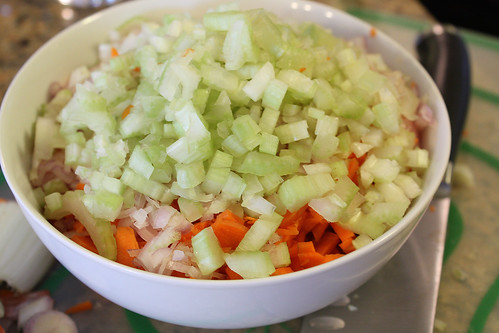
Chop your vegetables finely.

edited Ragu (3)


Heat the oil on the stove in a large pot. Once the oil is hot, put the flank steak in for about 2 minutes. This will help render some of the fat from the meat. Remove the meat and set aside.

Now put in all the vegetables. Keep them constantly moving so they don’t stick. After about 2-3 minutes, add the 2 cups of red wine. For this recipe, we used a lower-end bottle of red wine, but one that we like the flavor of. I recommend Columbia Crest Two Vines Vineyard 10 Red Wine. It’s a great cheaper red wine that has a good deep red flavor but not outstandingly spicy or fruity. It’s a great blend that’s wonderful for cooking.

The wine will help grab all the brown bits from the bottom of the pan.

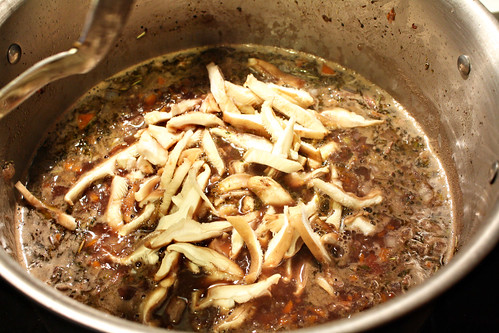
After 3-5 minutes, add the beef stock, and bring to a simmer. Let simmer for about 10 minutes. While the sauce is simmering, pull out your can of whole tomatoes and chop them up (remembering to puncture them to drain the juice before chopping to avoid a mess!). After 10 minutes, add the tomatoes and the tomato juice. Then, add your chopped shiitake mushrooms.

edited Ragu (5)


Then add the flour slowly by sifting it in and stirring frequently. We don’t want the flour to clump! Add whatever seasonings you wish - we used a bunch of dried herbs, as well as salt and pepper.

Finally, add your meat back into the sauce. Stir in, and cover the pot and stick it in the oven. Leave for 3 hours.

After 3 hours, when you’re ready to eat, you need to first return to your noodles and cook them!

Bring a pot of water to a boil. Add the noodles.

edited Noodles (11)


Boil for 7-10 minutes, depending on thickness.

edited Noodles (17)


Now pull your sauce out of the oven. Look how thick it’s become!

edited Ragu (13)


edited Ragu (14)


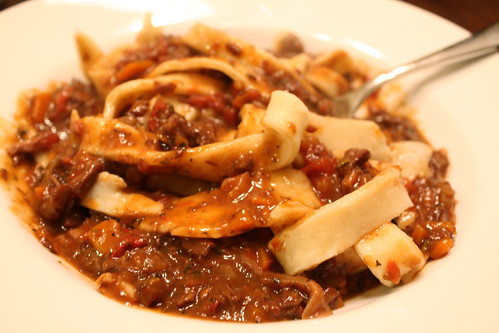
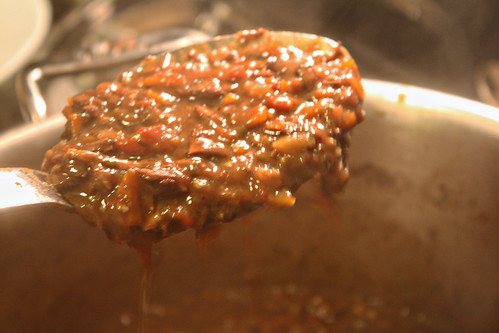
Sorry for the blurry pic... poor lighting + steam + impatient hungry husband = you take what you can get

Generously douse your noodles in the sauce.

edited Full meal (3)


edited Full meal (4)


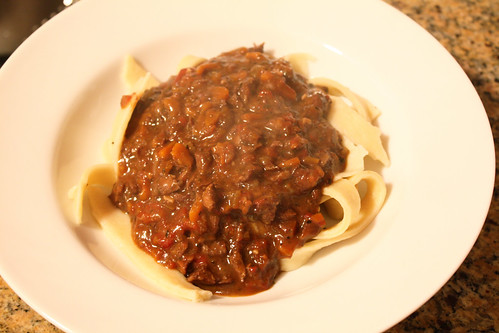
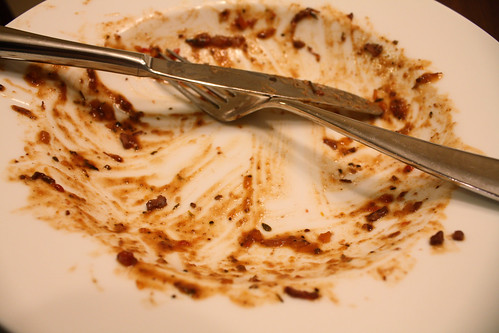
So thick and hearty! I loved absolutely every minute of eating this meal. And it paired perfectly with the Burgundy! I couldn’t have hoped for better noodles either -- these definitely held up to the thick sauce. Overall this was an outstanding meal, we couldn’t have been happier with the way it turned out!

edited Full meal (7)

Wednesday, August 11, 2010

Craft Sabbatical

Oh my lovely Mod Podge!

Mod Podge Moving (1)


So cute, all the three sizes. And they help me create such fun projects!

But, alas...

Mod Podge Moving (2)


The Mod Podge must go away for a bit. Sad, but for a happy reason: we're moving! Chris and I are packing up and moving at the end of this month to a slightly bigger place. A place which will need plenty of new projects and decorating as soon as I get in and start to set up! I see a landslide of craftiness in my future!

But for now...

Mod Podge Moving (3)


...away goes the Mod Podge, along with the canvases, ribbon, scrapbooks...

Mod Podge Moving (4)


...stamps, embosser, and stationery.

In the meantime, I will try to still post recipes and wine tidbits to tide you over until I can unbox!

Packing can be stressful, but I know a certain someone that thinks it's just the best thing ever. You see the eyes in the center?

Mod Podge Moving (5)


Now back to the packing!

Friday, August 6, 2010

My new kitchen obsession: Popovers

Even the name is fun to say - Popovers!

I don't really do a lot of baking because honestly, it scares me. Cooking is easy, it's just combining flavors to make a great dish. If you added a little too much spicy heat, just add a little sugar and you're good to go. But baking? That involves chemistry and specifically measured ingredients... There's just way too much possibility for error. I'm not comfortable with that kind of rate of failure!

But when I finally looked up the recipe for basic popovers, I was floored. 4 ingredients. No fancy things that make things rise (yeast, baking powder/soda, etc). Just four ingredients.

Milk.
Eggs.
Flour.
Pinch of salt.

That's it! Even I can't screw that up!

So I gave it a shot.

Original Popovers Recipe

2 eggs
1 cup milk
1 cup flour
Pinch of salt

Preheat oven to 450 degrees. Lightly wisk the two eggs, then add the milk and flour. Make sure you mix the ingredients, but don't beat them. The least amount of whipping as possible. Stir until it is just fully mixed. Add the pinch of salt, and stir in.

Pour into a greased custard tin, filling each cup about halfway up with batter. Put in oven at 450 for 20 minutes, then turn heat down to 350 for another 20 minutes. Makes 6 popovers.

*********************

Do I have a custard tin? No. But I figured muffin tins would work ok, and I would then just end up with a few more popovers. And of course since they were smaller, I would have to do about 12 minutes at 450 and 6 or 7 minutes at 350. And how did they turn out?

Popovers collage


Hot, fluffy, crispy on the outside, and absolutely delicious!

This is suddenly my new favorite hot breakfast item! I even make them in the morning when I'm getting ready for work since it takes little-to-no time to make the batter.

Personally, I love putting a little raspberry jam on them.

Popovers (12)


The funny thing about muffin tins versus custard tins is that my muffin tins are not quite half the size of custard tins. So while the original version made 6 popovers in the custard tins, the very same recipe in muffin tins makes exactly 11 popovers. No more, no less. 11.

Once I felt I had sufficiently mastered the oh so difficult popover, I decided to start experimenting a little. I had once seen a recipe that involved some asiago cheese, which sounded fantastic. Since I eat these for breakfast, I decided to stay away from the cheese though, and focus more on a hint of sweet.

So on Wednesday morning of this week, I got up and decided to do just a half batch of popovers, using only 1 egg, and experimenting with three different preparations. I figured I could probably stretch the batter to make a full 6, since I was now adding something other than just the four basic ingredients.

First, I decided to make two with a little bit of raspberry jam in them. I did this by pouring a little bit of batter into the cups, plopping a little bit of jam in the center...

Popovers (14)


...and then pouring in the rest of the batter.

Popovers (17)


This was my idea of how to incorporate the raspberry jam.

Chris thought my idea wouldn't work, but that instead I should try to stir a little bit of the jam in with the batter so it was all mixed in, like so:

Popovers (15)


Finally, I did a slightly more basic popover, mostly so that if the other two failed miserably, we'd still have something to eat that morning! I poured the original batter into the cups, and then drizzled just a hint of honey on top.

Popovers (16)


I popped them all then into the 450 degree oven for 14 minutes, then turned it down to 350 for 7 more minutes.

The Verdict

The ones with the jam on the inside of the batter got the biggest, like regular popovers do.

Popovers (24)


Unfortunately, all the jam had spilled out the bottom in the cooking process and created a hard candy crust on the bottom.

Popovers (25)


Not bad, certainly edible, but probably not going to make a repeat performance.


The ones with the jam mixed into the batter looked awesome on the outside, although they were definitely the smallest of the three.

Popovers (18)


But, upon tearing into them, we found the center was very mushy.

Popovers (30)


Definitely not enjoyable, definitely not very edible. If we were to try this again, I think we would need to use a little less milk and cook them for less time at the high heat and more time at the low heat. But I'm not really chomping at the bit to try this type again anyway.


And finally, the least tampered of them all, the original popovers with just a little honey drizzled on.

Popovers (20)


These turned out beautifully. Slightly crunchy on the top from the caramelized sugar, and perfectly fluffy inside.

Popovers (29)


I will definitely make this variation again!

And hey, at least two of the popovers were a success! Just enough for breakfast for the two of us!


Linking up to
Visit thecsiproject.com

Monday, August 2, 2010

Lightbulb Bud Vase


I am in love with this crafty way to reuse an old burnt out lightbulb! Such a cute result of recycling. And I love that it comes with instructions on how to do it! Check it out here:

Lightbulb Bud Vase

My only qualm with this tutorial is that the stand they suggest you make involves a very vague description of how to do it: sculpt. I think that might be the most difficult part of this tutorial! Maybe I could pull it off with a heavy duty wire hanger? It's a little intimidating, but maybe some rainy afternoon I'll give it a try!