Tuesday, June 28, 2011

Tuesday Night Pasta Sauce

There are only a few things in life I take a firm stance on, but jarred pasta sauce is one of them. I see absolutely no reason why anyone should eat this overly-preserved "sauce," even if you're pressed for time. A quick and flavorful homemade pasta sauce takes only a few ingredients, but results in a sauce a million times better (and healthier!) than the jarred stuff.


Tuesday Night Pasta Sauce

1 28oz can of whole tomatoes
1 tbs oil
4 cloves of garlic (or more if you're feeling garlicky)
1/2 white onion
1 shallot
A splash of white wine (optional)
Salt, pepper, red pepper flakes, and Italian seasoning to taste
Shrimp (optional)
Fresh basil (optional but recommended)

Chop the onion and shallot. Dice the garlic how you please -- I like to do mine in thin slices because I like the heartiness, but if you don't want your garlic to have as much texture, feel free to mince it.

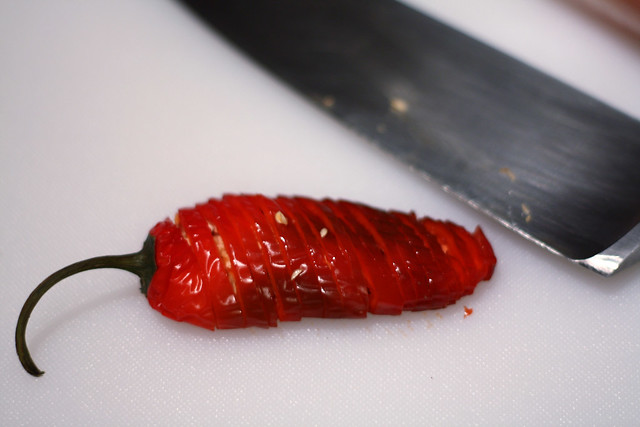
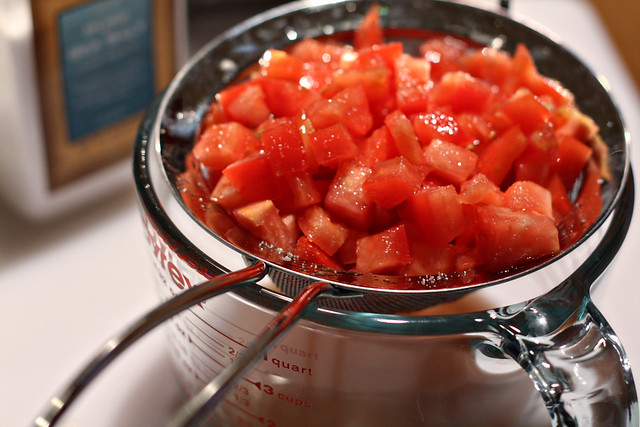
Next, grab the tomatoes. Use your thumb to pierce each tomato before removing it from the can to allow juices to flow out. If you don't do this, you'll have a pool of tomato juice on your cutting board that will end up running everywhere. Rough-chop each tomato individually. Leave the remaining juice in the can.

Put your oil in a nonstick pan (not a stockpot) and bring to medium-high heat. Once the oil is hot enough to sizzle, add the garlic, onion, and shallot. Sautee, constantly moving, until the onions soften but not so long that the garlic browns.

Next, add the chopped tomatoes, and approximately 1/4 cup of juice from the can. If you have white wine handy, add a splash for another note of flavor. Bring the sauce to a simmer.

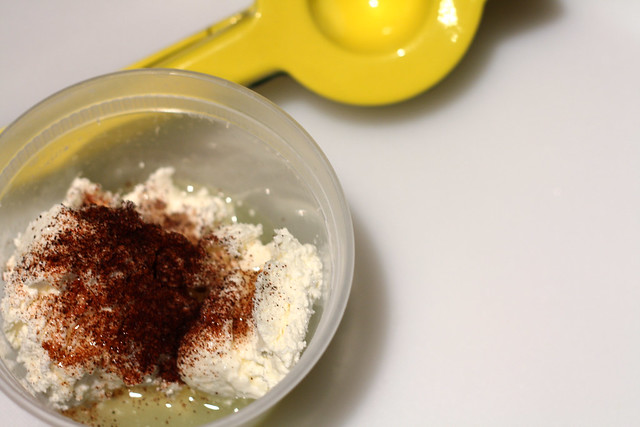
Now add your seasonings. I prefer a simple combination of salt, pepper, a dash of red pepper flakes, and a hefty dose of Italian seasoning, but feel free to add what you have on hand. Just make sure you include some form of salt and some form of herb. Mix it all into the sauce and let simmer for about 3-5 minutes.

Here's the last trick: when the noodles are just about ready to come off the heat, take a small ladle and remove some of the starchy boiling water and add it directly to the sauce. This starchy water will add a silkiness to your sauce that you won't get with just plain water. Mix it in with the sauce and let simmer.

At this point, you can throw this sauce on top of your pasta and be done with your super-quick, super-flavorful fresh tomato sauce. For me, I decided to add a couple shrimp to the sauce to give it more of a "meal" feel. I quickly thawed some frozen shrimp from Costco (always on hand and super quick to thaw in water), and put them right in the sauce just before we were ready to eat.

Shrimp pasta 1


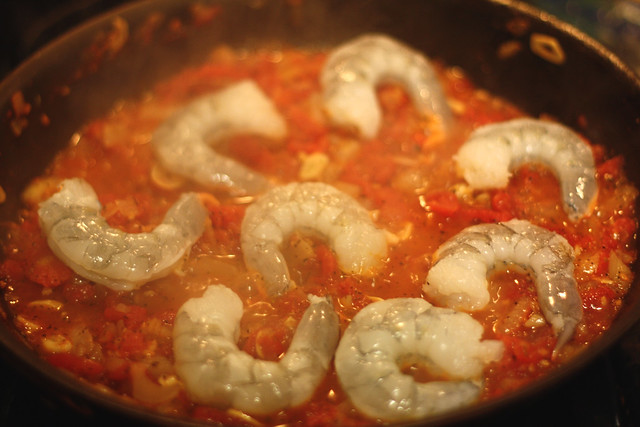
Since they only take about 2 minutes to cook, I knew I didn't want to throw them in until the very end. If you have fresh basil on hand, chop it up and toss it in at the same time as the shrimp. This will lightly wilt the basil without it being in the heat so long that it fully cooks.

Serve the sauce over the pasta, and enjoy your delicious, fresh dinner! Beginning to end, including prep, this fresh sauce will take less than 30 minutes, easily accomplished on a busy weeknight. So for only a couple more minutes than jarred sauce, you can make a fresh sauce that tastes ten times better!

Shrimp pasta 2

Wednesday, June 22, 2011

Shredded Pork and Chicken Flautas

Waaay back, over a year ago when this was just a wee little blog, I posted a recipe for shredded pork flautas. Little did I know, that would be my first "hit" recipe. People just loved them, and even came back and told me when they made them!

This past weekend, we made them again, and I thought it might be time to bring them back for a post. To change them up, we made half of them filled with shredded pork, and half filled with grilled shredded chicken. It was a great variation!


Shredded Pork and Chicken Flautas

Small flour tortillas
Slow-cooked shredded pork
Grilled, seasoned chicken, shredded
Red tamale sauce (can use a packet)
Oil


In the last post, I started by showing the best way to make juicy, flavorful shredded pork. I'll let you reference that here, and I'll start from the point of actually making the flautas.

Pour enough oil in a non-stick pan to easily cover the bottom. Heat the oil hot enough to sizzle, and place a tortilla in the pan. It will begin to puff, and will begin to fry. Flip after about 30 seconds, leave on the opposite side for 30 seconds, and remove it and place it on a plate with a paper towel on the bottom.

IMG_1477


Repeat for each tortilla, placing a paper towel between each one.

Let the tortillas rest for a minute until they are cool enough to handle, but still warm.

Next, grab a tortilla, and place a strip of meat on the inside. I place mine slightly off-center so that it rolls easier and stays rolled.

IMG_1481


Repeat with all the meat, both chicken and pork. I did chicken and pork separately, but there's no reason why you can't get creative and mix them!

IMG_1485


Bake set them all on a baking sheet and bake at 400 degrees for 10-15 minutes, until they are crispy and brown.

IMG_1492


Serve topped with red enchilada sauce and alongside some grilled corn or rice. Enjoy!

Friday, June 17, 2011

Banh Mi Inspired Rice Bowls

Chris and I recently had a banh mi at a restaurant in Chicago, and just adored it. In case you're not familiar with a banh mi, this is what they look like:


It's a Vietnamese sandwich usually consisting of some sort of pork (grilled, roasted, steamed, etc) and topped with fresh carrots, cilantro, daikon, jalapenos, and more.

The other night, we had some leftover pork roast that needed to be used, so Chris suggested we make a rice bowl in the style of a banh mi.


Banh Mi Inspired Rice Bowls

Plain shredded/roasted pork butt
Ginger, chopped
Garlic, chopped
Green Onions, chopped
Chili Paste
Soy Sauce
Brown Sugar
Rice wine vinegar
Peanuts

Carrots, cut into matchsticks
Cucumber, cut into matchsticks
Cilantro, rough chop
Rice, cooked


You'll notice that I'm not putting measurements in the above ingredients list, and there's a very good reason for this. We so haphazardly put in the ingredients, that I wouldn't feel comfortable telling you measurements. You'll just have to feel it out for yourself.

Start with some peanut oil in a wok and heat until it sizzles when water is sprinkled in. Add the chopped garlic, onion, and ginger. Cook until they soften and just barely start to brown. Next, add the pork. Flip it a couple times to incorporate all the garlic/ginger/onions, then press down. The important step here is to get the pork to brown a little bit. Flip it over a few times and press down to brown between each flip. Once it's browning but before it begins to burn, add about 2 tbs of rice wine vinegar, and some soy sauce. Also add the brown sugar, chili paste (to your spice liking), and peanuts. Flip in the wok until all the ingredients have cooked together, 3-5 minutes.

Serve over fresh, hot rice, and top with fresh carrots, cucumber, and cilantro.

Banh mi rice bowl

Tuesday, June 14, 2011

New Comforter: Repurposed Duvet

As you know, my third anniversary with my husband was last week. And in the past three years of marital bliss, I have to confess that our bed looked like this:

01 Old Bedroom Bedding


And in case you can't quite see in the above picture, here is a close up of that comforter:

02 Old Bedspread hearts flowers yarn ties


Pretty faded daisies, tulips, hearts, and ribbons. And let's not forget the super-awesome yarn ties. Don't get me wrong, this comforter has a very special place in my heart. My grandma made this comforter for me when I got my first big girl bed at the young age of 5, and it is to this day the most comforting comforter ever. However, not the most appropriate for a married couple. Also, it's made for a full size bed, and we have a queen.

Now taking a step back, we did actually get some bedding when we got married three years ago. We registered for a nice down comforter and and charcoal gray duvet and skirt/sham set. Since we were moving to Chicago and assumed it was cold all the time, the down comforter made sense to us. Fast forward a couple months, we got to Chicago, and guess what?

Down comforters are hot.

Really, really hot.

We lasted about 3 months with it before giving up all together, and the down comforter has lived in the closet ever since.

I recently started looking for some new bedding, but just couldn't find anything I really liked. I also kept comparing everything to the charcoal duvet set I already had, since I really liked the shade and feel of the fabric. Finally, one day it hit me: just make the duvet cover into a comforter!

And that's exactly what I did.

03 Duvet fabric charcoal striped


I started by taking out all the seams and laying it out on the floor. Of course, you know me, I couldn't just stick some batting in it and call it a day. I had to make it my own!

After heaps of scraps and plenty of measuring, cutting, and sewing, it started to take its new form.

04 Comforter stripe


I sewed a stripe down the center using this pretty Joel Dewberry Damask fabric.

05 Completed Comforter


I then stuffed it with two layers of extra-loft batting, queen size. I lightly tacked it in a couple places to keep it from shifting (sorry Grandma, no yarn ties!), and my new comforter was complete!

...Ok, in reality this took me a ton of hours spread out over two days. Sewing something this large takes a lot of time and measurement, and being creative with the stripe just adds to the time! Not to mention, I also got a little creative with the underside...

06 Completed Comforter Damask yellow gray


I decided it would be fun to sew the underside using a yellow fabric to pull out the yellow in the damask, and continue the stripe down the center. I love how I can make my bed now two different ways to get two different looks!

Friday, June 10, 2011

Anniversary Wine Album

It's no secret that Chris and I like wine, and I do plenty of crafts with the debris. From glass etched wine bottles to wine corks to my massive wine label collage, we have a serious wine theme going in our home.

So given the emphasis we have on wine, it's not surprising that we still save some wine labels for their sentimental value. Specifically, we save the labels from our anniversary wine bottles.

The label from our first anniversary is front and center in our wine label collage, so unfortunately it will be immortalized in the collage forever. However, starting with our second anniversary, I saved the label and stuck it in a photo album I had lying around.

IMG_1293


A nice black page, written with the date and year with a silver pen, very classy. The only problem was that the outside didn't quite share the same level of class.

IMG_1285


I stuck it away, always holding in the back of my mind the intention to give it a makeover. It wasn't until I pulled it out this year for our 3rd anniversary label that I finally determined it was time!

I used Mod Podge to cover the album in a pretty pearl and silver swirly paper. I then created a label using my Silhouette (mostly because I don't have a printer), outlined in a square of solid silver paper.

IMG_1294


I then covered the back in the solid silver, to create a slight contrast to the front of the album.

IMG_1310


Finally I gave the whole thing a nice topcoat of glossy Mod Podge.

IMG_1324


I love the way it turned out, and I can't wait to slowly fill up the pages with a label for each year!

final anniversary wine label album

Wednesday, June 8, 2011

Handmade Anniversary Gift

When Chris and I do something little that's special for the other person, we call it SHMILY.

See how much I love you.

It could be anything from a bag of puffy cheetos when I've had a bad day, to a a new sleeve of golf balls to get him excited about summer.

The key is that it's all just because, and it all has a little sticky note on it that says SHMILY.

In fact, Chris' ring has SHMILY engraved on the inside.

So this year, for our anniversary, I had a fantastic idea! The fabulously talented and oh-so-entertaining Leonora of Yellow Heart Art makes some truly awesome graphic art. And, even better, she's a sponsor of mine this month (woo!). So of course I shot her an email to see if she could make me a custom graphic art highlighting our little tradition.

And the outcome pretty much rocks.

But you can see for yourself.

SHMILY 1


It's hanging on my slowly growing wall of handmade art in our bedroom. I just love it!

SHMILY 2

Monday, June 6, 2011

3 Years

Three years ago today, I got to walk down the aisle toward this guy:

KM & CP wedding day 1165


We exchanged some vows...

edited KM & CP wedding day 733


...surrounded by some wonderful friends and family.

edited KM & CP wedding day 347


We also exchanged some rings...

KM & CP wedding day 477


...and signed a marriage license.

KM & CP wedding day 473


We danced until the wee hours of the morning, overjoyed because we were finally married!

KM & CP wedding day 633


Happy 3rd Anniversary to my best friend and the love of my life. I'm so happy that we have a lifetime to share together.

KM & CP wedding day 1170

Thursday, June 2, 2011

Grilled Chicken Flatbread with Grilled Corn-Tomato Salsa

This recipe is one of my favorite new dishes that I made up recently. I got inspired on the way home while flipping through Bon Appetit, and couldn't wait to get home to get started!

Marinated Chicken

1 chile (jalapeno, serrano, ancho, your choice)
Goya Marinade
Juice of 1 Lime
2 chicken breasts


Grilled Flatbreads
adapted from Bon Appetit, approx 2.5 hrs

1 quarter-ounce envelope active dry yeast
1 tbs olive oil, plus more for brushing
5 cups all-purpose, unbleached flour
1 tbs salt
Cumin or Taco Seasoning, for sprinkling


Lime Crema

8 ounces cream cheese (I used the whipped kind)
2-3 limes
1 tsp ancho chile powder


Grilled Corn-Tomato Salsa

2 ears of corn
Olive oil
2-3 tomatoes
Salt
2 green onions
1 cup cilantro, chopped


Start by getting the marinade ready for the chicken. Slice up a jalapeno (or any chile you have on hand). You'll notice my jalapeno has turned red because it has ripened, but it'll be just fine for the marinade.

Chicken Flatbread 1 with jalapeno


Add about a cup of Goya Mojo marinade and the juice of one lime to a bag with two thawed chicken breasts and the chile slices. If you're not familiar with Goya Mojo, you can find it in the hispanic/ethnic aisle of most national grocery store chains. It's super cheap and full of flavor, and we always have it on hand!

Chicken Flatbread 2 goya marinade


Put the ziplock in the fridge and let the chicken rest.

Now dice up 2-3 tomatoes (depending on size), and place in a mesh strainer above a bowl. Sprinkle with salt so that the tomato water begins to draw out.

Chicken Flatbread 3 tomatoes tomato water


With the chicken marinating and the tomatoes resting, it's time to move on to the flatbreads. Pour 2 cups of warm water (105-115 degrees) into a stand mixer fitted with the paddle. Sprinkle the yeast over the water, and let sit until it dissolves (about 10 minutes).

Mix in 1 tbs of olive oil. Slowly add 5 cups of flour and 1 tbs salt. Beat until a dough forms. Transfer dough to a floured surface and kneed until smooth, adding more flour by spoonfuls as needed for soft but slightly sticky dough. Kneed for approximately 5 minutes.

Chicken Flatbread 4 kneaded dough


Place dough in a large, lightly oiled bowl and turn to coat. Cover with a kitchen towel and set in a warm place for approximately 1 hour to allow dough to rise.

While the dough is rising, move on to your lime crema. Combine the cream cheese, juice of 2-3 limes (depending on how juicy they are and how thin you want your crema), and a sprinkling of ancho chile powder.

Chicken Flatbread 6 lime crema


Blend with an immersion blender. If you don't have an immersion blender, use a food processor with a small bowl. Transfer the crema to a dish or a multi-purpose squeeze bottle and put in the fridge.

Now it's time to get the corn on the grill. Lightly brush each ear with olive oil and sprinkle with salt and pepper. Roll up in aluminum foil and place on a medium-high grill for approximately 30-40 minutes, rotating throughout.

Once the corn is done, remove from the grill and unwrap from the foil. Let sit 10 minutes to cool, then use a knife to cut off all the kernels. Add the corn to a large bowl. Grab the tomatoes that have been sitting, push down slightly to get a little more tomato water out, and add the tomatoes to the bowl with the corn. Also add the diced green onions and chopped cilantro. Season with salt and pepper. If necessary, add a small amount of the tomato water back into the bowl for moisture, but be sure to keep it from getting soupy.

Chicken Flatbread 10 grilled corn salsa


Set the salsa aside.

When the dough has rested for an hour and you're ready to begin to prepare your flatbreads, remove the chicken from the fridge and let sit to warm up slightly. Very cold meat tends to seize up when it hits a hot grill, so letting the chicken warm up a little will help it stay tender.

Remove the dough from the bowl and place on a floured work surface. Cut the dough into eight equal pieces.

Chicken Flatbread 8 cut dough


Roll the dough into balls and set on the surface 2" apart. Cover with a towel and let rest for 15 minutes.

Lightly brush 4 baking sheets with oil. Working with one dough ball at a time, roll out into a long oblong shape. Brush both sides lightly with oil, and sprinkle with cumin or taco seasoning (if you don't have cumin on hand).

Chicken Flatbread 9 flatbreads


Roll out all balls in this fashion and place them on the baking sheets, and let sit.

Now add the chicken to the grill. Flip halfway, and cook through. Remove it from the grill and cover with aluminum foil.

Grab the flatbread dough, and place it on the grill in batches. Grill until lightly charred, 1-2 minutes per side.

Now it's time to build the flatbreads!

Chicken Flatbread building


I started by drizzling some of the lime crema on the bread, then piling slices of the grilled chicken on top. I then topped it off with a heavy scoop of the grilled corn-tomato salsa, and a little extra drizzle of crema.

Chicken Flatbread 14 finished


These turned out warm, soft, crunchy, and absolutely delicious!