Thursday, December 22, 2011

Christmas Present for a Super Foodie


Well hello, gorgeous.

That's right, meet the newest member of my kitchen family!

My absolutely wonderful husband found this beauty for a steal - over $200 off! I've been wanting a Le Creuset for years but never could justify the expense, even for a present. But the stars aligned, he found it at a price we couldn't turn down, and I am now the proud owner of my very own Le Creuset!

Now what to make with it first??

Also, there's another member of our family who is also thrilled with the purchase, because that means he got a new box.

Simon Le Creuset


What are you wishing for this holiday season?

Monday, December 19, 2011

One-Pot Macaroni and Cheese

I was on Twitter for the first time in weeks the other day, and my good friend tweeted that she was about to make some groundbreaking mac and cheese that she had discovered on Pinterest. She said the outcome was pretty tasty, so I had to give it a try myself!

One-Pot Macaroni and Cheese
discovered on Pinterest, originally posted by White on Rice Couple

2 cups large elbow Macaroni, uncooked (about 1/2 lb)
2 cups low fat Milk (about 16 oz)
if needed, additional 1/4 cup milk or water for final cooking
1 tablespoon Butter, for flavor ( I tried this recipe once without the butter and I didn’t notice any difference with the recipe. More heart healthy!)
1/2 teaspoon Mustard powder
1 teaspoon Salt, plus additional for final season later
1 cup Grated Cheese, any one or combination of ( jack, cheddar, swiss, mozzarella, gouda, parmesan*, asiago*, pecorino*) *Hard cheeses are best combined with a secondary, softer, better melting cheese.
black pepper to taste (optional)

Place raw elbow macaroni in colander and quickly rinse under water. Let drain.

In medium sauce pan (about 3.5 qt), add milk, raw elbow macaroni, salt, butter, mustard powder and nutmeg.

On medium heat, slowly bring milk/macaroni mixture to a simmer, stirring the macaroni frequently as it comes up to a simmer. This will separate macaroni and keep them from sticking together. DO NOT LEAVE THE STOVE! The milk mixture will come to a boil very quickly and leaving it unattended will leave a big mess on your stove top.

Mac and cheese 1


Once mixture comes to a simmer, immediately turn down heat to LOW. Macaroni will slowly cook in the milk. Having your heat too high will evaporate the milk too quickly! Cover and continue to stir the mixture every couple minutes so that macaroni will cook evenly and absorb milk evenly.

Cook for about 15-20 minutes or until milk has been fully absorbed. If macaroni is not cooked fully, add a little more milk or water to mixture (in small amounts) until macaroni is fully cooked. This will take about another 5 minutes.

When milk has evaporated, stir in grated cheese of your choice. I decided to use mozzarella and a medium-hard sheeps milk cheese for no other reason that that's what I had on hand at the time.

Stir the cheese evenly into the macaroni. Turn off heat and place lid on top of the pot and cover for about 5 minutes. This rest period will allow macaroni to plump up and absorb any excess milk.

Take a final taste and add additional salt to taste. Before serving, stir one final time to mix everything together.

Mac and cheese 2


My verdict? It's not the best mac and cheese I've ever had, but it's near the top of the list of mac and cheeses that I've made myself. And given how simple it was with just one pot, I definitely will be making it again, and will try some new cheese combinations!

Sunday, December 11, 2011

Peppermint Swirl Marshmallows

Back in May, I finally shared with you all my life-changing homemade marshmallows. The marshmallows that blow you away with one squishy, sugary bite. The marshmallows that I make twice a year.

And guess what? Time for some more marshmallows!

There's a reason though why I always make them in December.

Three words.

Peppermint.
Swirl.
Marshmallows.

There's really nothing more festive or delicious for the Christmas season! And the best part is that they're exactly the same as the basic vanilla marshmallow recipe, just with some peppermint extract added and a little food coloring fun.


Peppermint Swirl Marshmallows
adapted from source

4 gelatin envelopes
3/4 cup water
1 Tbs vanilla extract
1.5 tsp peppermint extract

3 cups sugar
3/4 cup water
1 1/4 cup corn syrup (Karo)
1/2 tsp salt

Red food coloring

Coat a 9x13 and 8x8 pan with vegetable oil or non-stick spray.

Fit a stand mixer with the whisk attachment. In the mixer bowl combine the 3/4 cup of water with vanilla extract and peppermint extract. Sprinkle the gelatin over the liquid to bloom (soften).

Add the sugar, salt, corn syrup, and remaining 3/4 cup water to a heavy saucepan. Bring to a boil with the lid on and without stirring. When this mixture is at a boil, remove the lid and continue to cook without stirring until it reaches the soft-ball stage (234-240 F).

With the mixer at medium speed, pour all of the hot syrup slowly down the side of the bowl into the awaiting gelatin mixture. If you have a splatter shield for your mixer, I highly suggest you use it. This is going to whip for a long time and it will definitely splatter, and molten sugar is very hard to clean off counters and cabinets!

When all of the syrup is added, bring the mixer up to full speed. Whip until the mixture is very fluffy and stiff, about 8-10 minutes. Yes, you read that right!

Pour the marshmallow fluff into the oiled pans and pat the bottom to get all bubbles to surface. Drop a few drops of red food coloring on various areas of the surface (3-5 drops will do) and swirl around with a toothpick or chopstick. Then let sit to cool for at least 8 hours.

Peppermint Swirl Marshmallows 1


Sift confectioners sugar generously over the rested marshmallow slab. Turn the slab out onto a cutting board dusted with more confectioners sugar. Slice with a pizza cutter into desired shapes. If you're feeling creative, you can try a greased cookie cutter to cut the marshmallows into holiday shapes! Dip all cut edges in confectioner's sugar and shake off excess.

You can eat these plain, or dip them in chocolate and cool for a fun holiday treat! And of course, very best of all, you can plop a few into a nice steaming cup of hot cocoa and enjoy a peppermint hot chocolate!

Peppermint Swirl Marshmallows 2

Sunday, November 13, 2011

Coq Au Vin for 2

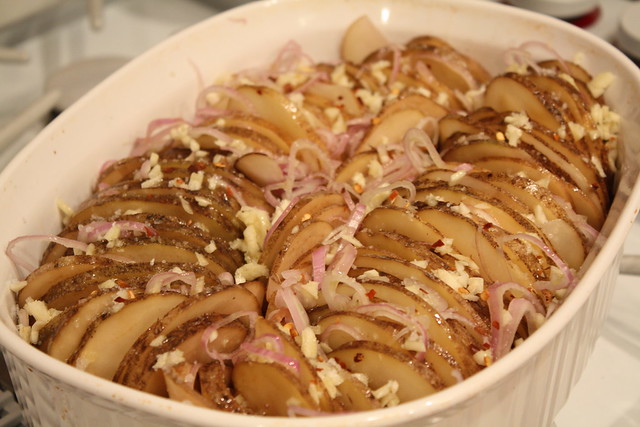
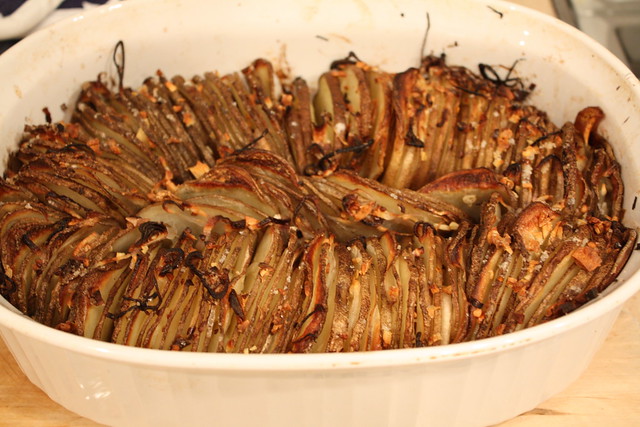
Last night, Chris and I decided to stay home and have a date night in, especially since we have been so busy with work lately and haven't been cooking as much as we'd like. With the cold weather outside, we were looking for something hearty and satisfying. And what's more satisfying than a good coq au vin?

We started with Julia Child's recipe, but tweaked it a bit (see: used a lot less butter).

Coq Au Vin for 2
adapted from Julia Child's Mastering the Art of French Cooking

2 bone-in chicken breasts
4 slices thick-cut bacon
1 tbs butter
Salt and pepper
2 cups red wine (Pinot Noir, Burgundy, Beaujolais or Chianti)
2 cups homemade chicken stock or low-sodium chicken stock or broth
1 tablespoon tomato paste
3 cloves garlic, mashed or minced
1/2 tsp italian seasoning

1 tbs butter
1/2 large white onion
1 carton white mushrooms

3 tablespoons all-purpose flour
2 tablespoons butter, softened
Flat-leaf Parsley sprigs

Preparation

Dry chicken thoroughly in a towel. Season chicken with salt and pepper; set aside.

Remove any rind off the bacon and cut the bacon into lardons (rectangles 1/4-inch across and 1-inch long). In a large saucepan, simmer the bacon lardons in 1 tbs butter until browned and crisp. Remove lardons from pan and set aside on a paper towel.

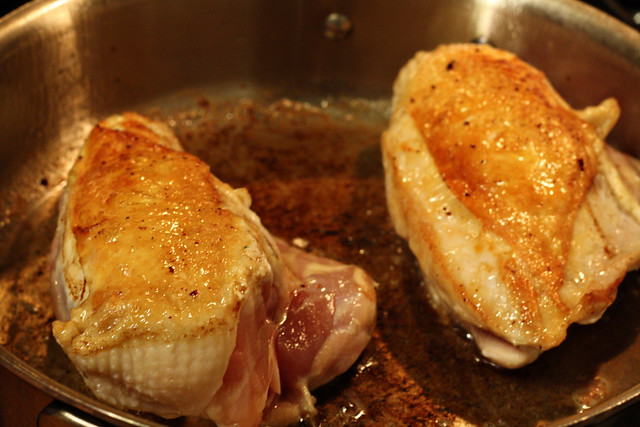
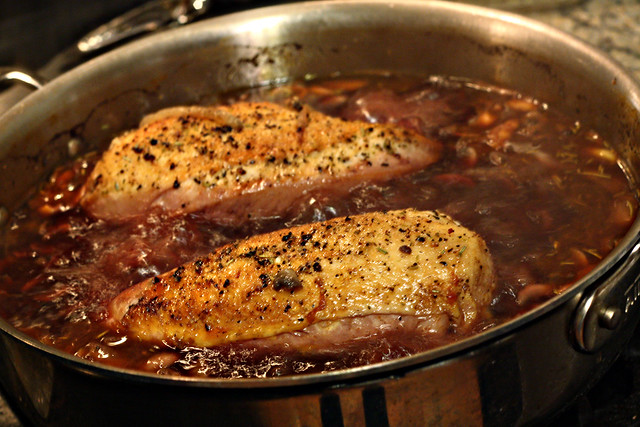
Place chicken pieces into the hot oil (not crowding pan), and brown on all sides.

Coq au vin 3 browned chicken


While the chicken is browning, melt 1 tbs butter in a non-stick pan, and add the onions to begin browning.

Coq au vin 2 sauteed onions


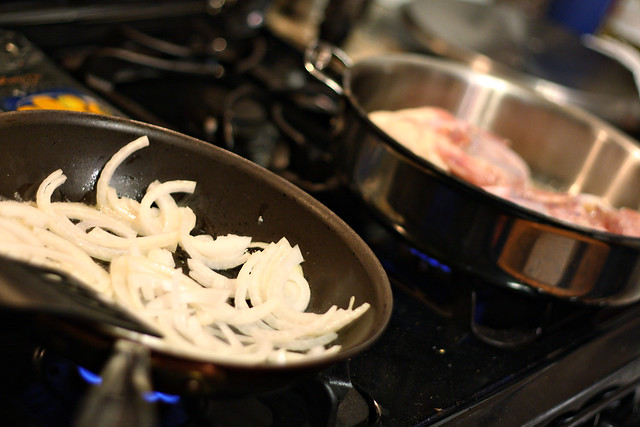
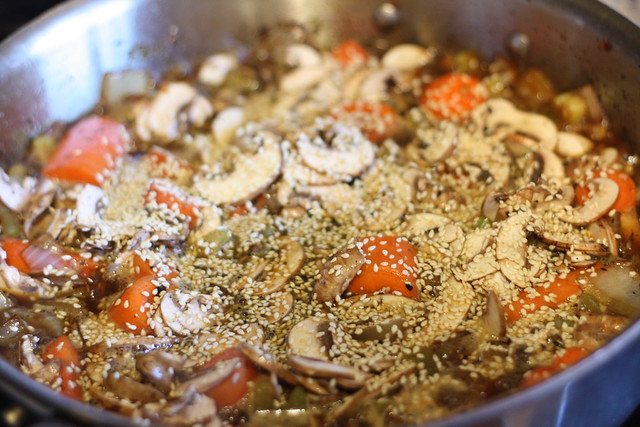
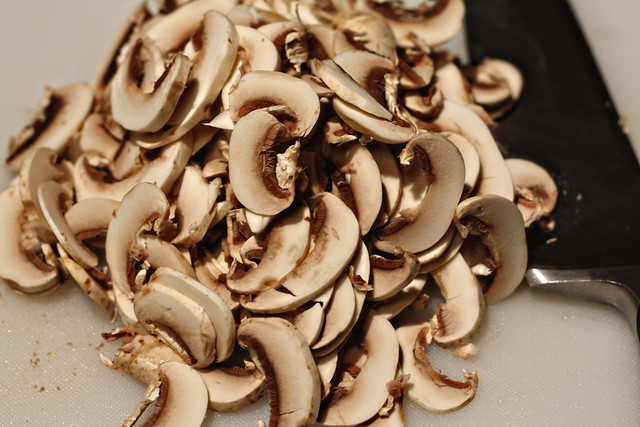
When the onions are wilted and begin to brown, add the cut up mushrooms and sautee.

Coq au vin mushrooms


When the mushrooms and onions are sauteed, turn off the heat and set aside.

Once the chicken is browned, return bacon to the pan, cover pan, and cook slowly for 4 minutes, turning chicken once.

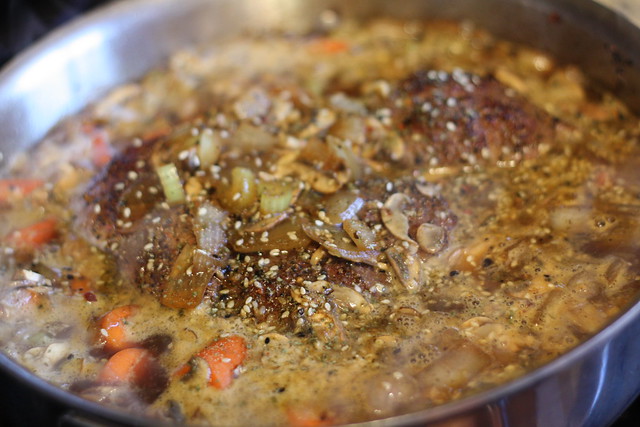
After browning the chicken, pour the red wine into the pan and add just enough chicken broth to mostly or completely cover the chicken pieces. Stir in tomato paste, garlic, italian seasoning, and sauteed mushroom/onion mixture.

Coq au vin 4 boiling chicken


Bring the liquid to a simmer, then cover pan, and simmer slowly for about 30 minutes or until the chicken meat is tender when pierced with a fork or an instant-read meat thermometer registers an internal temperature of 165 degrees F.

Coq au vin 5 cooked chicken


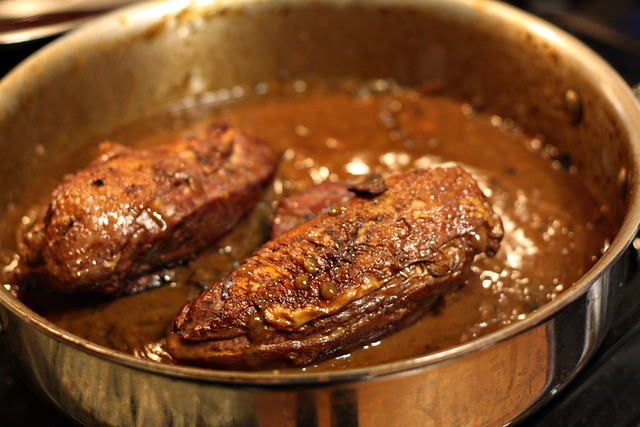
When the chicken is done cooking, remove from the pan to a platter, leaving the cooking liquid in the pan. Increase heat to high and boil the cooking liquid rapidly until approximately 2 cups of liquid remains.

While the liquid is boiling, in a small bowl, blend the 3 tablespoons flour and 2 tablespoons softened butter into a smooth paste; beat the flour/butter mixture into the approximately 2 cups hot cooking liquid with a whisk. Simmer and stir for a minute or two until the sauce has thickened (the result will be a sauce thick enough to lightly coat a spoon - just thick enough to coat the chicken and vegetables lightly). If sauce is too thin, boil down rapidly to concentrate; if sauce is too thick, thin out with additional spoonfuls of chicken stock. Taste the final sauce, adding more salt and pepper if necessary.

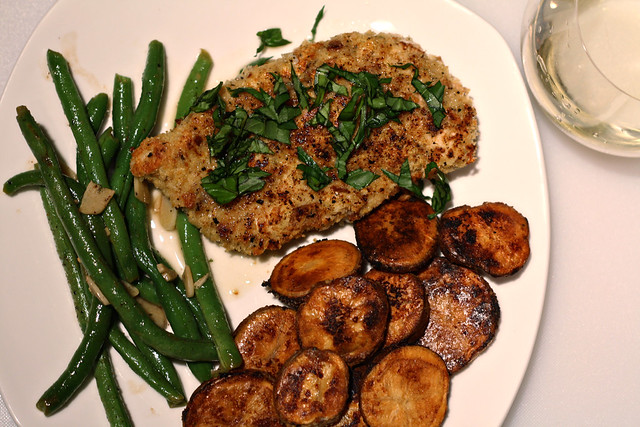
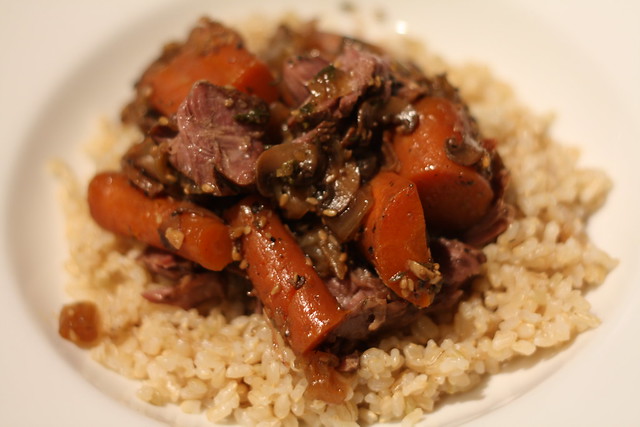
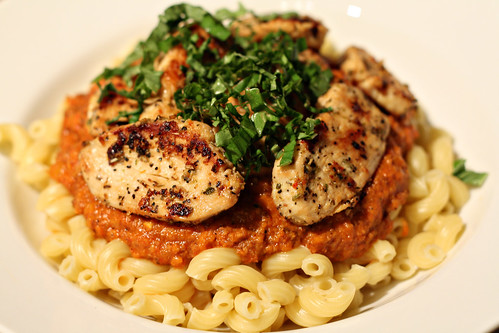
Plate chicken with pasta and spoon sauce on top.

Coq au vin 6 finished


And in the words of Julia, bon appetit!

Saturday, November 5, 2011

Pretty Sliced Potato Dish

One of my favorite food bloggers is Smitten Kitchen, and largely because of her amazing food photography. She could make a simple pb&j look like the most scrumptious lunch you could possibly imagine.

When I first saw this recipe, I knew I had to make it, soon. It's just too beautiful to pass up!

Crispy Potato Roast
adapted from smitten kitchen

2 tablespoons salted or unsalted butter, melted
2 tablespoons extra-virgin olive oil
Coarse salt
Pepper
1/2 to 1 teaspoon red-pepper flakes
3 pounds russet potatoes, peeled (smaller diameter potatoes are great, if you can find them)
2 shallots, diced
4 cloves of garlic, chopped

Preheat the oven to 375 degrees.

Slice the potatoes using a mandolin into thin slices. If you don't have a mandolin, just use a sharp knife to create the thinnest potato slices you can.

In a small bowl, combine the oil and melted butter. Pour about 1 tbs of the mixture into the bottom of a 1-1.5 quart casserole dish. Sprinkle a little salt, pepper, and red pepper flakes into the dish as well. Then arrange your potato slices vertically around the dish.

Slide the diced shallots and chopped garlic between the slices of potato and all throughout the dish, distributing as evenly as possible. Brush remaining oil/butter mixture and sprinkle with more salt, pepper, and red pepper flakes.

IMG_1901


Cover with foil and bake for 1 hour. Remove foil and cook for another 45 minutes, or until potatoes are crispy on top and cooked throughout.

IMG_1909


This pretty dish would impress anyone at your Thanksgiving table this year, and is a surprisingly simple side dish to make!

Saturday, October 29, 2011

Cinnamon Scones

First and foremost, I apologize for the lapse in posts! Things were very crazy at work following my craft retreat, and then I had a week-long vacation in Napa and Sonoma (I know, be jealous!), so I'm just now getting back into the swing of things!

Now onto the recipe for these delicious scones.

I made these scones at the Craft Retreat Weekend, and they were a hit! The cinnamon was subtle and delicious, and the scones were crumbly and buttery.

Cinnamon Scones
adapted from The Farmer's Wife

1/4 c sugar
1/4 tsp ground cinnamon (or a couple big shakes)
1 1/2 c all-purpose flour
1/2 c whole wheat flour
2 1/2 tsp baking powder
dash of salt
8 tbsp cold unsalted butter (it's gotta be unsalted)
2 eggs
1/3 soy milk (or use regular)

Preheat oven to 425 degrees. Combine flour, baking powder, salt and sugar in a mixing bowl. Cut in the cold butter with a pastry blender or a fork until it looks crumby.

Beat eggs in a small bowl, then add the milk. Pour the egg mixture into the flour mixture and combine.

Dump the dough onto a floured surface and knead 6 or more times. Next, press out the dough into a small disc, and sprinkle a little bit of the cinnamon in. Fold in half and press out again, sprinkle more cinnamon, and keep folding and pressing until all the cinnamon is incorporated throughout all the layers of the dough.

Finally, form the dough into a ball, then roll out with a floured rolling pin to form a large rectangle that is about 1/2 thick. Cut the dough into triangles and place on an ungreased cookie sheet.

IMG_1879


Sprinkle with sugar, and place in the oven for 10 to 12 minutes until the scones are golden brown on top.

Serve and enjoy!

IMG_1884

Saturday, October 8, 2011

Craft Weekend 2011

This past weekend, I had the pleasure of spending time with some absolutely wonderful crafty ladies! We met in person back in April at Creative Estates, and have been inseparable online ever since. I even told you about them when I came home from the conference.

We knew we had to get together again and so we planned a getaway girls weekend in California. Blessed with a free beach house for the weekend, we all packed up our bags and made the trip out west!

Here are just a handful of pictures from that awesome weekend, and don't worry I'll do a separate post on some of the fun recipes I made when I got to play chef all weekend.

Enjoy!

IMG_1922

IMG_1918

IMG_1915

IMG_1935

IMG_1931

IMG_1938

IMG_1939

IMG_1940

IMG_1941

IMG_1952


{ Jacqui of Craftee McGee } :: { Amy of Amy Cornwell Designs } :: { Nicole of Olive Blue } :: { With us in spirit from her home, Alison of aPearantly Sew } :: { Megan of Flawed Perfection Jewelry } :: { Elizabeth of Sew Chatty } :: { Kristen of Rock-A-Bow }

Wednesday, September 28, 2011

Homemade Granola

I'm pretty much a yogurt and granola addict. I eat it literally every day when I get to work, and absolutely love it. So of course, I love to make my own granola. It's kind of like making your own trail mix - you get to add random ingredients to give it your own twist! I definitely recommend trying this before you buy another bag of the pre-made stuff!


Homemade Granola

8 cups rolled oats
Any add-ins that suit your fancy (I used dried blueberries, dried cranberries, crushed almonds, crushed hazelnuts, and crushed peanuts)
1 1/2 teaspoons salt
1/2 cup brown sugar
1/4 cup maple syrup
3/4 cup honey
1/2 cup vegetable oil
1 tablespoon vanilla extract

Mix all the ingredients together in a bowl until thoroughly combined.

IMG_1842


Pour onto a sheet pan lined with parchment paper. Cook at 350 degrees for approximately 45 minutes, stirring occasionally, until the granola is browned.

IMG_1856


Remove from heat and let cool completely before breaking apart and storing. Enjoy with yogurt, milk, or plain as a healthy snack!

Tuesday, September 13, 2011

Summer Reading List :: My Life from Scratch

I know we're into September already, so many of us have our eyes on fall, but it's 85 and sunny out so I'm going to keep on trekking with the Summer Reading Series.

The next book on the list is My Life from Scratch by Gesine Bullock-Prado.


Though you may not recognize the author's name, you may recognize a part of it: Bullock. That's right, this book is written by Sandra Bullock's sister, Gesine.

This book is a charming account of how Gesine escaped the miserable life of Hollywood movie-making drama and ran off to the back-woods of Vermont to open a bakery. It's raw and real, and filled with pastry-goodness. She spends her time trying to teach her little town about the love and care of good pastry, and how much better it is for your palette and your soul to have a fresh-baked croissant over a mass-produced Twinkie.

I absolutely loved this book, and especially loved when her beloved sister, "Sandy" (as she calls her), pops up from time to time and rolls up her sleeves to help get work done.

Check it out, I know you'll love it!

Tuesday, September 6, 2011

The No-Cost Cat Bed

This was a fantastically productive weekend. We ran a ton of much-needed errands, and then came home and tackled some major projects. First, we cleared out our entire pantry, added new shelving, and put it all back in. It looks better than I could have imagined!

Then, we attacked our bedroom. We completely shuffled everything in the room around, including the outrageously heavy armoire that we were actually incapable of lifting to move. It was an impressive series of lifting and falling and lifting and bouncing the top off the bed to get it to the other side of the room, but now we're completely maximizing the space and it looks awesome.

And since we were on a roll, we decided to make Simon a little cat bed. He always sleeps on the top of our bookcase in the living room, but it's so hard and he has a tendency to nearly fall off when he's in deep sleep.

With the intention of using only scraps and other things we had lying around, we got to work on the new no-cost cat bed.

First, we needed a frame for the shape of the bed. Luckily, when we cleared out the pantry, we found ourselves the proud owners of some useless wood doors.

IMG_1800


Conveniently, they were exactly the width of the bookcase!

So I employed my very handy husband to cut a base and four sides out of the scrap door.

IMG_1802


(please ignore the tears in the screen... courtesy of Simon trying to claw through to get at the birds... wait, why did we make him a custom bed?)

Anyway, back to the project. I added some leftover batting from when I made my new comforter to the base.

box in progress


I then cut apart a soft old blanket for the base, and used trusty Sheila the staple gun to staple down the fabric. I used leftover fabric from my new pillows to then cover the sides so that it would fit in in the living room. Finally, I nailed the sides on and it was done!

edited finished box


It looks great on our bookcase, and ties in so nicely with the pillows. And not to mention, Simon loves it!

edited box on bookcase

Thursday, August 25, 2011

Ina Garten's Chicken Piccata

I really adore Ina Garten. She's wicked smart and completely composed. Not to mention, she's a fantastic cook. If you don't know much about Ina's background, I highly recommend reading her Wikipedia page. She's got her pilot's license, she wrote the nuclear energy budget for the White House under multiple presidents, and more. Seriously, she's amazing.

I've had her Chicken Piccata recipe bookmarked for a long time, and I finally made it the other night. Let me just say, it does not disappoint! And for once I actually didn't stray too far from the actual recipe!


Ina Garten's Chicken Piccata
original recipe found here

Ingredients

2 split (1 whole) boneless, skinless chicken breasts
Kosher salt and freshly ground black pepper
1/2 cup all-purpose flour
1 extra-large egg
1/2 tablespoon water
3/4 cup seasoned dry bread crumbs (I made my own using dry bread and italian seasoning, salt, and pepper)
Olive oil
3 tablespoons unsalted butter, room temperature, divided
1/3 cup freshly squeezed lemon juice (2 lemons), lemon halves reserved
1/2 cup dry white wine
Sliced lemon, for serving
Chopped fresh parsley leaves, for serving

Directions

Preheat the oven to 400 degrees F. Line a sheet pan with parchment paper.

Place each chicken breast between 2 sheets of parchment paper or plastic wrap and pound out to 1/4-inch thick. Sprinkle both sides with salt and pepper.

Mix the flour, 1/2 teaspoon salt, and 1/4 teaspoon of pepper in a shallow plate. In a second plate, beat the egg and 1/2 tablespoon of water together. Place the bread crumbs on a third plate. Dip each chicken breast first in the flour, shake off the excess, and then dip in the egg and bread crumb mixtures.

Heat 1 tablespoon of olive oil in a large saute pan over medium to medium-low heat. Add the chicken breasts and cook for 2 minutes on each side, until browned. Place them on the sheet pan and allow them to bake for 5 to 10 minutes while you make the sauce.

For the sauce, wipe out the saute pan with a dry paper towel. Over medium heat, melt 1 tablespoon of the butter and then add the lemon juice, wine, the reserved lemon halves, 1/2 teaspoon salt, and 1/4 teaspoon pepper. Boil over high heat until reduced in half, about 2 minutes. Off the heat, add the remaining 2 tablespoons of butter and swirl to combine. Discard the lemon halves and serve 1 chicken breast on each plate. Spoon on the sauce and serve with a slice of lemon and a sprinkling of fresh parsley or basil.

Ina's Chicken Piccata

Monday, August 22, 2011

August Garden Update


We've had so many storms lately, I feel like I end up checking the weather forecast every day just to see if I need to water my plants! Luckily they've survived multiple torrential storms and even two hail storms, and the veggies are absolutely beautiful.

Let's start with the red bell pepper plant:

IMG_1651


From this top-down view, you can see these pretty bright red peppers peeking out between the leaves! There are also still a few green peppers that haven't turned yet, but boy are these red peppers gorgeous.

IMG_1652


The basil is still flourishing, and I'm starting to need new basil recipes!

IMG_1656


Finally, the tomatoes are popping out everywhere.

IMG_1657


A few are starting to turn red, but most are still growing.

IMG_1659


I'm happy that the tomato plant is still flowering though, because it should mean that I'll have a steady stream of tomatoes for a while!


Now you may have noticed that I'm missing some pictures of a plant here - the cilantro plant. That's because it's very, very dead. After bolting and flowering, and creating the coriander seeds, the plant decided it had fulfilled its potential and kicked the bucket. That's ok, it wasn't producing cilantro anymore anyway!

I'm definitely loving my little Chicago garden, and already plotting out next year's crop!

Thursday, August 18, 2011

Asian Pork Burgers


Flipping through my Real Simple magazine the other day, I came across a delicious-looking recipe for Asian pork burgers. We don't make burgers all that often since we try to eat pretty healthy, and turkey burgers often are kind of a letdown, so I liked the idea of trying pork. Somewhat in between beef and turkey on the healthy scale, we made these with a side of grilled corn and salad to balance out the meal.

Overall, I was super impressed! With only a few ingredients, these burgers were tender, flavorful, and completely satisfying. Also, we bought a pound of ground pork, which made four patties for us. I froze two of them, so we will definitely be enjoying them again soon!


Asian Pork Burgers
recipe courtesy of Real Simple

1 lb ground pork
2 tbs Sriracha
2 tbs soy sauce
2-3 cloves garlic, chopped
1-2 green onions, diced
Ground black pepper, to taste

1/2 cup ketchup
1-2 tbs Sriracha

Combine the pork, 2 tbs Sriracha, soy sauce, garlic, green onions, and ground black pepper.

Asian Pork Burgers 1


Mix all ingredients thoroughly. Form into four patties. To keep them from puffing up in the middle while cooking, use your thumb to create a small divot in the center of the patty.

Grill until cooked through.

Mix together ketchup and remaining Sriracha to create a spicy sweet sauce. Slather on pork burger, and top with your favorite burger toppings.

Asian Pork Burgers 2


Enjoy!

Tuesday, August 16, 2011

New Pillows

I feel like a home is never finished, and I always find new ways to put my stamp on each room. Especially since we currently rent our place, decorating can be a little limited. Without the ability to paint or change the hideous light fixture hanging above the kitchen table, I have to rely on changes that I do have control over!

We recently got new couches from West Elm, and I absolutely love them. Gray microfiber, classic look, I know we'll enjoy them for a very long time.

The only thing is that they didn't come with pillows. But you know me, I had no problem with that since of course I had some fabulous fabric in the back of my mind that I wanted to use!

Every time I walk into The Needle Shop in Bucktown, I find more and more amazing fabrics that I just adore. I also love that they have an Etsy store, so I can peruse even before walking into the store!

Anyway, back to my pillows. I got my fabulous fabric this past weekend, and came home to whip up my pillows. I just love how they turned out!

New pillows 1


New pillows 2


I love how they go so well with the gray couches but also bring a wonderful pop of color and whimsy!

Tuesday, August 9, 2011

Asian Braised Beef Shank


I think I've mentioned before that Chris and I love to go to Whole Foods on a Saturday, then stay in that night and cook an amazing meal. And since we love to try new recipes, we also often buy ingredients we've never used before. This past weekend, we picked up a beef shank, and even though we didn't know what we were going to do with it, we came home and found a great recipe to use as a rough guide!


Asian Braised Beef Shank
adapted from Ming Tsai's Asian Braised Short Ribs

1 beef shank
1 tablespoon canola oil
1 medium onion, chopped
2 carrots, chopped into chunks
2 celery stalks, chopped
3-4 cloves of garlic, chopped
1 tablespoon ginger, minced (from 1/2-inch knob)
10 baby bella mushrooms, sliced
2 tbs rice wine vinegar
2-3 tbs soy sauce
2 whole sprigs fresh thyme
1 cup water
Sesame seeds
Pepper, to taste


Heat the oil in a pan. Sear the beef on both sides, 2-3 minutes per side, to get a brown crust on each side. Remove the beef, and add the garlic, ginger, onion, carrots, and celery. Sautee until the onions begin to turn translucent. Add the rice wine vinegar, soy sauce, and water to deglaze the pan. Nestle the beef back into the center of the pot so that the liquid reaches the top of it. Bring it to a simmer, then add the mushrooms, thyme, sesame seeds, and pepper.

IMG_1634


Turn the heat to low and put a top on. After 30 minutes or so, take off the top and ladle some of the liquid over the beef.

IMG_1636


Cook until the meat begins to fall apart, approximately 2 hours. Serve over rice and enjoy!

IMG_1637

Wednesday, August 3, 2011

Summer Reading List :: The School of Essential Ingredients

The fourth book in my Summer Reading Series is one my mom came upon, and she even got to go to a book signing by the author, Erica Bauermeister.


This is a great book that really hits on the emotion of food. A fictional novel, The School of Essential Ingredients follows the lives of eight students who gather every Monday night for cooking class. A young mother struggling with the demands of her family; an Italian kitchen designer learning to adapt to life in America; a widower mourning the loss of his wife to breast cancer; and more. Chef Lillian helps them to create dishes whose flavor and techniques expand beyond the restaurant and into the secret corners of her students’ lives. One by one the students are transformed by the aromas, flavors, and textures of Lillian’s food.

"Brought together by the power of food and companionship, the lives of the characters mingle and intertwine, united by the revealing nature of what can be created in the kitchen."

It's a lovely read that will leave you smiling from chapter to chapter!

Friday, July 29, 2011

My Favorite Recipe Sites

I'm doing a guest post today over at Midwestern Moms, but I thought I'd share it with my readers as well! Midwestern Moms hosts a Friday Foodies weekly feature, and I was able to share some of my favorite recipe sites.

There are definitely some great sites out there, and there are some already featured in previous Friday Foodies posts that I just love. The Epicurious iPad app is absolutely wonderful, and I will always adore Pioneer Woman and all the stories that go with her fabulous pictures. But when I'm looking for some truly unique recipes to try in the kitchen, I go to these great sites:

Smitten Kitchen

Smitten Kitchen is a professional blog written by a woman with spectacular photography skills, and according to her posts, the smallest kitchen in the world. I love everything about her recipes because they are so wonderfully unique. From whole wheat raspberry ricotta scones to leek toasts with blue cheese, she'll reinvent your cooking repertoire!


Tasty Kitchen

Tasty Kitchen is a cooking community created by the Pioneer Woman to allow her wonderfully-talented readers the chance to share their best. It's like All Recipes with more creativity and amazing photography. This is a more traditional recipe site in that you can search for exactly what you're looking for and get a myriad of new recipes to try as a result. The reason why I love it is that all the recipes are submitted by impassioned readers who love food and photography, just like PW, and want to share it with each other!


Food Gawker

If you haven't figured out yet, I love food photography almost as much as I love food. And it's only fitting that I love a website devoted to the best food photography on the web, that all links to the blog posts about the food and the recipes. You can search by the latest submissions, most popular, and more, but I guarantee you that you won't be able to peel your eyes away. These drool-inducing photos will draw you in and get you hooked, and you won't be able to close the window without poring through dozens of recipe posts.


I hope you enjoy my suggestions and found some new sites for foodie inspiration!

Monday, July 25, 2011

It's My SITS Day!!

Welcome to everyone who is stopping by from SITS!

If you're a regular reader and you're not familiar with SITS, it's a community of women-bloggers set out to create a community and lend each other a helping hand.


If you're visiting from SITS, well hello! Nice to meet you!

I live in the best city in the world, Chicago, with my wonderful husband

Chris and Katie New Years Eve 2010 soft


...and our overly friendly cat, Simon.

Christmas Simon 2010


If you haven't guessed by now, I have three loves (aside from the men in my life): Food, Wine, & Mod Podge. I'm so blessed that my husband is my partner in the kitchen and loves to create new flavor combinations just as much as I do. And we love to do it all with a glass of wine in hand! When I'm not cooking, I'm always crafting, trying out new tricks and mediums, though Mod Podge will always have a special place in my heart.

You can check out my many recipes here, and you'll quickly learn that I love to tweak recipes to make them my own!

005 Roasted bell pepper sauce with Chicken over pasta


Also feel free to browse through my many crafts. Anything from stamp embossing to sewing, and of course plenty of Mod Podge, I hope you'll find something new and fun to try!

Letter k


Thanks again for stopping by, enjoy having a look around!