Wednesday, May 22, 2013

Grilled Corn and Pepper Salad on Cilantro Lime Rice


Every year, as soon as spring hits, I'm constantly amazed at how amazing the fresh produce can be.  You'd think I'd get used to it, but after a dreary winter of eating soups and stews, a fresh meal on a warm day is absolute bliss.  And of course, anytime I can also fire up the grill, I'm even happier.

photo
follow my food (and life) adventures on instagram


Grilled Corn and Pepper Salad on Cilantro Lime Rice
serves 2-3

2 small red/orange/yellow bell peppers (I used 1 red and 1 orange), chopped
1 medium ripe tomato, chopped
1 poblano pepper
2 ears of corn, shucked
1/4 red onion, finely diced
1/2 cup of cilantro, chopped
1 large lime
1 cup rice

Cook the rice according to its instructions, preferably in a rice cooker.

While it's cooking, rub the corn and the poblano in olive oil and season with salt and pepper.  Grill them, turning often, until the corn caramelizes slightly on the outside and the poblano skin is charred.  Let them cool off the grill for 5-10 minutes, and then peel the charred skin off the poblano and discard, and chop up the flesh (removing seeds and stem).  Carve the kernels off the corn cob (alliteration, for the win!).  Combine the chopped poblano flesh and corn kernels with the fresh chopped bell peppers, finely diced red onion, chopped tomato, and half of the cilantro.  Juice 1/2 of the lime on the mixture, and season with salt and pepper.  Toss to mix, and set aside.

When the rice is finished cooking, add the remaining cilantro and juice from the other half of the lime to the rice, add a pinch of salt, and fluff to combine.

Serve the corn and pepper salad over the cilantro lime rice, and enjoy!


_ _ _ _ _ _ _ _ _ _ _ _ _ _ _ _ _ _ _ _ _ _ _ _ _ _ _ _


Don't forget, Google Friend Connect will be going away soon, so update your reader to follow me on Bloglovin'!

Friday, May 10, 2013

Grilled Red Snapper with Warm Grilled Salad and Herb Dressing

When the weather begins to warm up in the springtime, there's nothing more wonderful than grilling.  Don't get me wrong, I still grill all winter long so long as there isn't measurable snow covering my grill.  But that's just a method of cooking - grilling in warmer weather is an experience.  You invite people over, crack open a beer, leave the windows open, and throw anything and everything on a big grill.  There's really nothing like it.

This past weekend, a friend came over to grill up some whole red snapper.  We had been aching to grill and it was finally warm enough, and she also had recently mentioned that she had never prepared a whole fish, so what better time than now!


Grilled Red Snapper prep


Grilled Red Snapper with Warm Grilled Salad and Herb Dressing

Ok, that's a terrible title - I used "grilled" twice.  I make good food, I'm not a copywriter.

Herb Dressing
Dill
Italian Parsley
Capers
Garlic cloves
Lemon Juice (1 lemon - fresh)
Olive Oil
Salt & Pepper

I realize I didn't use any measurements here, because you'll want to do this to taste.  Stuff a ton of dill and Italian parsley into a blender (or magic bullet, which I used), a few capers, 2-3 cloves of garlic, salt and pepper, lemon juice, and olive oil.  You'll want to keep adding olive oil as you blend until you get a thick creamy/smooth consistency.  Don't add too much oil, or it will turn into an herb oil not a thick herb dressing.


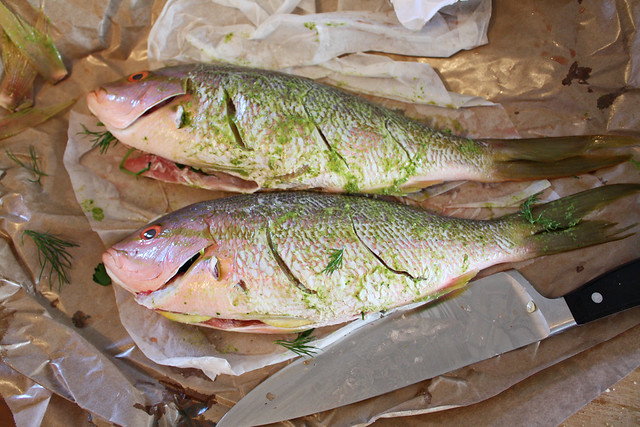
Preparing the Red Snapper
When buying your snapper, have the butcher remove the gills, and if the scales are still on, might as well have them scale it too.  Scaling a fish is no picnic, and those little buggers get everywhere.

Stuff the cavity of the red snapper with thin lemon slices, fresh dill, and Italian parsley. Score the flesh of the fish 2-3 times per side, and rub the outside with a Tbs or so of your herb dressing (be careful to not contaminate the remaining herb dressing with raw fish spoon or something - you'll want to use this cool and uncooked on the fish and salad later).  Set these aside to come to room temperature.  Fight off circling cats.
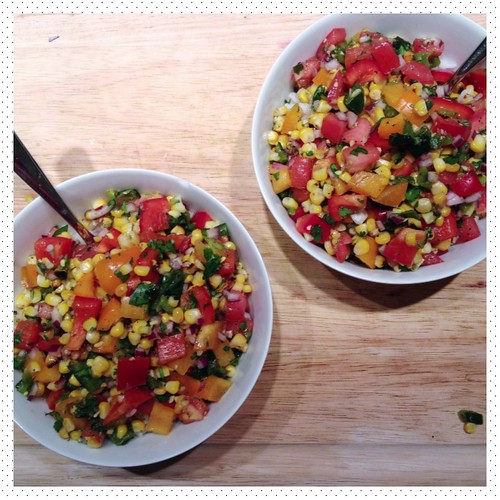

Grilled Salad
3 ears of corn, unhusked (pull off silks though)
3 large potatoes, sliced into 1" thick slices
1/2 yellow onion
1 small head napa cabbage, sliced in half

The ingredients are listed in order of how long they need to be on the grill.  The corn should be put on the grill first, and will take 15-20 minutes, rotating every 5 minutes.  Cook the potatoes until they're fully cooked throughout.  Grill the onion, cut side down, for 7-10 minutes.  And finally, oil (and salt & pepper) the cut side of the cabbage halves, and place them on the hot grill for 5 minutes.  Remove all the veggies, and let them cool.  Set aside.

Now it's time to come back to the fish.

Place the fish on the hot grill and close the lid; let cook for 6-8 minutes.  Then flip the fish, and let cook for another 6-8 minutes on the other side.


Grilled Red Snapper on grill whole

The goal of course is to preserve that wonderful skin, which will get nice and crispy.  The key to this is using enough of the herb dressing to oil the fish and help keep it from sticking.  You'll notice one of my fish got a little stuck, so I could have used a little more dressing/oil on the fish to avoid that.

After the 6-8 minutes are up, remove the fish from the grill.

Grilled Red Snapper off grill


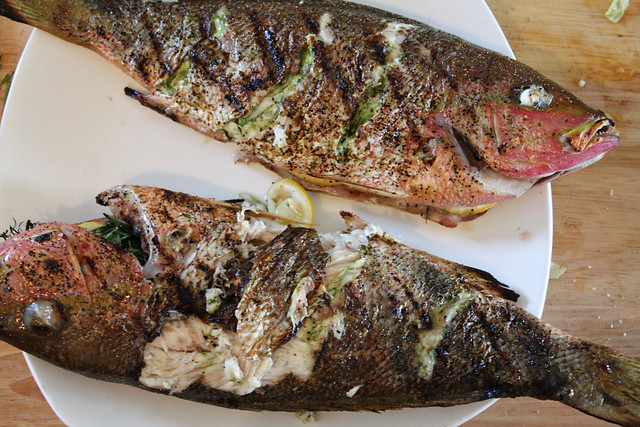
As your fish rest for a couple minutes, roughly chop up the grilled veggies, which now should be warm enough to handle.  Toss with some of the herb dressing to coat.


Grilled Red Snapper meal

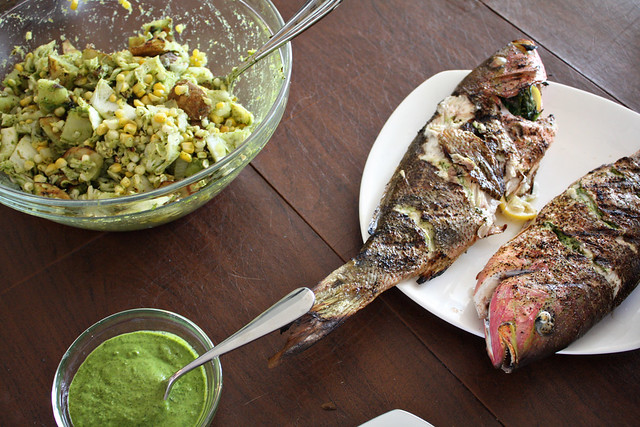
Serve the fish family style with the warm grilled salad and a side of extra herb dressing.


Grilled Red Snapper composed plate

Wednesday, May 1, 2013

Pasta Salad with Avocado-Lemon Dressing


When the weather starts to warm up and the produce is flourishing, I get so excited to make fresh dinners highlighting the beautiful raw ingredients.  Since it actually reached into the 80's this week, I decided to make a nice cool pasta salad one night.

Pasta salads are great because you get to use up whatever veggies you have on hand, maybe some cheese and some meat if you prefer - basically, there's no way to go wrong.  And while I have made pasta salad with bottled dressing plenty of times in the past, I've recently been drawn to making my own dressings, especially on a pasta salad where the dish is a meal in itself.

The other night, I had an avocado on hand, perfectly ripe.  At first I was going to just chop it up with the other veggies, and then I had one of those eureka! moments...


avocado pasta salad 1


Pasta Salad with Avocado-Lemon Dressing
serves 3-4

For the dressing:
1 large avocado, ripe
2-3 Tbs olive oil
The juice of 1 small fresh lemon
A pinch of salt & pepper, to taste

In a small food processor (I used my magic bullet), puree the dressing ingredients together.  Adjust the amount of olive oil as you puree if you need more to make it combine into a nice thick creamy dressing.  Also, feel free to back off on the lemon juice if you prefer your dressing less acidic.

Pasta salad:
2 cups of pasta (I prefer small shells or rotini for pasta salad)
Any chopped veggies you like (I used broccoli, red pepper, and tomatoes, since I had that on hand)
Optional: meat (I threw in some leftover crumbled bacon, but leftover grilled chicken would be great as well)
*I wouldn't include cheese in this, since I think the cheese texture/flavor would get overpowered by the creamy avocado dressing

Cook the pasta to al dente, immediately drain and rinse with cold water to cool the pasta.  Put the pasta in a fridge for 20-30 minutes to cool completely.  Meanwhile, chop up your veggies, and the meat if you're including any.  Toss the chopped ingredients with the cooled pasta, and top with the dressing.  Stir to combine, and top with freshly cracked pepper.  Serve, and ideally enjoy outside with some beautiful weather!


avocado pasta salad 2