Wednesday, June 30, 2010

A Menu Planning Must-Have

The other day, my husband shared this AMAZING online tool with me that I just couldn't wait to share with you!

It's an interactive Food and Wine Pairing guide, and all I can say is

Where have you been all my life?!

Ok ok, not to be overly dramatic, but this thing is awesome. Planning a dinner for friends, family, parties big and small? Trying to impress your significant other? Check this out!

There are two ways to use the guide.

The first option is to match food to wine. In other words, you have a type of food that you plan to prepare, and you want to know what will pair well with it.

So, let's pretend you're starting with a cheese appetizer. You click the little icon that looks like cheese. But then the tool starts to work and you get three options: Blue (Bleu) Cheese, Hard, Flavorful Cheese, and Soft, Rich Cheese. Since you just bought some awesome reggiano, you choose Hard, Flavorful cheese.

And magic!
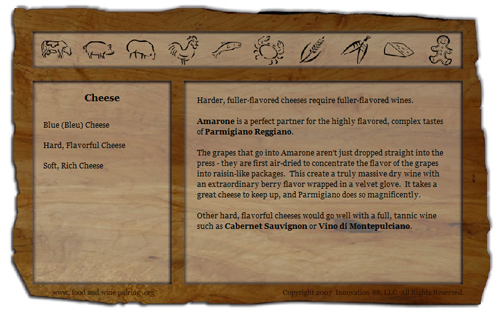
Cheese


Amarone goes great with reggiano, but other choices are cabernet sauvingon and Montepulciano. How cool!

Ok, now on to the meat course. Yes we're still playing pretend.

Say you planned to make chicken. More specifically, a nice slow-roasted chicken.

BAM!
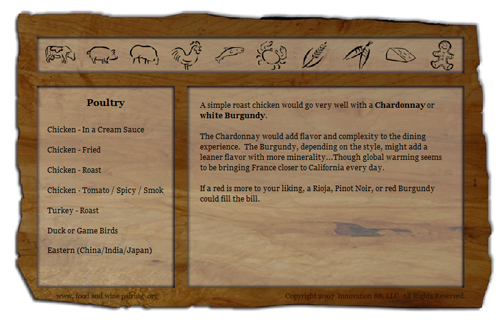
Poultry


Chardonnay, or white Burgundy!

Seriously man, I'm in love.

But wait! There's more!

Say you want to plan a menu, but you want it to go well with a bottle of wine you already have...

The tool also has another option to match wine to food!

I'll use a real-life example for this. As an anniversary gift, Chris' parents gave us a bottle of Paul Hobbs Pinot Noir. (yum!) What should I make with it?
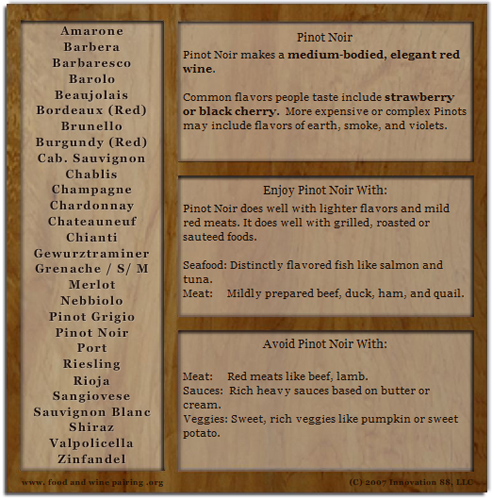
Pinot Noir


Well, I should clearly pick a lighter-flavored dish. I like the suggestion of salmon! But look in that last box on the bottom right side. I love that this tool also tells me what not to pair with this wine! With this knowledge, I know to make a very clean preparation of the salmon, not a butter-heavy preparation.

I am so glad someone put together such an easy-to-use tool. Having the option to go wine to food or food to wine, and also including things that don't pair well in addition to what does pair well is absolutely invaluable!

Have some fun playing around the site... I know I will!

Photobucket

Note: I was not contacted by the maker of this site to do a review or to share it with you all. I honestly just think it's that cool :)

Featured Tutorial!

What a great surprise to find sitting in my inbox this morning... I am being featured at SomewhatSimple!

Steph chose my embossing tutorial to be the featured tutorial today.

You can check it out here!

SomewhatSimple

While you're there, take a look around. She's got some really great projects and stories!

Sunday, June 27, 2010

Korean Rice Bowls

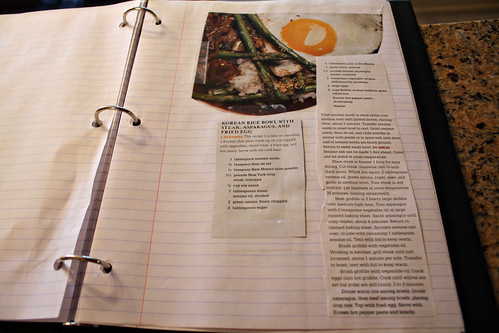
Chris and I love Asian-inspired dishes. We're suckers for all the Asian flavors, pretty much across the board. So the other night, when we were flipping through our magazine recipe book for something new to try, we knew we had to try Bon Appetit's Korean Rice Bowls with Steak, Asparagus, and Fried Egg.

edited Korean Rice Bowl (21)


But, as always, we adapted it to what we had on hand.

Korean Rice Bowls
adapted from Bon Appetit

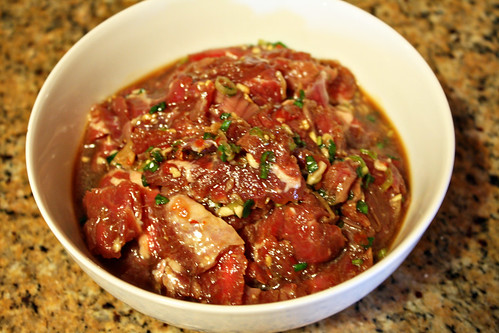
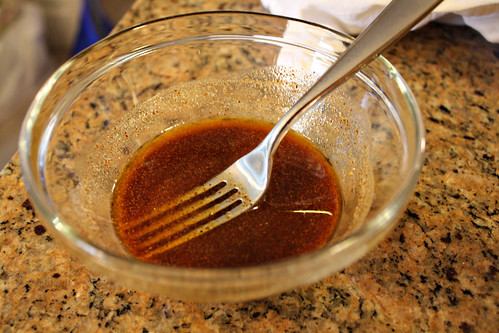
Start with a skirt steak. If it's frozen, bring it out and get it until it is about half-thawed. If it's not frozen, stick it in the freezer for about an hour to harden the meat up a bit. The reason for doing this is that it makes slicing the beef thin much easier. Slice it in strips against the grain, and drop into a plastic bag. In the bag, add:

1/4 cup soy sauce
3 tbs sesame oil
2 chopped green onions
2 tbs sugar
1 tbs sherry
2 minced garlic cloves
1 tsp chopped ginger

Seal up the ziplock bag and let the beef marinate for at least 30 minutes. During this time, the beef will finish thawing.

While the beef is marinating, combine the following ingredients:

1 tbs toasted sesame seeds
1 tsp sea salt
1 tsp chile powder

If you have a mortar and pestle, grind the mixture together. If you don't, put it in a plastic bag and beat with a meat tenderizer or something of the like. Then set aside.

Just before starting to cook your meat, put some short-grain rice in your rice cooker and start it cooking. We also have a little steam tray for our rice cooker, so we chose to cut up some broccoli and steam that with the rice, in lieu of the asparagus that this recipe calls for.

Once your beef is ready, put it into a bowl for easy access.

edited Korean Rice Bowl (2)


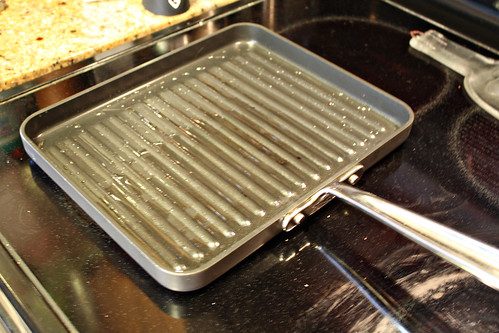
Then set a grill pan on the stove. Or in our case, the bottom of a panini press pan!

edited Korean Rice Bowl (4)


Put about 2 tbs of oil in the bottom of the pan and heat until the oil just begins to smoke.

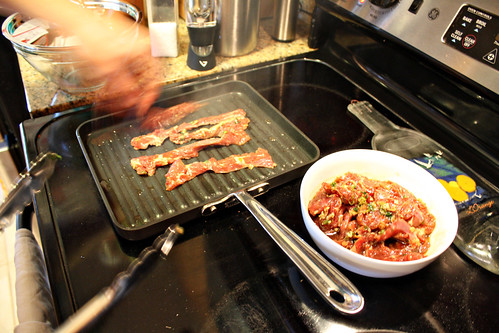
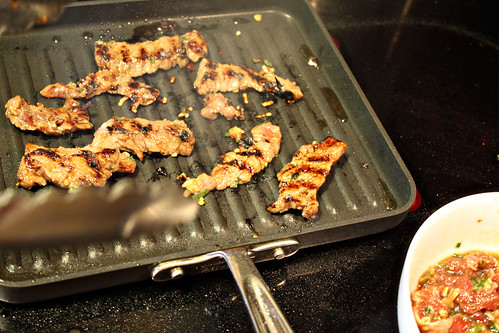
Then, working in batches, start grilling the meat. It will take about 1 minute per side as the meat is very thin and the pan is very hot. Also, you don't want to cook the meat all the way through anyway, because it will be tough as leather.

edited Korean Rice Bowl (7)


Ignore the phantom-hand in the photo above...Chris doesn't pose well!

edited Korean Rice Bowl (17)


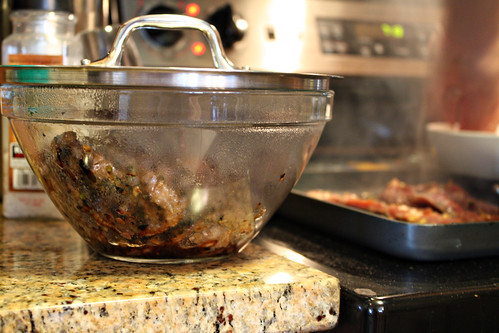
To keep the cooked meat hot as you are cooking the other batches, make sure you have some sort of bowl ready with either tented aluminum foil, or in my case, a pot top.

edited Korean Rice Bowl (18)


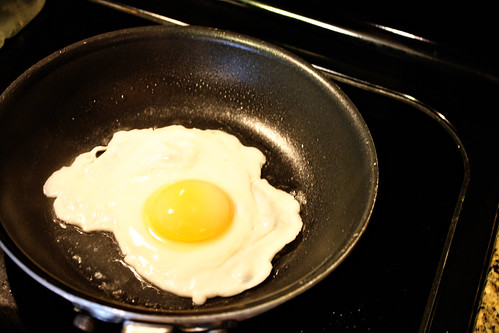
Once the meat is all cooked and staying warm in a covered dish, quickly cook a sunny-side up egg.

edited Korean Rice Bowl (19)


Since I'm not a fan of runny whites but I do like runny yolks, and since I am terrible at making an over-easy egg, I usually put about a teaspoon of water in the pan once the egg has started to cook and cover it for about a minute. The steam from the water will cook the top of the whites without cooking the yolk. A handy little trick!

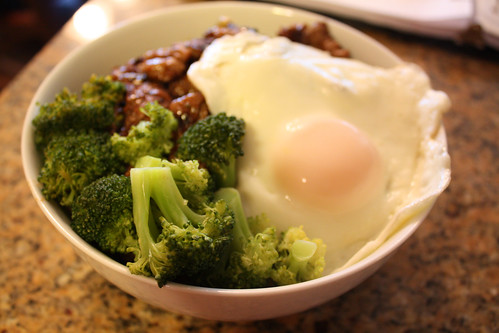
Now you're all ready to assemble! Put some rice in the bottom of a bowl, then scoop some beef in, the broccoli, and the egg.

edited Korean Rice Bowl (22)


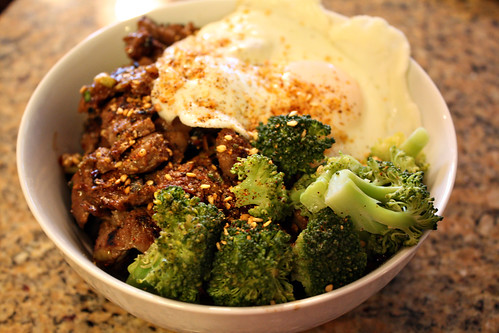
Finally, finish with the sesame seed/salt mixture.

edited Korean Rice Bowl (35)


This turned out to be one of my favorite magazine recipe dishes we've made yet. It will definitely have a few repeat performances!

Enjoy!

Tuesday, June 22, 2010

Mod Podge Roller

When I was waiting (impatiently) for the Recipe Book I made a while back to dry, I was sitting there bored with all my papers and Mod Podge in front of me, thinking, "What else can I do while this is drying??"

Then my eyes locked on something...

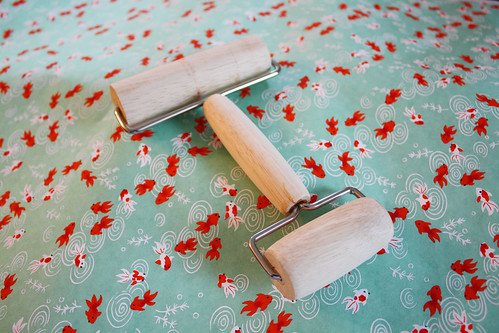
Edited Roller Redo (1)


How remarkably boring is my roller?!

My wonderful tool that takes away bubbles in my Mod Podge projects was so dull and lifeless!

So what else to do but Mod Podge it!

Edited Roller Redo (2)


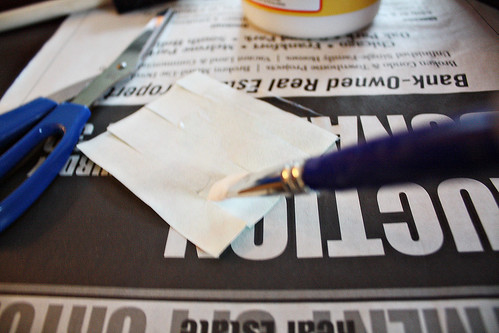
I started by cutting out a little rectangle that was big enough to wrap around the handle. Yes, there's my lap again. I'm telling you, a great place to craft!

But then I needed to cut slits in the paper because the handle of the roller was tapered at the ends. I decided to cut three slits in each side.

Edited Roller Redo (3)


I then brushed a little Mod Podge on the back of the paper...

Edited Roller Redo (4)


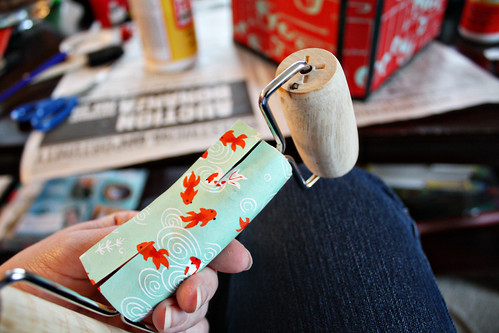
...and began to wrap it around.

Edited Roller Redo (7)


I was very careful to let the slits overlap so that it wrapped snugly around the handle.

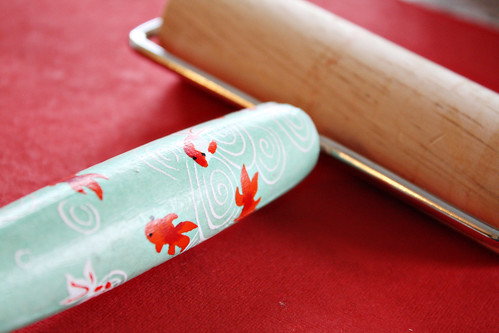
Then a quick coat of Mod Podge (matte) on the outside (after I had impatiently let it dry, of course), and here we have it!

Edited Roller Redo (10)


So much prettier!

Edited Roller Redo (24)


This is what I do when I'm bored and impatiently waiting for Mod Podge to dry. I do more Mod Podge. Hey, at least my addiction doesn't hurt anyone! :)
Thursday, June 17, 2010

Baby Back Ribs

Now that it’s summer, everyone is breaking out their grills and doing some outdoor, open-flame cooking. Well I live in a high rise condo in Chicago with no patio, so unfortunately I’m not exactly dusting off the ol’ barbeque. But that doesn’t mean I can’t make some awesome summertime food!

One of the major grill foods we all think of is ribs. Sticky, tasty, eat with your hands but get them all over your face... there’s really nothing more amazing. But honestly, good fall-off-the-bone ribs are hard to accomplish on the grill. Often ribs tend to be a little tougher, and although they have that good charred taste, they’re not as good as you can get at a restaurant.

But (shocker) I’ve got a secret!
Amazing Fall-Off-the-Bone Ribs

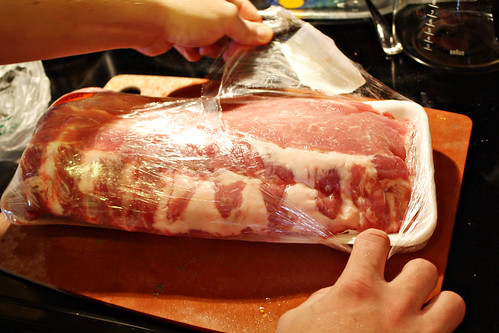
Start with a rack of baby back ribs. Chris and I got this rack thinking it was a nice size, not too big, maybe a little leftovers but would be good for us.

Ribs edited(2)


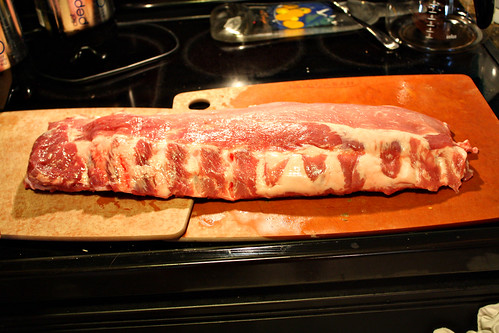
Aaand then we completely unpackaged it, realized what we thought was a good size was actually folded in half

Ribs edited(3)


…and we found ourselves in possession of a ridiculous amount of ribs. Oh well!

Moving on!

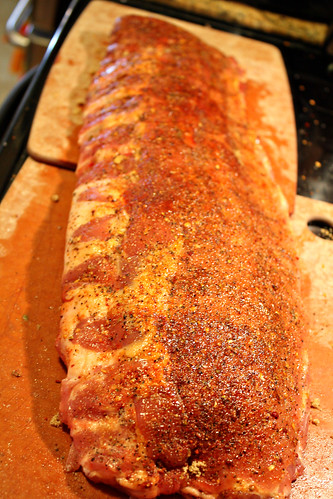
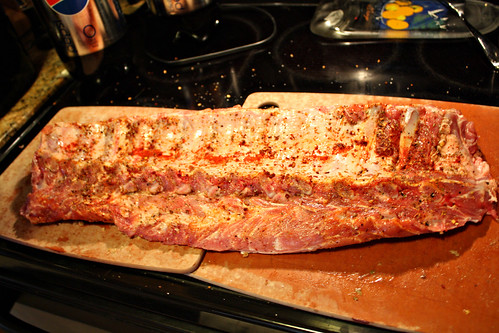
Start by rubbing a hefty amount of liquid smoke on both sides of the ribs. This will add the smoky flavor (obviously) but will also help the dry seasonings to stick to the ribs. Then coat the ribs in a good crust of dry ingredients. Whatever you choose, just make sure to use a ton of it! We used sweet mesquite seasoning (from Costco), salt, pepper, Pullman Pork Seasoning (from Spice House), smoked paprika, and garlic powder.

Ribs edited(8)

Ribs edited(10)


Now on to the secret. Our very close friends taught us this secret one night when we went over to their place for ribs, and we will never again do ribs any other way.

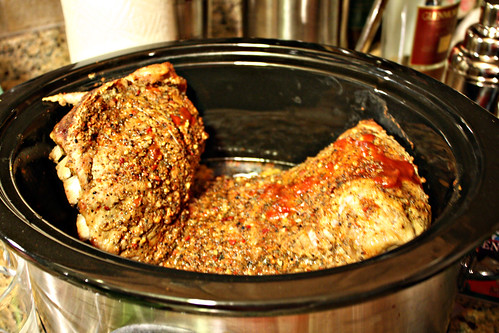
Stick the ribs in your crock pot.

Ribs edited(15)


Ok, ok. So ours look a little ridiculous in there. We should have cut the rack in half and set each half on its side so that they fit nicely in there. But hindsight is always 20/20 so oh well. It still accomplishes the same goal!

So getting back to crock potting your ribs. Why would you do such a thing?!? Because you want them tender, silly! We all know deep in our hearts that the way to make something truly fall-apart melt-in-your-mouth tender is to cook it low and slow in a crock pot. So why not ribs?

Put them in the crock pot (maybe a little more gracefully than my little arrangement here) on low with some chicken stock, apple cider vinegar, and lots of cracked pepper. Leave for about 4-5 hours. The important thing is you take them out before they get too tender. Though you want them to fall off the bone when people eat them, you don’t want them to fall off the bone before you even get them out of the crock pot.

Ribs edited(20)


I feel the need to take a moment to express that the little red you see there on top is my husband putting a teeny tiny bit of bbq sauce on the ribs partway through for no good reason. I just thought I had to reassure that 1) that’s not blood and 2) you don’t have to put red stuff of any kind on your ribs at this point so I didn’t miss a step.

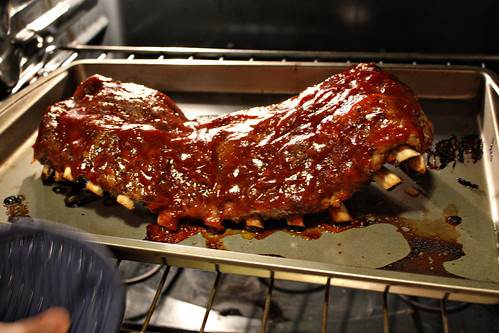
Remove the ribs and place on a baking sheet, and brush the ribs with your bbq sauce of choice. I choose to use the homemade stuff, you can find the recipe in my brisket post.

Ribs edited(24)


Now place in a 200 degree oven to let the sauce begin to dry out and get sticky.

Ribs edited(25)


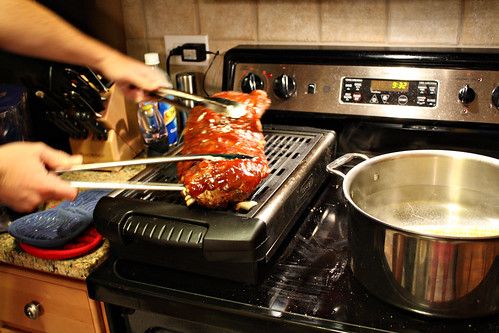
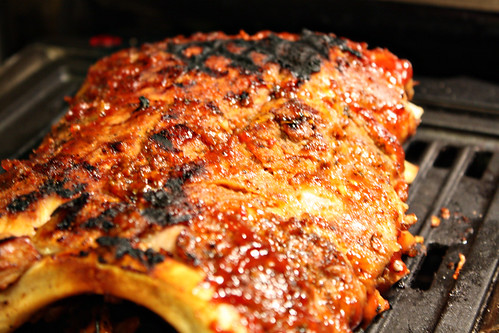
While they’re in the oven, fire up the grill. In our case, plug in the electric grill. Since we’re only trying to get a char, not trying to actually cook the ribs, this does just fine. Make sure you put it on the highest setting.

Once it’s hot enough, take the ribs out and stick them on the hot grill.

Ribs edited(27)

Ribs edited(34)


Flip after about 2-3 minutes.

Ribs edited(39)


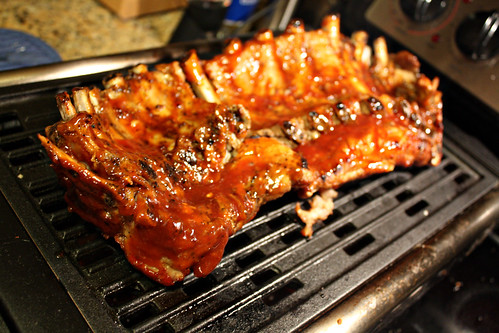
Leave for another couple minutes, and flip again. You should start to get a really good char as the sugars in the bbq sauce begin to caramelize and burn.

Ribs edited(52)


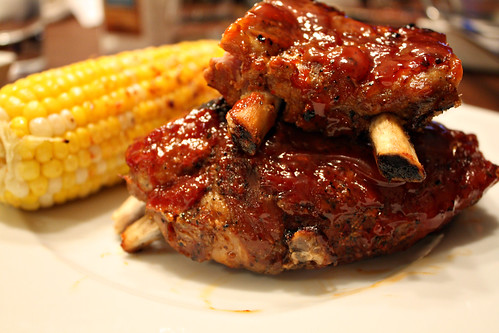
Then remove from heat, and plate 2-4 ribs per person, with your favorite side.

Ribs edited(72)


These are super tasty, fall-off-the-bone, amazing ribs! Happy summer eating!

Tuesday, June 15, 2010

How to Store Wine

How do I properly store my wine?

You may be wondering what to do with that special bottle you got as a wedding gift that came with a card saying “Open on your 10th anniversary!” Or maybe you’ve started to get into wine more, and you would like to hold some of the heartier reds that need at least 5-10 years of aging. Whatever your situation, it’s important that you store your wine properly to avoid an unfortunate experience.

There are three main factors that affect wine: temperature, light, and humidity.

Temperature - storing your wine at a temperature warmer than 65º can cause chemical changes in your wine such as oxidation, reduction, and esterification. In other words, your wine will lose its flavor and will age prematurely. A temperature of about 55º is ideal.

Light - Avoid direct sunlight. Not only will this cause temperature swings, but the UV light will also harm the wine by breaking down the organic compounds in the wine. These compounds make up the flavor and aroma of the wine, so allowing the UV light to enter will have a negative effect on these very basic components of the wine.

Humidity - Humidity mostly has an effect on the wine’s cork. Since corks are naturally all different, most corks will not seal perfectly. However, if the cork is moist, it will expand and fill any space it's imperfections left. If you plan to age more than a couple years, it’s important to keep the cork healthy and moist. The main way to accomplish this is by storing the bottle on its side. By doing so, the cork will stay moist and will expand, preventing any oxygen from entering the wine. If the bottle sits up in a dry room and oxygen does enter the wine, it will turn to vinegar, and the wine you’ve been waiting years to open will be a sour disappointment.

Depending on your budget and number of bottles you plan to store, there are a few options to maintain temperature, light, and humitidy. The most obvious solution is a wine cellar.

Whether it’s a little four-bottle wine cellar that can hide off to the side on your kitchen counter...


...a twelve bottle cellar that could take up a little more counter space...


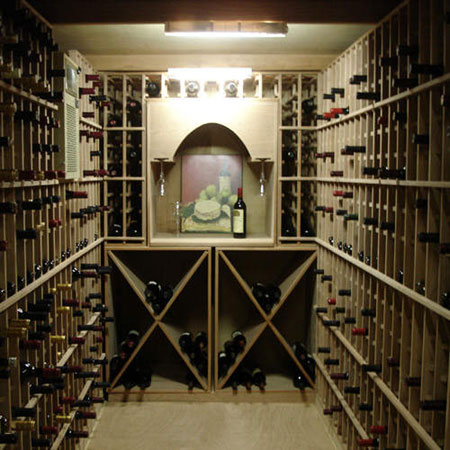
...or a whole actual walk-in cellar...


...you will be able to age your wine with confidence that it is being properly stored.

If you don’t plan to go out and buy a cellar, you can always do the tried-and-true method of laying the bottles down in a remote place in a closet. Closets are good because they are dark and generally are able to maintain a more consistent temperature than other places in the house. If you have a basement, a closet down there is even better because basements tend to be cooler than the rest of the house. Just make sure it’s a closet that is not frequently used, like a coat closet or the like. If it’s in the clothes closet, it is more likely to be jostled around when looking for a pair of shoes, or exposed to light if the closet is left open.

Good luck, and happy aging!

Source: Studio Vino

Saturday, June 12, 2010

Spiced Popcorn

Today, Chris had a craving for popcorn, but I was kind of sick of the average, plain popcorn. Since it is rainy and miserable out, I suggested we take a little time and try out a spiced popcorn! I have seen recipes before in magazines and online, but had never actually tried them. And now I'm so glad I did, because WOW! This stuff is so absolutely delicious!

Spiced Popcorn

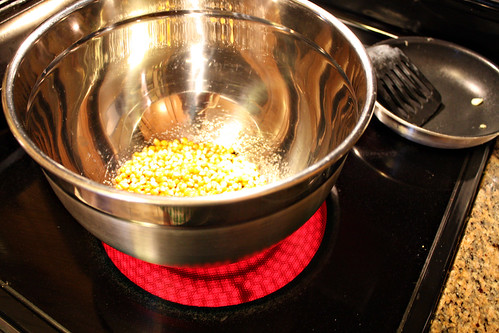
Start by popping 1/2 cup popcorn in the way that you like. We sometimes do air popped popcorn, but for this recipe, we decided to use Alton Brown's Perfect Popcorn preparation method.

We used 1/2 cup popcorn with 2 tbs peanut oil.

Edited Spiced Popcorn (2)


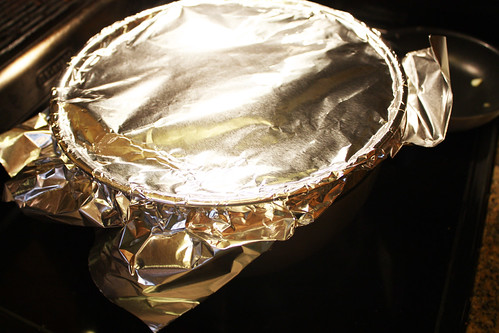
Toss to coat the kernels in oil, and quickly cover tightly with aluminum foil.

Edited Spiced Popcorn (8)


Poke a few holes in the top to allow the steam to vent.

Edited Spiced Popcorn (9)


Keep it constantly moving so the kernels don't settle. It will start to pop fairly quickly. Don't stop shaking the bowl until all kernels are popped, approximately 3 minutes. Then remove from heat and set aside.

Now grab the ingredients for the spiced topping.

Edited Spiced Popcorn (15)


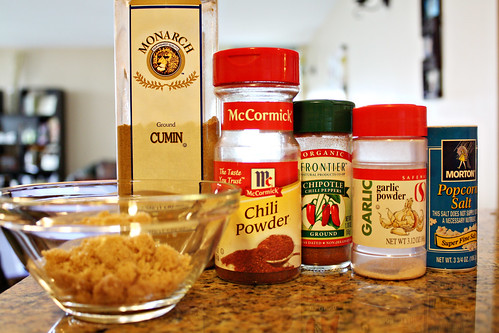
- 2 tablespoons packed light brown sugar
- 1 teaspoon chili powder
- 1 teaspoon ground cumin
- 1/2 teaspoon chipotle powder (the recipe calls for cayenne, but I couldn't find our cayenne so I substituted it with the chipotle powder)
- 1 teaspoon garlic powder
- 2 teaspoons salt

And of course, we can't forget the most important ingredient of all...

Edited Spiced Popcorn (20)


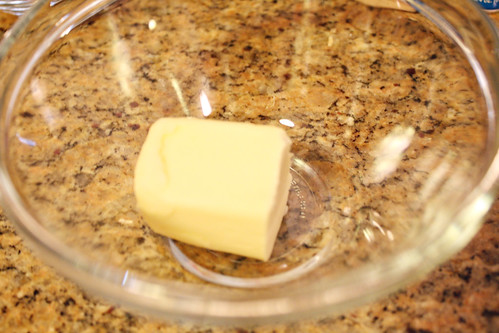
Butter! The recipe calls for 4 tbs, or 1/2 stick.

Melt the butter, and then add the dry ingredients and stir until the sugar has dissolved and the ingredients have melded together.

Edited Spiced Popcorn (21)


Now go back to your big bowl of popcorn, and very slowly drizzle about 1/4 of the spice mixture on top. Toss the popcorn, and add 1/4 more, then toss, 1/4 more, toss, the last 1/4, and toss again. The goal is even coverage of the popcorn, so however it works for you!

Edited Spiced Popcorn (23)


Now dig in! This is an awesome salty-savory-sweet popcorn, and it goes great with a Corona on a lazy Saturday afternoon! Enjoy!

Wednesday, June 9, 2010

Wine Label Removal

First off, I'd like to take a moment to say I'm so very sorry! I did that last post (Wine Label Anniversary Project) and had no clue so many people would be so interested! Since I didn't expect it to be so gosh darn popular, it didn't occur to me to explain how to properly remove wine labels so they remain pretty and intact.

Heat your oven to 175 degrees.

Yes, you heard me right. We're not soaking, or using fancy "removers." We're using good old fashioned heat.

Once it's heated (which should take all of a minute and a half), put the empty, corkless wine bottle in the oven for 10-12 minutes.

Remove with a pot holder, and begin to peel slowly from one corner, being very careful not to go too fast or it will rip. Once you've got it removed, the sticky side will actually still be sticky, and you can now stick it to a piece of plain white computer paper. These collect really easily and you can keep them in a file until you're ready to cut them out and Mod Podge them to something fun!

The reason this works is because the heat melts the glue that adheres the label to the bottle. Based on my experience - and you can see that I have a LOT of experience - this method will work for about 90% of wine bottles from US-based winemakers. It gets a little trickier when we go country hopping. Old world wine countries (Italy, France, etc) sometimes tend to use more of a cement than a glue. For these, I've got nothin'. Sorry! But other countries with newer production methods (Australia, Chile) tend to lean toward the glue, which works great for this method.

If you're doing something similar with beer bottles, same rules apply.

Good luck! If you do something using wine labels, I'd love to see pics!

Photobucket

Sunday, June 6, 2010

Happy Anniversary!

Today is my anniversary with my wonderful husband. I can't believe another year has flown by! The reason I'm bringing this up on the blog though is because my anniversary gift to him last year was the straw that broke the camel's back; it was the first project I used Mod Podge to make since high school. It's also the first project that got me into the blogging world. As you can see, it's been a slippery slope!

One year ago....

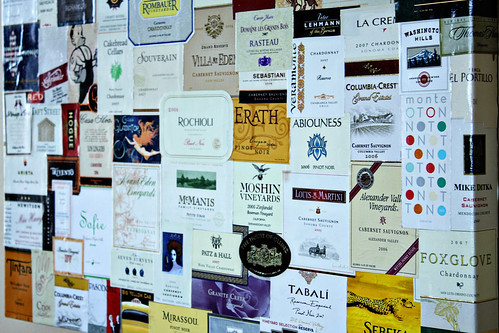
Chris and I had been saving all of our wine labels in a book from that first year of marriage, and about a month before our anniversary, I got the bright idea to decoupage them into a piece of wall art to hang above our couch. I knew he'd love it because, 1) he LOVES wine, and 2) he didn't like the picture frames we had above our couch and was looking for a bigger piece of art to hang up there anyway.

So I ordered a plain canvas online, a 30"x30" canvas. It arrived, and I started to cut the wine labels out of the book, and you know what? It takes a TON of wine labels to cover a 30"x30" canvas! WAY more than we had. I think we had something like 25 or 30 labels... that hardly covered a corner of the thing. Needless to say, I couldn't finish this alone. So I called in the Moms. I begged them to please please please save all their wine labels from every bottle they consumed, and start mailing them to me so I could do this thing!

Well, because of my poor planning, I was only able to tell my husband about his gift, I had nothing to show him yet. And since I was getting help from family sending me wine labels, I decided to let them know the progress of the project by starting a little blog for them to follow along. I go back and look at it now, and still can't believe I wasn't able to finish the darn thing until October! But in the end, I am so proud of it; it really is one of my favorite Mod Podge projects I have ever done.

Wine Label Project edited(14)

Wine Label Project edited(15)


I then very clearly caught the crafting and blogging bug, because the Food, Wine, & Mod Podge blog you know and love today was started the very next month after I finished this project. And look how far we've come!

If you're interested in seeing the step-by-step for the wine label project, I do go through the whole process in the old blog. Hope you enjoy!

http://winelabelproject.blogspot.com/


**Note: For how to remove wine labels easily, go to my post on Wine Label Removal

Saturday, June 5, 2010

A-MA-ZING Shrimp Dish

Let me start by saying this:

Oh. My. Goodness.

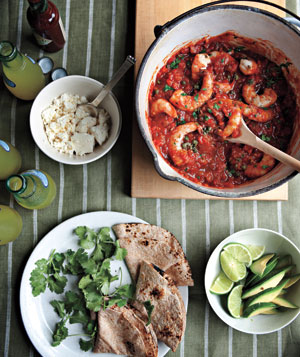
So you know the magazine cookbook I made in the last post? Well, the very first page holds a recipe from Real Simple for a shrimp dish. And since we spent all that time cutting out all the recipes, this past weekend we decided we couldn't resist how amazing this looked:

camarones_300


But like all recipes, I never can quite follow them exactly... But let's start with the original recipe and we'll go from there.

Camarones Enchiladas


Ingredients

* 2 tablespoons olive oil
* 1 medium onion, chopped
* 1 red bell pepper, chopped
* 2 cloves garlic, finely chopped
* 2 teaspoons paprika, preferably smoked
* 1/4 to 1/2 teaspoon crushed red pepper
* kosher salt
* 3/4 cup chopped fresh cilantro, plus more for serving
* 1/2 cup dry red wine
* 1 tablespoon capers, chopped
* 1 14.5-ounce can whole tomatoes, drained
* 1 1/4 pounds peeled and deveined medium shrimp
* 1 tablespoon fresh lime juice, plus lime wedges for serving
* 8 small whole-wheat tortillas, warmed
* Sliced avocado, chipotle-flavored hot sauce, and crumbled queso fresco (fresh white Mexican cheese, available in many supermarkets) or Feta, for serving

Directions

1. Heat the oil in a Dutch oven or large saucepan over medium-high heat. Add the onion and bell pepper and cook, stirring occasionally, until they begin to soften, 3 to 5 minutes. Add the garlic, paprika, crushed red pepper, and ½ teaspoon salt and cook, stirring, until fragrant, 1 to 2 minutes.
2. Add the cilantro, wine, capers, and tomatoes, crushing them with your hands as you add them. Bring to a boil. Reduce heat and simmer, stirring occasionally, until the liquid is slightly thickened, 15 to 20 minutes.
3. Add the shrimp and lime juice to the tomato mixture and cook until the shrimp are opaque throughout, 3 to 5 minutes. Serve with the tortillas, avocado, hot sauce, queso fresco, cilantro, and lime wedges, if desired.


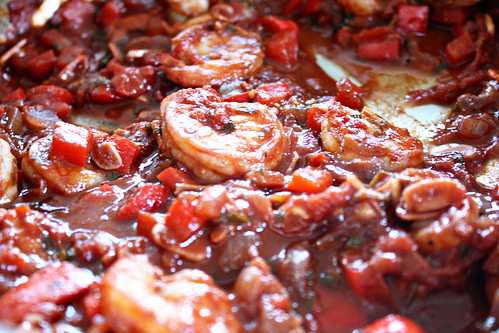
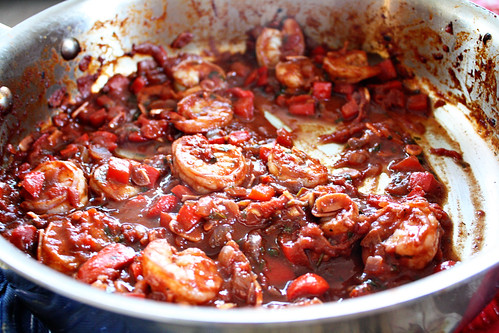
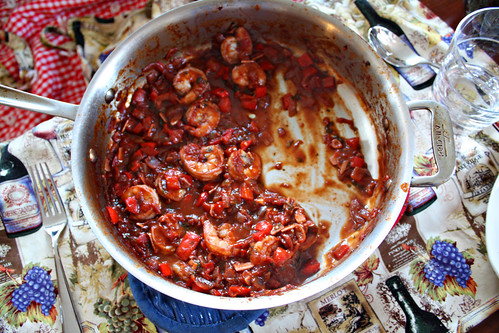
So here's where we strayed... Tomatoes, bell peppers, red pepper flakes, red wine... absolutely no Mexican/Spanish flavors at all! Except for the very end where you put them in tortillas and add an avocado, everything else screams more Italian to me than anything else. So we followed the recipe exactly, except for the serving method. Instead of tortillas, we grabbed an Italian baguette to sop up the amazing sauce. And let me tell you, it was absolutely amazing. We ate up every morsel. The sauce was divine, the bell peppers tender, and shrimp perfectly cooked. We will absolutely be making this again soon!

(Ok, that's not the only area where we strayed...we added a TON more garlic, but who doesn't love more garlic?!)

AMAZING Shrimp edited(5)

AMAZING Shrimp edited (7)

AMAZING Shrimp edited(9)