
"So Katie, I've been reading your blog lately, and I've got to say, you've had a lot of food and wine lately, not so much Mod Podge. What's with that?"
I confess, you're right. My Mod Podge love has been a little absent lately, and it should be a bigger part of this blog. However, Mod Podge is not the only crafty medium I use, so I think the MP part of this blog will have to include all crafty projects.
So here's what I've been up to lately!
Heat Embossing
Those who know me know that I have an obsession with stationery. A couple months ago (January?) I was wandering around Paper Source, and saw them doing a heat embossing demo. I was amazed at how easy it was! The options were endless, and could be applied to so many different applications.
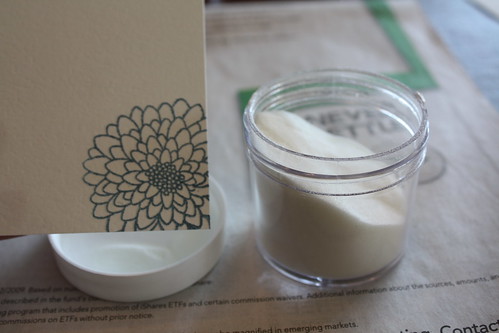
Here are the items you will need:
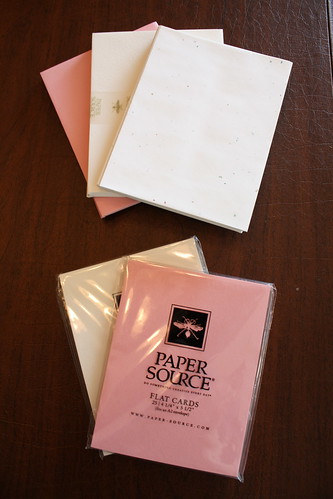
Notecards and envelopes. Of course this is an embossing overview for stationery, but really you can emboss any paper project.
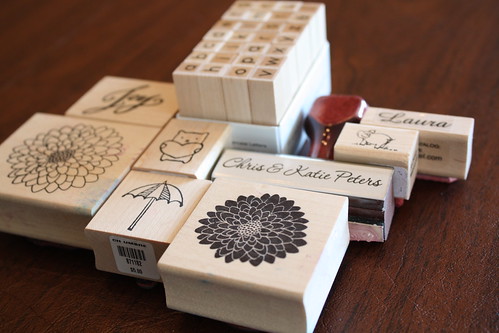
Rubber stamps. Any stamps that tickle your fancy. They're not too expensive, in the $5-$10 range. Also, through Etsy there are plenty of sellers that will happily make you a custom stamp if you're looking for something particular.
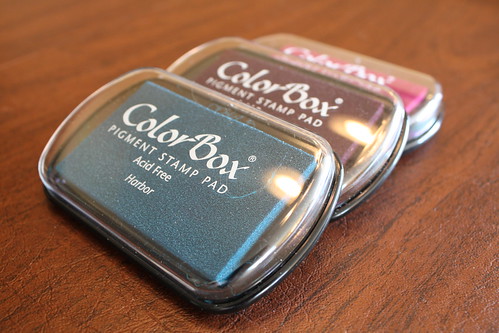
Stamp pads. I prefer Color Box pads because the ink stays moist a little longer than others, and for embossing that's a good thing.
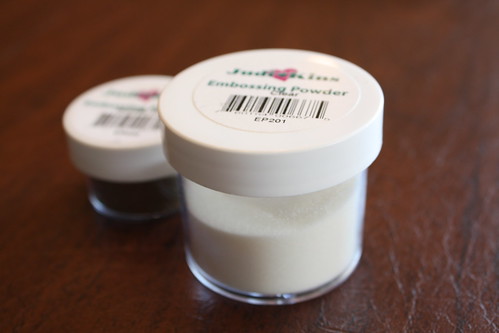
Embossing powder. You'll need clear powder for sure to get the color through from the stamp. However, you'll see that I have another smaller container hiding back there, I'll explain what that is later.

And finally, the embossing heat tool. This is essentially a really high heat, low speed, small hair dryer. It blows very, very hot air gently to melt the embossing powder.
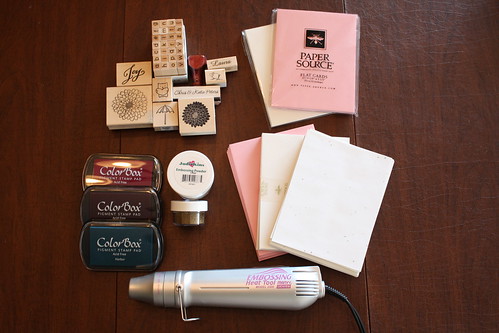
That's it!
Ok, now let's get started. I promise, this is so easy!
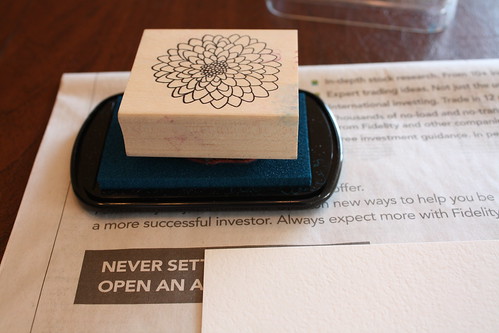
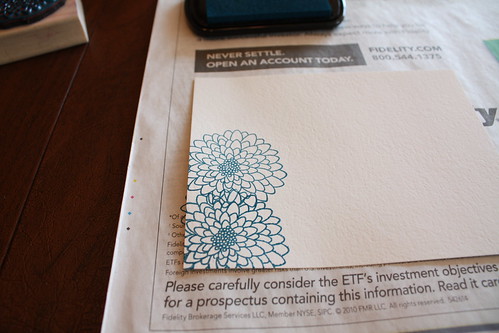
Get the stamp nice and covered in ink. Really make sure it's completely covered.

Press down firmly where you want the stamp to go. You see I'm going off the edge of the card (on purpose) which is where the newspaper underneath is a good choice. Press firmly, but don't wiggle it. It will be blurry if you do that.
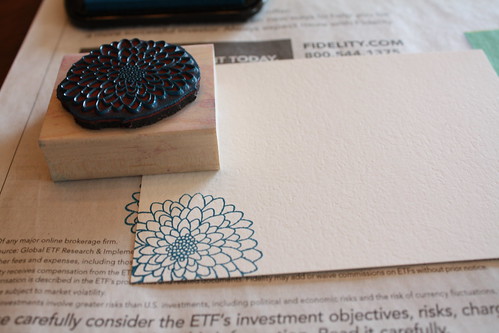
Stamped.
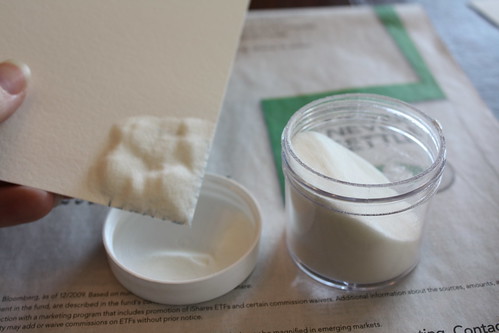
Pour the clear embossing powder onto the stamped area. Since I'm going off the edge, I do it over the cap of the powder container, so I don't lose too much. Then tap it all off to it looks like this:
Now, it's time for the embossing heat tool. Turn it on, and wave it back and forth, pointed at the stamp, about 2 inches from the paper. As it warms up, you'll start to see the powdered stamp transform into a glossy, vibrant stamp.
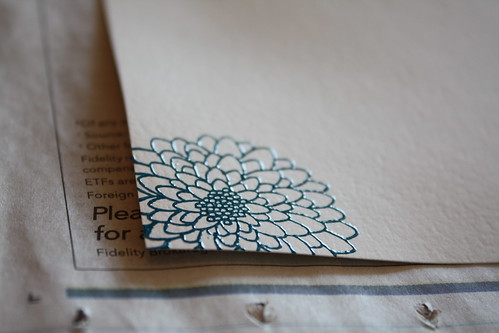
See that shine? And it's beautifully raised as well. You'll be amazed at how professional these look!
That's it! You're done! Well, of course, if you only wanted one stamp. Though I'm now going to show you that other embossing powder, the one that was hiding behind the clear powder. This is a gold powder. The transformation of this one is so cool.
Stamp another fresh stamp down on your paper. You'll notice I used blue again. Believe me, it will only be blue for a few more seconds. You can stamp right over your already embossed stamp, it won't mess it up.
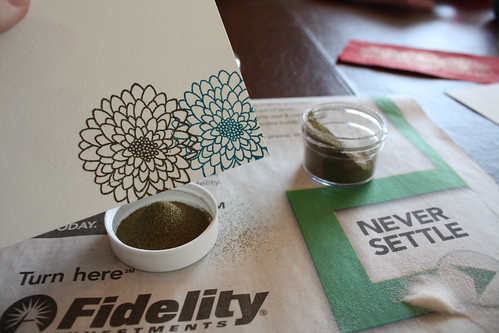
Pour the gold powder on your new stamp, and shake off excess. Then use your magic heat tool and....

Look at that beautiful shiny gold! The blue hiding underneath is completely gone, and we're left with a glistening raised gold stamp.

Some examples of the different fun things you can do. The one on the far left is the example I did for you today. The one in the middle was cute for a Valentine's day note, or just a note for your honey. And finally, on the right is an example of the stationery I made for my mom for her birthday. Then on the bottom, I had some scrap paper lying around, and I did the gold stamps on that one. I thought it could look really cool for some scrapbooking projects, or whatever you want!

I LOVE the note cards you made for me! I am especially fond of your "Joy" stamp! Love you!
ReplyDeleteI love this! I need to go to Paper Source for some cards, and I'm pretty sure I'm going to end up leaving with an embossing tool. :) Your blog is so cute, Katie!
ReplyDeleteSO beautiful! I want to emboss now . .
ReplyDeleteawesome tute! that looks so fun, i might have to break down and buy some embossing things now.
ReplyDeleteI've seen cards embossed and figured it must be a lot of work but I was wrong! I love the gold! Do you think Michael's or Hobby Lobby has the best selection? I've got to get me some of this stuff for the weekend!
ReplyDeleteexcellent and beautiful
ReplyDeletedo share this lovely lovely lovely embossing tutorial with more of us by linking it here:
http://www.finecraftguild.com/diy-tutorial-linky-party/
Ooh, thank you for the simple tutorial! I have always been intimidated by the sound of 'embossing.' I guess I was being silly!
ReplyDeleteThis seems so easy! And they're so pretty.
ReplyDeleteI am hosting a giveaway and I'd love it if you stopped by.
Laura @ along for the ride
Very cute! I had no idea you could emboss this way! Thanks for sharing and linking up at PonyTails&FishScales!
ReplyDeleteterelauritsen.blogspot.com
Thanks for reminding me to use this technique again. I love your notecard, the blue and gold are so beautiful together.
ReplyDeleteHi Katie, thanks for the post on weddingwire! I think I got that stamp at Joann's...maybe AC Moore, but I'm pretty sure it was Joann's. Check out etsy too, there are a bunch of folks on there who have stamps for sale.
ReplyDeleteI've been using the same technique for thank you notes as well! http://momimadethemaquilt.blogspot.com/2010/08/new-etsy-stuff.html
Thank you for the tutorial - you really do make it look easy. I won't admit how long I have had that tool and never used it - for shame! Thanks for the inspiration - I will link back when I make something ;)
ReplyDeleteAWESOME tutorial! I've always loved the look of embossing, but thought it was a complicated process. It's now on my crafty list! -diane
ReplyDeletethat's COOL!!! So easy to do... hope I can find the materials here in Philippines
ReplyDeleteThank you so much for sharing this! I just wanted to let you know that you inspired me to rush out and buy the necessary materials so I could try it for myself, and your tutorial couldn't have been more perfect. I blogged about my first attempt here:
ReplyDeletehttp://sourkrautkrafts.blogspot.com/2011/01/embossed-stationery.html
Oh goodness- I started following your blog after your SITS day and I was just snooping around some of your posts... I can't tell you how long I've wanted an embossing tool, I just always thought it would be too hard for me... Looks like I know what I'm doing with this bunch of Jo-Ann coupons!!! SO looking forward to stopping by more often to see what else you've got in store :) Love finding awesome blogs!
ReplyDeleteGreat tutorial! I recommend using VersaMark ink in place of colored ink, as VersaMark is very sticky, so the embossing powder sticks to it better. I find that it also stays sticky for a little bit longer than chalk ink. I pretty much always use clear ink + colored embossing powder. There are so many colors of powder to choose from! Happy crafting :)
ReplyDeleteOHMYGOSH YES! I've always wanted to do this!!!!! pinning it for later =)
ReplyDeleteI love your tutorial here!!! I have finally been trying my hand at stamping, after buying lots & lots of inks, stamps, etc., to actually do it! (and now I find out that I still don't have the right colors of papers to match the inks, to match the embossing powders - you know how it goes, I imagine!) Anyway, I was just hoping you would tell me what exact colors of inks and embossing powders you used. Also, the name brand too if you don't mind. It seems like I have four or five golds, but none are exactly what I am looking for, but yours DOES!!! Also the color of blue ink is pretty too. And if you wouldn't mind telling me what your clear powder was too. If you wouldn't mind sharing that information, I would be ever so grateful! If possible, might you be able to email me back? I haven't been keeping up with my blog much, and it seems like it doesn't let me know if someone has commented! I would surely appreciate your help!
ReplyDeleteThanks,
And Hugs from Michigan,
Diane
This is great, thanks for sharing! I'm definitely going to buy these tools & try myself! Have you ever used white ink + clear powder for a blind emboss look? I'm going to try it...thanks again!
ReplyDeleteThis is pretty cool. I will try this method tomorrow. It definitely will put my creativity on another level. Thanks!
ReplyDeleteVery pretty!
ReplyDeleteDon't you love the Paper Source? I think their cards and envelopes are the best - so many colors. The only thing I don't like is I having to travel to the store. I need one in my town, plus how fun to work there a couple days a week? Thanks for the tip about the gold powder. And I second VersaMark love it.
ReplyDeleteI've used dye ink successfully for embossing -- but you have to move very quickly. I use a paper plate and pour the clear powder over the image as soon as I lift the stamp. A less panicky method is to coat the stamp with versamark before inking with the color of choice.
ReplyDeleteI have been looking for this flower stamp you used in this tutorial for quite awhile. Where did you get it and when, and who makes it. Just figured out how to get to this tutorial. Like the good job you did, clear and concise. Also the tips you gave were very good.
ReplyDeleteputting white card stock on top of news paper always causes ink smudge from the newspaper to appear on the back of the white cardstock...so, don't use newsprint. heating the embossing powder with a heat gun always causes the cardstock to curl/raise so I weight it down with paper weights or even use clothes pins to pin the cardstock down to another cardstock underneath. also, you may want to fix the typo to read 'stamped image' instead of 'stamp' as someone may think to pour embossing powder onto their stamp which is a bad idea..
ReplyDeleteThank you for showing that technique. Guess I thought if you was going to emboss , you had to do it all at one time. Didn't think about using different colors either. very beautiful.
ReplyDeleteThis comment has been removed by the author.
ReplyDeleteThat flower colored stamp looks good and it's easy to make designs on card. We offer custom metal stamps. contact us for details.
ReplyDelete