
So we got the bed, and I even found some beautiful bedding at Target. In fact, I secretly wanted to steal it for my own bedroom it’s so pretty!

But alas, I restrained, and moved on to the headboard.
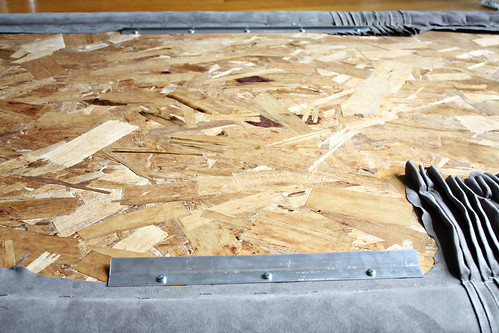
I had always planned to make my own padded headboard for the day I finally got a second bedroom. I have seen them a million times on DIY/Home shows, and for the price you just can’t beat it! So I took some measurements, hopped over to Home Depot to buy some wood for my base (I used composite board), and then got the fabric and batting to accomplish what I pictured in my head.
And now with all the background info… away we go!
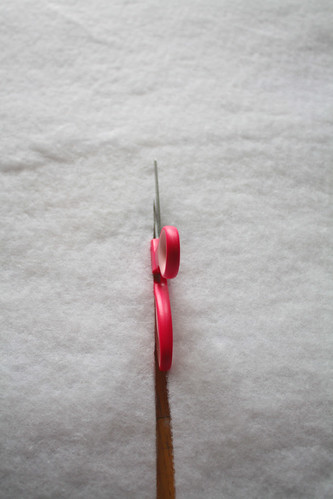
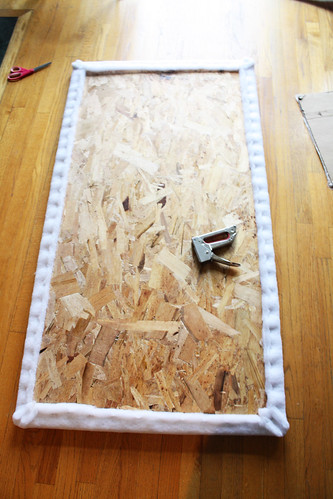
Assuming you’ve had your wood already cut to size by the helpful people at the hardware store, begin by cutting your batting to be a couple inches bigger in width and height than the board.
Next, use your staple gun to staple the batting to the board.
I highly recommend you name your staple gun. It’s a super handy tool that can be used for so many fun projects. She deserves a name. Mine is named Sheila. Sheila the staple gun.
Ok, back to the project!
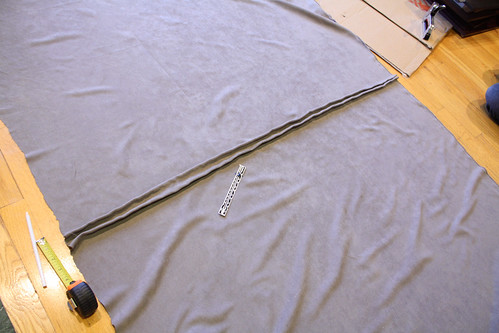
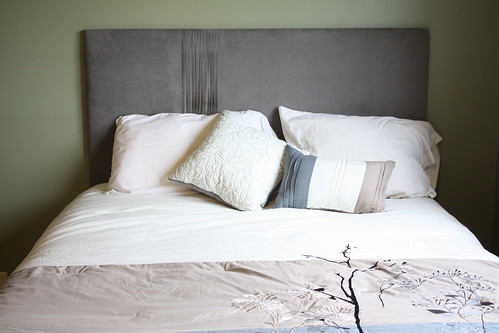
Now grab your fabric. I used a nice, soft microsuede in a lovely gray color.

At this point, if you just want a classic and simple fabric-covered headboard, you can just cut the fabric to be slightly larger than the batting-covered wood board, staple it down just like you did with the batting, and you’re done.
But, if you’re like me, plain is just so… plain.
Before undertaking this project, I thought long and hard about this part. Buttons! No… multiple fabrics! No… Piping! No….
Pleats!!
You see, there’s this tiny little pillow that comes with the bedding set which has vertical pleats on it. It’s very cute. I decided I wanted to tie in those pleats with some pleats in the fabric on the headboard. Sounds easy enough!
Ok, here’s where we get to the confession part of the post.
I have a wonderful, nice, super-awesome sewing machine that I received as a wedding gift from a wonderful Aunt and Uncle over two years ago.
Confession: I hadn’t ever used it until this project.
Don’t get me wrong – I grew up sewing; I know perfectly well how to sew. I also enjoy making things with a sewing machine. It’s just that, up until this point, I didn’t really have a very good reason to break it out. I didn’t have anything that needed to be hemmed, I didn’t have a pillow that needed to be fixed, and the place we were living in already had curtains. So aside from getting really ambitious and making my own clothes from scratch, I didn’t really have an immediate need to whip it out. Also, trying it out involved reading directions since I had only ever sewed on one machine in my life (my mom’s), so that was even more of an excuse to put it off.
But it was time. The sewing machine needed to make its grand debut!
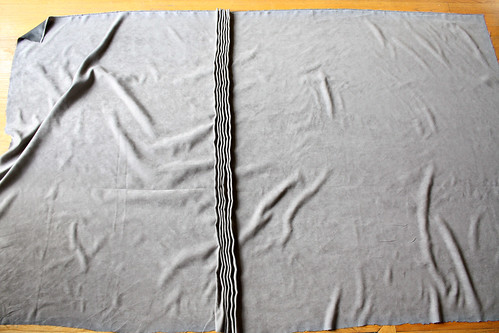
I began the pleats by measuring, marking, and pinning a single 1-inch pleat, and sewing it. Then I did another, one inch from the first.
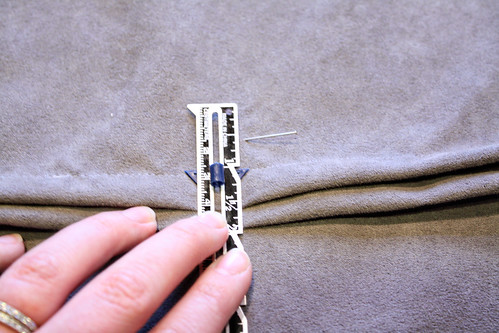
Folded in half, that equals a half-inch pleat each.
Problem is, such precise measuring, pinning, and sewing is necessary when you’re trying to accomplish perfectly parallel lines. It’s also remarkably time-consuming. So after a couple hours, I got to here:
It was just about time to head to dinner, and I was starting to go cross-eyed. I think even Simon had had enough for the day.

The next morning, my friend and I woke up and tackled the rest of the pleats head-on. And I’ll be honest – each pleat did get easier and easier as I became more comfortable with the measuring, marking, pinning, sewing. Soon enough, the pleats were done!
We then ironed them all down so they would be crisp and uniform.
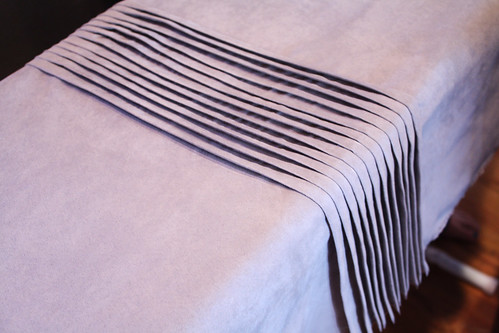
Success!
Now, back to our actual headboard tutorial…
Grab your fabric, and use Sheila the staple gun to staple it all down. I chose to staple past the end of the batting so that it would get a slight padded wrap-around effect and thus lay flush to the wall.
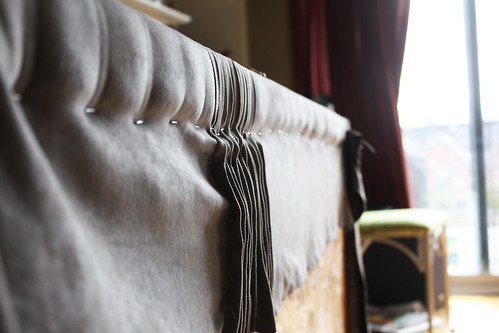
Trim all the excess fabric up to the staples. Since I had sewing involved with the pleats, I actually left that part long and just stapled it all down. I didn’t want the sewing to come out at any point!
Next, time to mount the headboard.
A headboard tutorial I had once seen described something called a “Flush Mount” which looked like this weird u-shaped gadget which sort of locked into place. The idea is that you don’t want to just hang it up, because there’s a very good chance that someone will lean up against it, and the slightest shift up could bring the whole thing down upon them. You want this on the wall securely, both top and bottom.
Since the lovely helpers at Home Depot had no idea what I was talking about when I said “Flush Mount” (I even showed them a picture), I had to come up with another plan. I then saw these:

This is a French Cleat. It consists of two metal strips which fit into each other snugly, but are pretty gosh-darn flush. Not to mention the fact that they’re made to hold up to 200 pounds. French Cleats are advertised for hanging heavy paintings/pictures securely on the wall, but I thought they could definitely be used for this! But since I wanted the headboard secured on both the top and the bottom, and I didn’t want it to be able to be accidentally lifted off, I decided to use two: one on the top of the headboard, and one on the bottom installed upside down.
By installing one right-side up on top, and one upside-down on bottom, both the top and bottom would be secured, and I would have to slide it on from the side. That way no one could possibly accidentally knock it off!
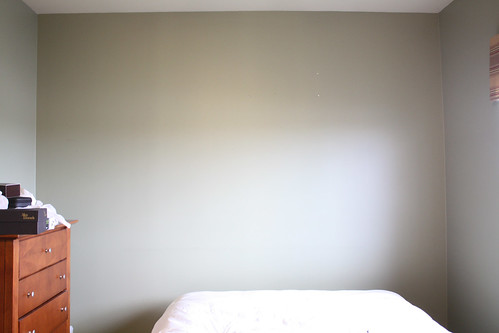
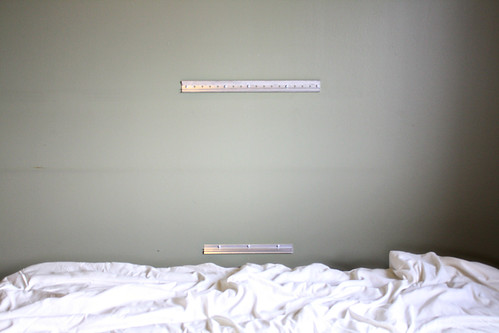
So we started with our blank wall, and began some intense measuring.
We then secured the cleats to the headboard and to the wall, making sure that they were perfectly spaced so that they would match up when sliding on the headboard.
We then slid it on, and it went on like a charm! Perfectly secured on top and bottom, and the batting wrapped around the back meets up perfectly with the wall to hide any view of the cleats.
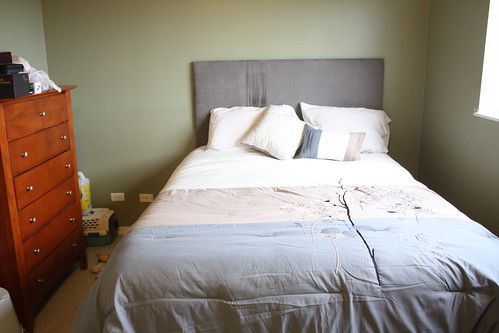
I’m so happy with the result! It goes so well with the bedding, and looks great in the room. And it was all accomplished for less than $100!

I can't stop staring at this headboard. I love it too much.
ReplyDeleteGreat job! Thanks for posting about the French Cleats, did they have that at Home depot?
ReplyDeleteYou girls were busy that weekend! I can't believe how much you got done. And it looks fabulous! I absolutely love the pleats and how they go with the pillow. I laughed that you named your staple gun Sheila!
ReplyDeleteWow! I am so inspired by reading your posts! Very beautiful headboard...and you make it sound so easy. Thanks for your inspiration :)
ReplyDeleteGreat job on your headboard -- you're awesome!
ReplyDeleteI'm going to hire you one day to decorate my house. It's settled.
ReplyDeletePleats?! genius!
ReplyDeleteThat is gorgeous!!! I've always wanted a padded headboard too so now I know how to do it! So glad I stopped by!
ReplyDeleteI just wanted to say thank you for taking the time to visit my blog yesterday & help to make my SITS day awesome!
I really really really love those pleats - what a genius idea!
ReplyDeleteGreat looking bed & project! And I love your crafting assistant! (I have 2 assistants of my own! They make projects very fun!) Thanks for linking up for Friday Favorites last week!
ReplyDeleteHope you'll stop by again this week. I'm celebrating my blogiversary with a giveaway for a Presto Cool Touch Griddle!
I learned much from you that I'm bookmarking this post. I'll make a headboard, no, make it 3 headboards, within the year, and your post is so timely. Btw, I found you over at Under the Table and Dreaming. I'm a follower now and hopefully, you choose to be a follower, too, so we can have more mutual visits :)
ReplyDeleteLove, LOVE, Love the headboard! Looks great. And I am a big fan of naming the tools. ;0
ReplyDeleteThe pleats were an inspired idea and give your headboard a designer look. Well done!
ReplyDeletegreat tutorial !! love the headboard :)
ReplyDeleteOh, my gosh, Katie, I did this exact thing last week. I modified my design from that of Martha Stewart having not seen your post.
ReplyDeleteAfter it was done, however, I found that it faintly smells of the plywood--which is to say it smells slightly of wood glue and pine. Do you have any suggestions for this problem?
Love the pleats! I have made one of these, and I'm looking for ideas to re-cover it-I may try these pleats, it looks so pretty and tailored. Incidentally, we made our own french cleats (didn't know it had a name!) out of wood. Not too difficult, if you have a saw to cut the angles, and that made the project SUPER cheap!
ReplyDeleteThanks for the tutorial!