

The best part about this felt dahlia is that it comes with an awesome tutorial, which you can find here. I encourage you to actually go to that site for the full tutorial, but I'll still share my attempt!
Last night, I grabbed my felt and some scissors.

Then, per the instructions on the tutorial, I cut out my strips: three 1.5" strips, two 1.25 inch strips and one 1 inch strip. I then laid them out nicely to take a picture, and by the time I put my camera up to my eye, someone decided to lay right on them!
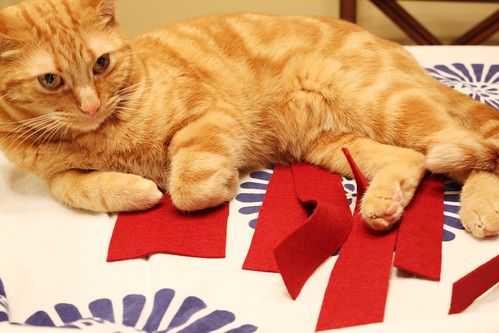
So if you want a pretty picture, you'll have to go to the original tutorial.
I then began to cut out the squares, and subsequently the petals.
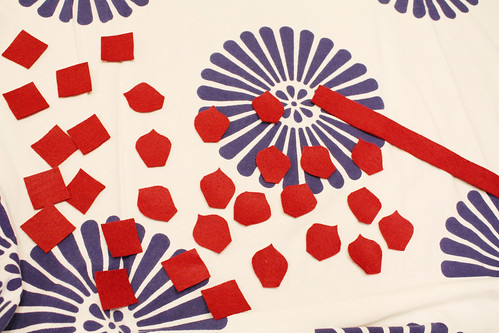
And you know what? 30+ squares then 30+ petals take a really long time to cut out. By the time I reached this point in the flower, it had been an hour and a half and it was 10:30pm. So instead of venturing into the assembly part of the flower, I called it a night and started again after dinner tonight.
So here's where I differed a bit from the tutorial: instead of using FabriTac, I used hot glue. Why? I didn't have FabriTac. Simple as that. So I used my hot glue gun to hot glue the base of each petal so it curled around.
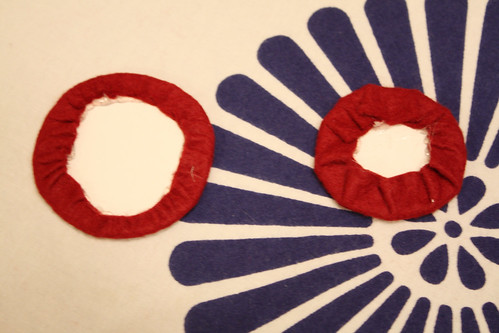
The next place I strayed: the diameter of the cardboard. I originally cut out a 2" diameter circle like the tutorial suggests, but when I hot glued the 3.25" felt circle around it, it looked nothing like the picture. I then decided to do a 2.5" diameter circle instead. I'll let you be the judge, but I definitely think the larger circle looks much more like the picture in the tutorial.
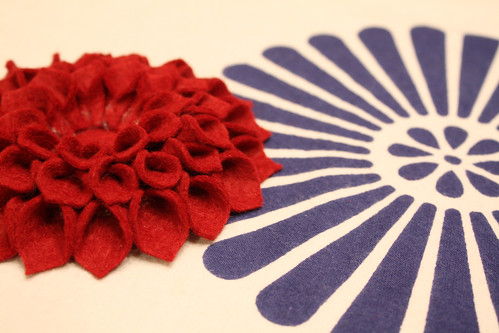
Once I had my base ready, I moved on to the petal assembly. Using a spot of hot glue on the base of each petal, I moved my way around the circle, gluing them all down as close to each other as possible. I ended up needing 2 more petals of each size than I had already cut out, so I had to make some more. I think I put my petals closer together though than she does in the tutorial. Here's the progress after the first outer ring:

I worked my way around with all three sizes of petals, until I had filled all three layers.

How awesome does that look already?!
I then needed to do the center. This part also took me a long time, because I didn't have pinking shears and thus had to slowly and carefully cut a uniform wavy edge around the circle for the center as well as the strip that gets all coiled up. But in the end, it was completely worth it, because it put the finishing touches on my fantastic dahlia!

Though I didn't end up putting the picture pocket nor the pin on the back, I will probably end up finding something to affix this to soon! I'm thinking maybe a purse? Haven't decided yet, but wherever it goes I will display it proudly! I think it turned out so great, and was totally worth the hours it took to complete!

You did an outstanding job. It's beautiful! I love it when the fur babies decide to "help". My dog feels the need to inspect my projects.
ReplyDeleteWow - I am very impressed. It is truly beautiful!
ReplyDeleteI would like to say I will give it a go myself but I'm not sure I actually will! If i do, i will let you know..
Visiting you from Australia via New Friend Friday!
Found you on New Friend Friday! I too love Mod Podge...Your flower is beautiful. The picture of your cat on top of the project is perfect!
ReplyDeleteYour cat and my cat have a lot in common : ) He loves to craft with me and make toys out of all my craft supplies!
ReplyDeleteAnyway, this is amazing! You've got some patience to create something so detailed! It looks gorgeous!
This flooks so good, I am going to have to make some!
ReplyDeletewow, that is gorgeous! dahlias are my FAV!! i think it would be so cute on a purse or on a pillow. love it, saving for later :)
ReplyDeletecome take a look at my blog too if you'd like.
I am definitely impressed with the felt flower skills!!!!!! It is very pretty!!!!!!!
ReplyDeleteThat is so beautiful...I love the red flower & your white/blue fabric is YUMMY, too!
ReplyDeleteI'm your newest follower!!
smiles!
www.blackberryvine.blogspot.com
I ran across that tutorial a few weeks back and have been saving it for a rainy weekend. I can't wait to try it! They're sooo pretty.
ReplyDeleteAMAZING!!! i've been wanting to make my dog a collar with a felt flower on it but i've been too intimidated. You've inspired me to try :) i'm visiting from sugar bee's take a look tuesday. come by and visit my page, i'm new around here :)
ReplyDelete-Jackie
http://jaclyndesigns.blogspot.com/
VERY pretty. Thanks for linking to FTF!
ReplyDeleteLove this! I can see it would be a lot of work but it turned out awesome!
ReplyDeletelove these! im featuring you next week at MMM :)
ReplyDeleteWow, quite a process there....but very worth the time...it's is so very cute! thanks for sharing at It's Party Time Thursday at PonyTails&FishScales!
ReplyDeleteLove this! Theresa
ReplyDeleteThose are some of the prettiest felt flowers I've seen out there. Love 'em! Thanks!
ReplyDeleteThis is so beautiful! I'm in love with felt flowers, and I think I will make this one my next challenge!
ReplyDeleteJo-Anna
This is gorgeous! Thanks for the great tutorial! I featured you over at my blog today!
ReplyDeletehttp://jen-simplyliving.blogspot.com/2011/01/stuff-i-like-sunday-1.html