
And that someday just happened to be this past weekend!
This past weekend, Chris flew home to AZ to hang out with his parents, and my mom flew here to hang out with me. A pretty good trade, I think! When I was thinking of things for the two of us to do, the filing cabinet overhaul suddenly *popped!* into my head. Conveniently, Sunday was supposed to be the only day with bad weather, so it'd be perfect to have an indoor project! So on Thursday, she and I went to Blick (where I had a gift card from my birthday, courtesy of two awesome friends), and picked up some paper and matte Mod Podge.
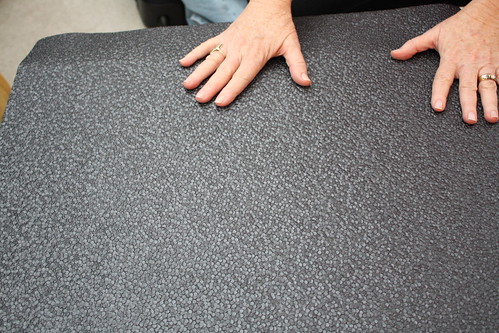
We definitely had a hard time picking out the paper; initially, I wanted to go with a pattern or a color or something, but since we're not currently in a very long-term residence, and someday I would like to have flexibility with a room, I didn't want to box myself into something I'd have to work a room around. So we ended up finding this great textured black paper. It gives just the amount of visual interest to look awesome, but won't be the center of attention in a room.
Ok, now that we've got all the background out of the way, here we go!
Filing Cabinet Overhaul: Mod Podge Style
Start by taking everything out of the drawers, and wipe down the whole thing with a damp cloth. It's very important to make sure everything is clean so the Mod Podge will adhere well.

Then remove all the handles and the lock.

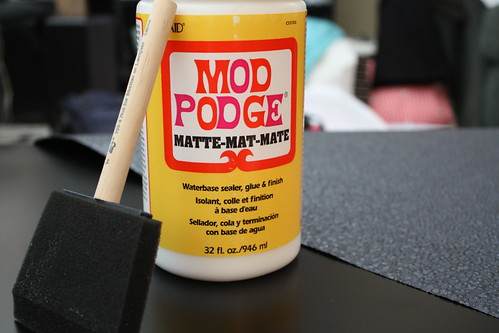
For the next step, you'll need the Mod Podge, a large sponge brush, and the paper.
Cut pieces of the paper for the fronts of the drawers with at least one inch extra on all sides for folding over. Then brush some Mod Podge on the drawer...

...and place the piece of paper on top, rubbing it down to get all the air bubbles out and to help it stick. I did this to all the drawers, and set them on end on the table to dry.
While those were drying, Mom and I moved on to the sides of the cabinet.
Since we did both sides in succession, one had to be face up, so we had to be extra careful to rub that one very well. Mama hands!
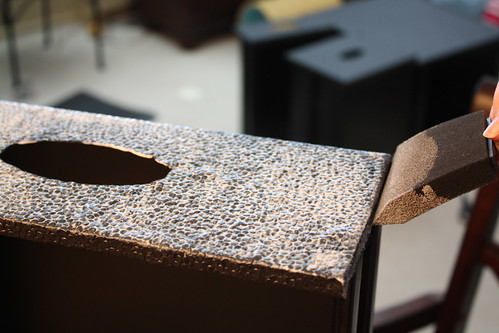
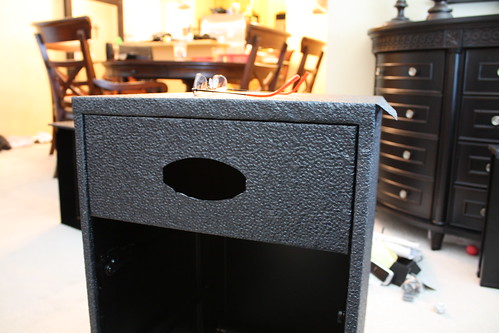
Once the drawers were dry (1 hr), we took a little razor blade and cut out the hole for the handle, and trimmed the edges to be long enough but not too long.

Then Mod Podge on all the edges, wrap the paper around, and hold down firmly until it adheres. Since this was a pretty thick paper, it was trickier than normal to get it to stick and stay. This is where the four hands really came in handy.
We did this to all the drawers, and to the cabinet, and let them all dry for a few more hours. The longer you allow to dry, the better.
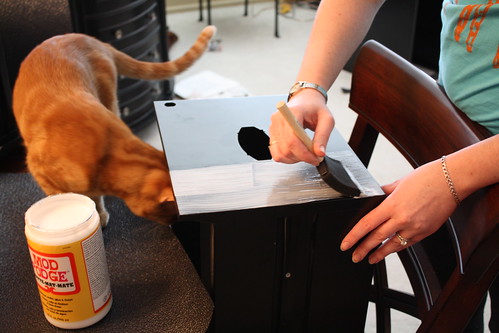
Then, we coated the outside.
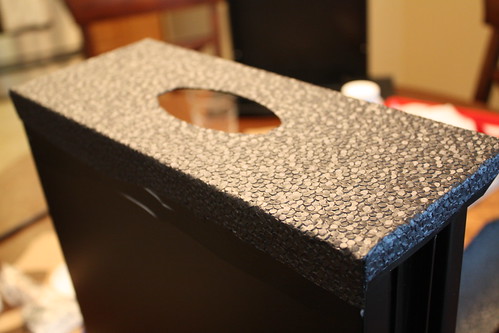
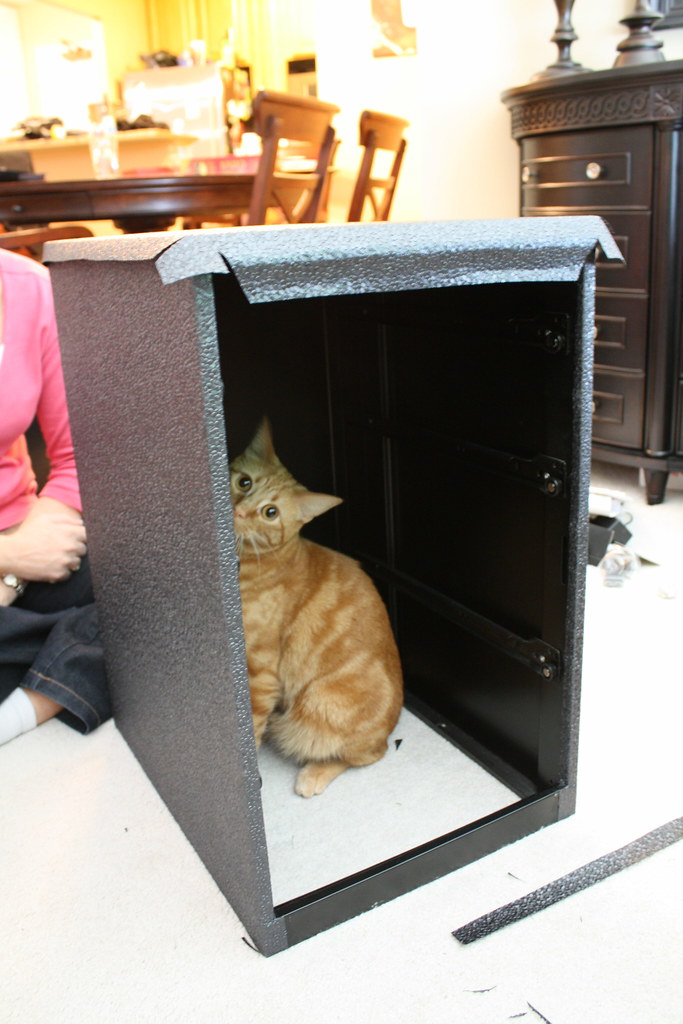
Finally, once the sides were dry, we added the layer of paper to the top of the cabinet. Can you tell Simon really enjoyed this project?
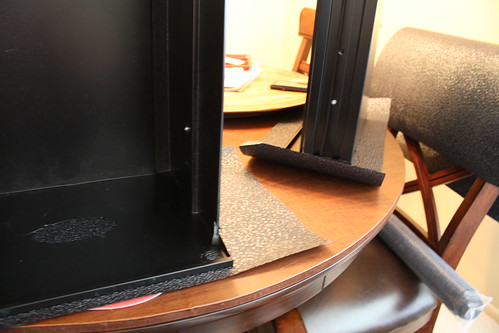
I'd like you to take note of the trimming we did at the edges there so it would fold nicely all together and cover everything. Taking the time to do things like this will result in a much cleaner-looking final product.
We knew we had a couple more coats left to do on the outside, but had to put just one drawer in to get a preview of what it would turn out like.
We let everything dry overnight with just the one topcoat on. Then the next day, I added one more coat all over to give it more protection and strength. Usually I do more coats than this, but since it was a textured paper, it was catching much more Mod Podge in all the little grooves than smooth papers do, so any more coats and there would have been too much dried glue in some of the divots.
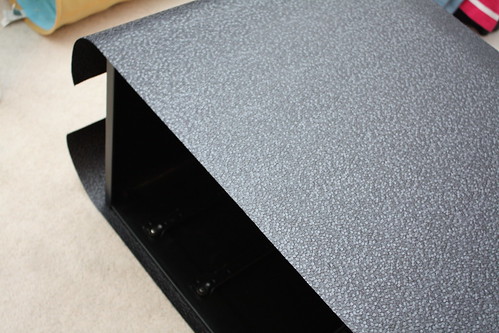
I let that next coat dry overnight, aaaaand that brings us to today! I popped the handles back in (which actually took about 30 minutes and every bit of strength I had, as well as some grunting and swearing), and screwed the lock back on, and ta da!

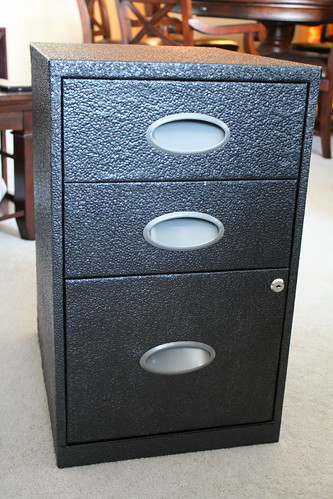
It was a fun mother-daughter project that turned out great!

This is so cute! I'm posting it in the MPR Facebook group!
ReplyDeleteWow that looks great! What kind of paper is that?
ReplyDeleteThanks! And Cari, I'm sorry but I don't know what kind of paper it is. It was in the decorative paper section of Blick, and they had it in multiple colors alongside lots of other interesting papers. I tried to look for it online but their website is confusing!
ReplyDeleteI loved working on this project with you! Thanks for a fun weekend!
ReplyDelete:o)
Very cute! Great filing cabinet upgrade! And love the cat pic..our cat Doodle gets into whatever he can...esp. boxes! Thanks so much for linking to my party...hope to see more of your projects next Thursday!
ReplyDeleteHave a great weekend!
tere
Very neat! I love the subtle paper you chose. I'm not a fan of makeovers like this where it ends up being zebra stripes or something! LOL
ReplyDeletelove it! I can't imagine where my crafting life would be without Mod Podge!
ReplyDeleteVery cute and clever! Love the subtle textured paper, very chic. Now I'm looking at my filing cabinets with a new eye.
ReplyDelete