One of my favorite parts of the Christmas season is all the peppermint flavoring flying around. From peppermint mochas to peppermint ice cream, it's just such a wonderful flavor that evokes the holiday feeling!
This year, to get ready for the flood of Christmastime following Thanksgiving, I actually baked a batch of peppermint meringues before the big turkey day, since they hold so well. And boy, did these turn out wonderful! In fact, my husband couldn't stop raving about how they are his favorite holiday baked good that I make. And I make them small enough that he can have 2 or 3 at a time! I hope you give them a try!
Peppermint Meringuesadapted from Mark Bittman's basic meringue recipe3 egg whites, room temperature
3/4 cup superfine sugar
1/2 tsp vanilla extract
1/2-1 tsp peppermint extract (I'll explain this later)
Red food coloring (optional)
Dark chocolate
Preheat the oven to 175 degrees. Line two baking sheets with parchment paper.
Use an electric mixer (believe me from experience, a good quality mixer is necessary with meringues!) to beat the egg whites on medium until they begin to foam. Next, add the sugar very slowly as the mixer is still on medium. Once all the sugar is added, crank it up to the highest setting, and let it whip for a couple minutes until the whites are no longer shiny.
Then, turn down the power to medium low, and add the vanilla and peppermint extracts. I chose to use 1 tsp of peppermint extract for these meringues, which makes them pretty potent, but that's because later we dip them in chocolate, so you want a strong peppermint flavor to stand up to the chocolate flavor. If you're not going to dip in chocolate but rather plan to just throw on some sprinkles or something, I would suggest only using 1/2 tsp of peppermint extract.
Since these are peppermint flavored, I also chose to drop in a little red food coloring to give them a pretty pink color, but you could leave them white, or even get creative and do two batches of red and white or even green and red!
Once it's all mixed together, either get out a piping bag (which I don't have), or a ziplock. Scoop all the meringue fluff in (and if you're using a ziplock, cut the end off), and pipe the fluff into little circles on your parchment-lined baking sheet.
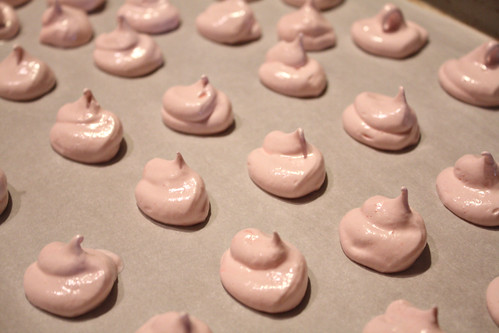
I chose to make mine rather small so you can just pop them in your mouth!
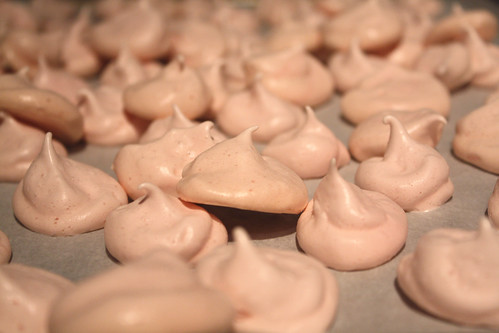
Next, put the baking sheets in the oven, for anywhere from 2-4 hours. Yup, you heard me. HOURS. There's a reason why meringues are often also known as Forgotten Cookies! The key in telling when they are done is that they will finally have a dry, matte appearance on the surface, instead of the slightly glossy surface they went in with. If you're having a hard time getting them to finish, you can bump up the heat to 200 or so, but be careful not to go too high. Then you'll just have chewy egg whites!
One cardinal rule:
DO NOT OPEN THE OVEN WHILE THE MERINGUES ARE IN THERE. PERIOD. They will fall and turn into sad, limp cookies that you will throw away.
Once you think the meringues are done, turn off the oven, and let them sit in there as the oven cools naturally for 1-2 hours.
When you're done, they'll look like this!
Now it's time for the chocolate.
Mmmmmmm.....
Choosing your chocolate here is very important. I chose to use a high quality dark chocolate, because it goes SO well with the peppermint. The problem though is that it melts
incredibly easily, so it's not good for times where the cookies need to travel or be eaten by little messy children. If you need the chocolate not to melt as quickly, I suggest chocolate bark.
So once you have your chocolate decision made, melt it down and dip the bottoms of the meringues in. Set them nicely on some wax paper to cool.
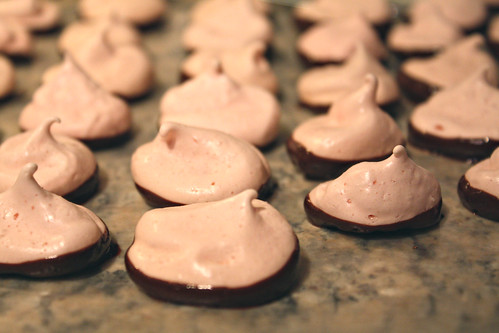
If you have the space for it, you can stick them in the fridge to speed up the cooling process.
Then there you have it! A sweet, pepperminty, chocolatey treat! And the best part is they last FOREVER in a ziplock in the fridge! Unless, of course, you have a husband who can't resist!


