Showing posts with label Silhouette. Show all posts

Monday, May 30, 2011

Silhouette Tutorial: Make the Font You Want

When I was making my plant labels for all my potted veggies, I was playing around, trying to find just the perfect font for my basil.

There's a fun font called Zebra (you can download it for free here) that I love, and that's what I was leaning toward using. But the "s" just wasn't exciting enough. So I used the Silhouette software to make it exactly how I wanted!

For this tutorial, I'm going to first show you the finished product, and keep it in the bottom corner of the screen so you can see how we get from beginning to end.

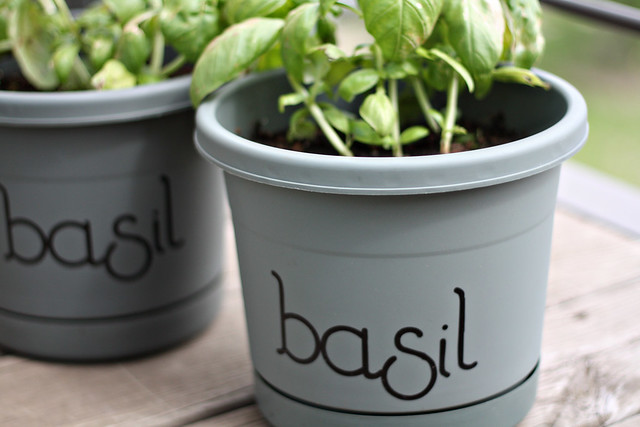
So to start us off, here are my finished pots:
basil


Now let's begin!

Basil 1


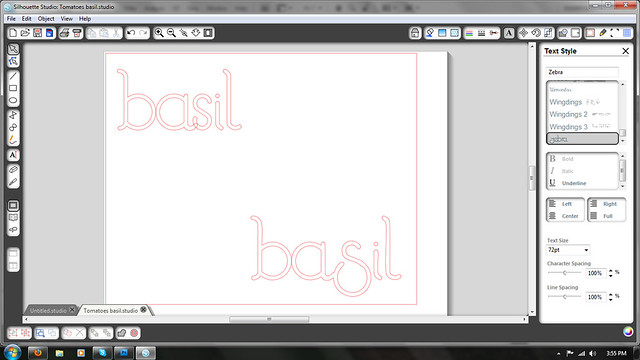
The top left word is the word "basil" typed in Zebra font with no editing. The bottom left word is our end-goal. I'll leave it there throughout the tutorial so you can keep your eye on the final product.
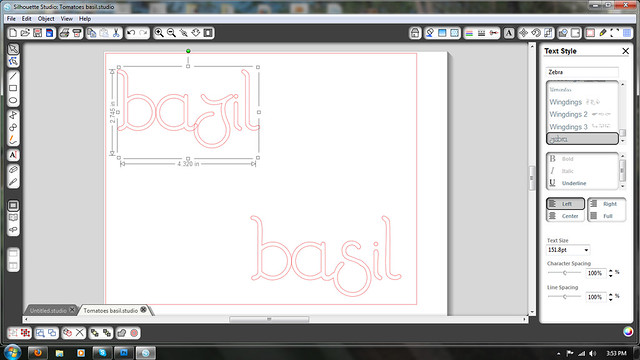
Basil 2


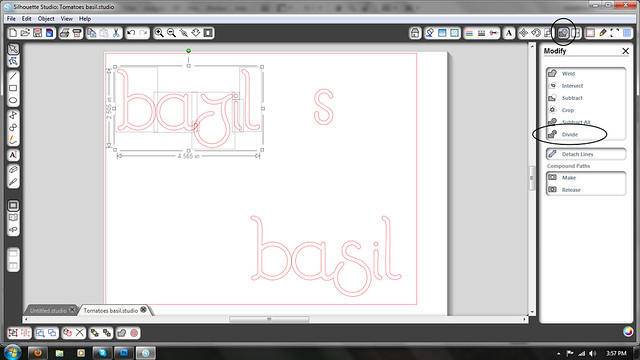
I have now misspelled basil to say "bazil." The reason I did this is because I love the big fat curve of the letter z, and want that as the base for my letter s.
Basil 3


Now click the Modify icon in the upper right toolbar, and click Divide. This will separate all the letters in "bazil." While you're at it, type an s off to the side. We'll use this for the top of our modified letter s.
Basil 4


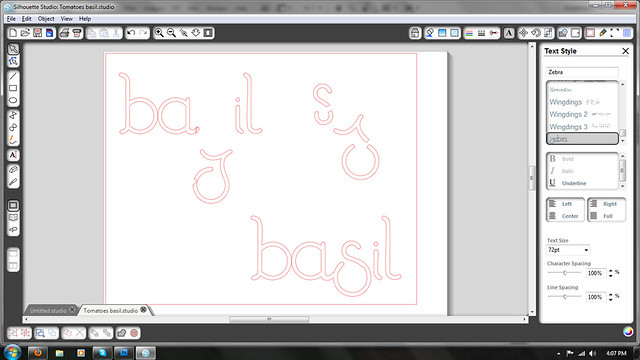
You'll now pull down the letter z away from the word "bazil." You'll see because it overlapped with the a, there is a notch cut out of the z. That's why we can't use this. So type another free-standing z off to the side, near the s.

Then use the Knife tool (on the left vertical toolbar) to cut the top off the s, and the bottom off the z. Separate the pieces.
Basil 5


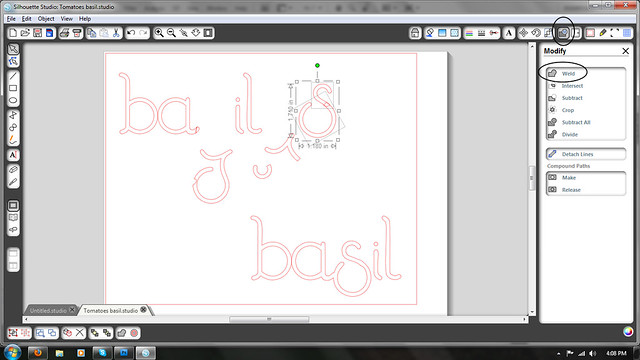
Now move the top of the s and the bottom of the z together and overlap to conjoin them. Then click the Modify tool, and select Weld. Welding will create one continuous letter. Since the new s looks a little crooked, grab the rotater at the top of the conjoined letter and rotate it counter-clockwise slightly to straighten it out.
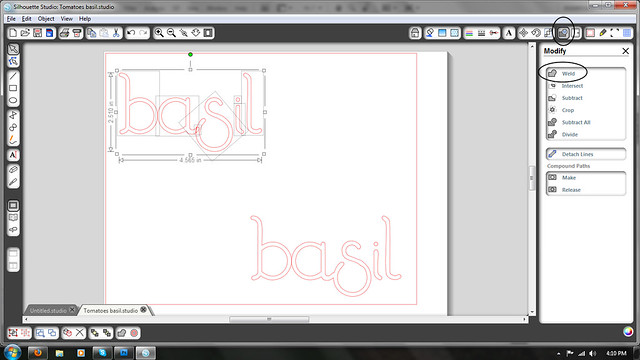
Basil 6


Now just delete the notched z, and the remaining parts of the cut-up s and z, and slide the new s into place.

Finally, select all of the word, click Modify and Weld, and you have a perfect new label with the font you want!
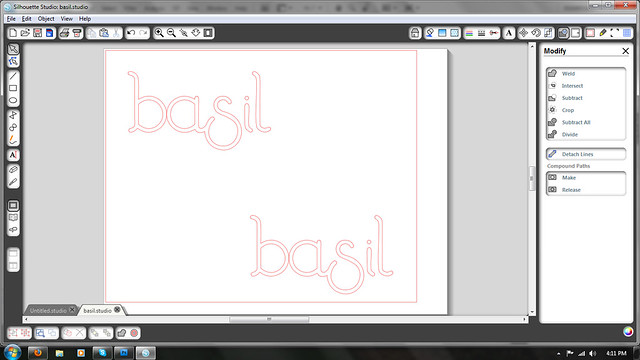
Basil 7 silhouette finished


I then applied it directly to my basil pots, and they look great on my porch. And the font is so much more fun now!

basil

Thursday, May 19, 2011

Plants and Pots

I finally got around to Home Depot the other weekend to pick up some vegetable plants for my deck. I picked out some great herbs and veggies, and threw in some pots as well. Since I was starting from scratch and didn't want to break the bank, I bought some plain plastic pots for all the plants.

Of course, when I got home, I knew they were just way too plain for my taste.

I thought about using a little Mod Podge to spruce them up, but I didn't have any papers that would go well with the army-green color of the plastic.

Then in a fabulous *a ha!* moment, I turned to my Silhouette!

Instead of using the silly little plant markers in the soil, I decided to cut out some adhesive vinyl to stick on the sides of the pots. By using the adhesive vinyl, I can also remove them at the end of the summer and that way I can relabel again next year!

So I designed and cut out my labels. For my step-by-step instructions on using the transfer paper, go here.

Silhouette labels


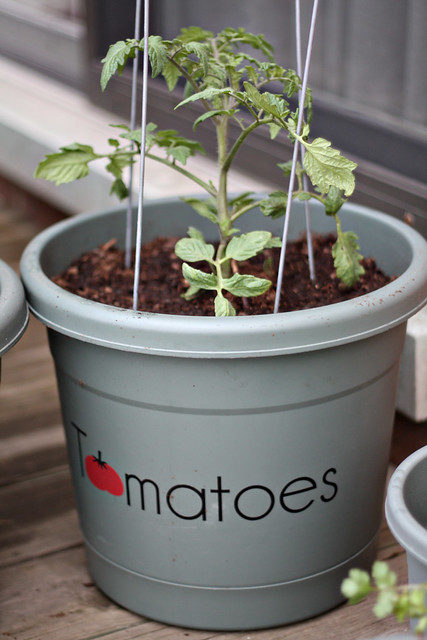
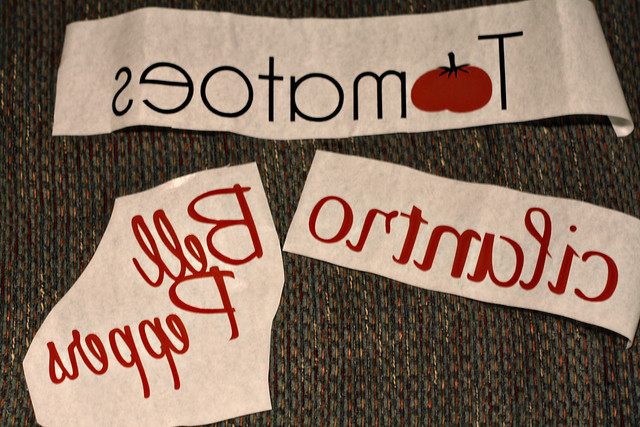
I actually cut out the word "T matoes" in black, and the actual tomato in red, then combined them on the transfer paper so they would be applied together.

Then I stuck them all on, peeled off the transfer paper, and ta da!

Tomatoes


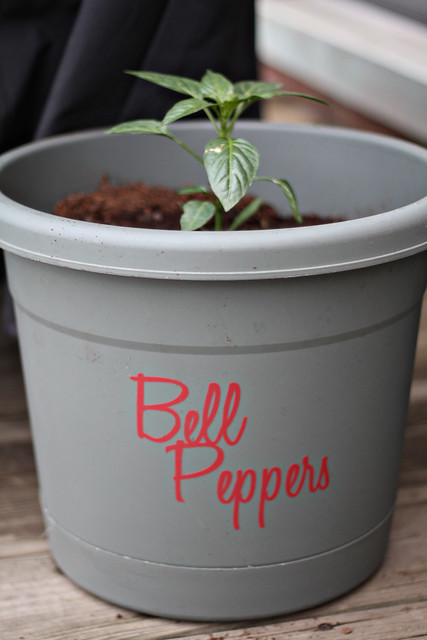
Bell Peppers


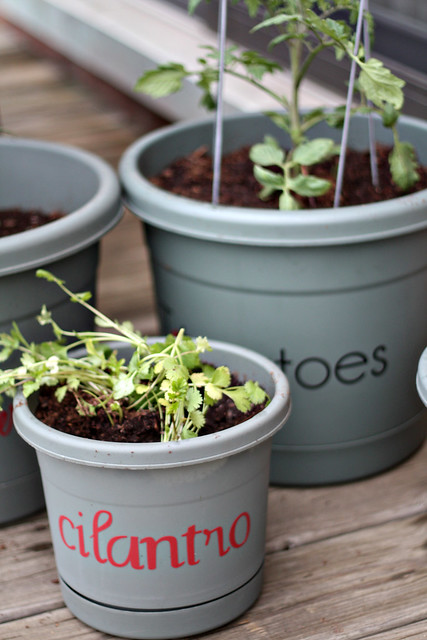
Cilantro


Perfect labels, and easy to remove and change for whatever I decide to grow next year!

Now here's hoping these little guys actually survive!

Monday, February 7, 2011

DIY Vinyl Wall Art

Courtesy of Snowpocalypse 2011, I was stuck indoors for a few days in a row and starting to go a little stir crazy. In an effort to keep my sanity, I decided to tackle the empty wall in my kitchen!

This is the empty wall that has previously housed holiday-themed decor:

edited Fall Leaves in Frames (2) vinyl 2


I'm not a big Valentine's Day person (I know, I know), and I wasn't sure if I wanted to do a Spring theme, so I thought maybe I would do something a little more year-round friendly.

So I got out the Silhouette and some black adhesive vinyl, and started on my new wall decal!

blog Bon Appetit wall decal (2)


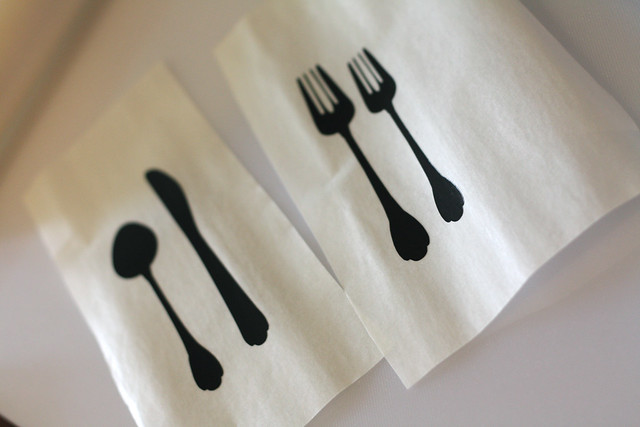
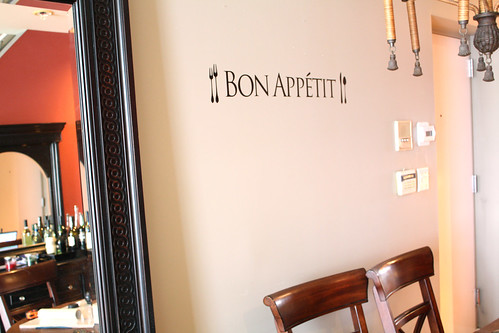
I decided to go with the simple words "Bon Appetit" with silverware on each side. Simple and classy, but cute.

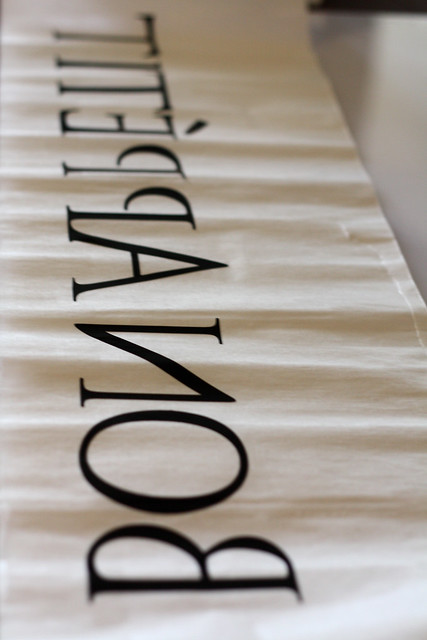
After I cut all the vinyl pieces (which I had to do in batches because the machine can't handle such a long strip), I pressed them with books for a few hours. They were so very curled from being tightly rolled up that this helped make it much more manageable.

blog Bon Appetit wall decal (4)


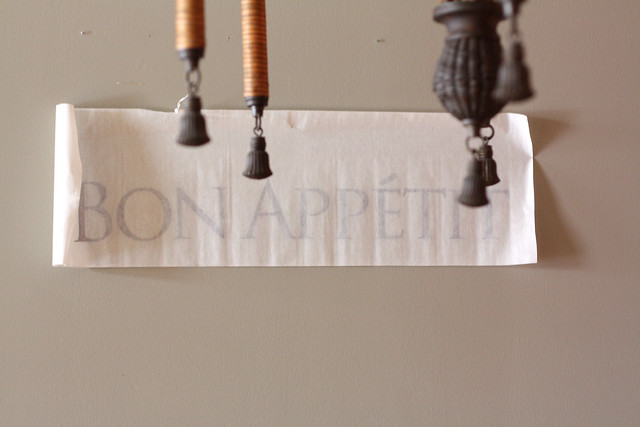
Once the pieces were ready, I peeled off the excess vinyl around the letters, then lined it all up and put it on the transfer paper. This was my first time using the transfer paper, but it worked like a charm! Though I'm pretty sure it's just really wide masking tape.

blog Bon Appetit wall decal (13) blog Bon Appetit wall decal (19)


Then I measured the center of my decal and where I wanted it centered on the wall, and stuck just the top of the transfer tape directly onto the wall. I did this so that I could take a moment to make sure it was level by lining the level up against the top edge.

blog Bon Appetit wall decal (16)


Once I was sure it was straight, I pressed it all down and slowly peeled back the transfer tape, leaving my wall newly adorned!

blog Bon Appetit wall decal (39)


I just love it, and also love how easy it was to do, and how easy it will be to change!


Have you ever done any DIY vinyl wall art? I'd love to see pictures!

Tuesday, October 26, 2010

Glass Etched Liquor Bottles

I have exciting news:

I bought a Silhouette!

It’s true, I finally broke down and bought one. I’ve been planning projects in my head for months, so with Christmas fast approaching and thus upcoming Christmas presents to be made, I bit the bullet and bought one.

I know, I know, I wanted a Le Creuset dutch oven… So that is now put on hold. The sole reason why my lovely Silhouette beat out the Le Creuset was because I am still decorating my new home, and the Silhouette would play a key role in that. If I bought the Le Creuset instead, my home would remain unfinished.

So when I ordered my Silhouette, I ordered a couple other things at the same time for what I knew just had to be my first project:

Adhesive Vinyl.

Glass Etching Cream.

That’s right! Time to do some glass etching!

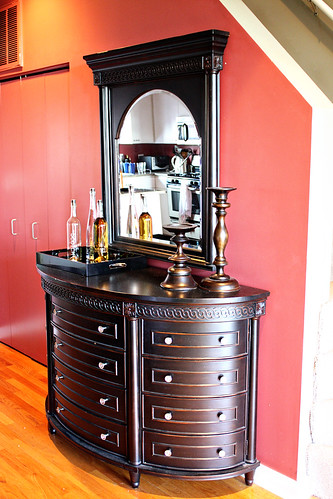
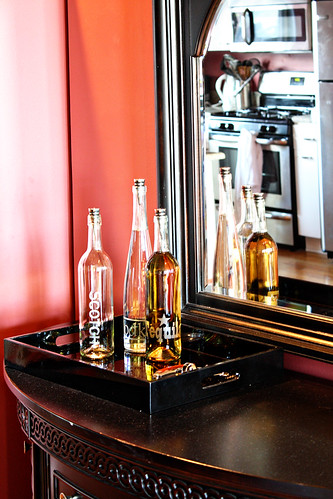
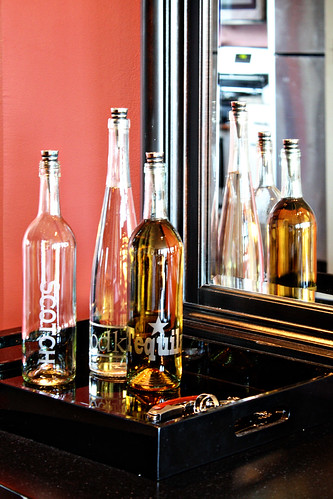
In our kitchen/dining area, we have this striking black demilune chest with a matching mirror above it. It’s really a beautiful piece of furniture. Though it was in the living room at our old place, its new location leant itself well to become a small bar area on top. We bought a black tray, and instead of buying fancy liquor bottles, I decided I should make some myself and customize them by etching the glass. Not surprisingly, we have a wine theme throughout the house, so as a twist on the usual liquor bottles, I saved a few different clear wine bottles to use.

Now let me tell you, clear wine bottles are not as common as you might think, so I did actually have to have this planned for a while to get three different clear bottles. But I’m so glad I did, because these turned out fabulous!

So let’s jump in to the project!

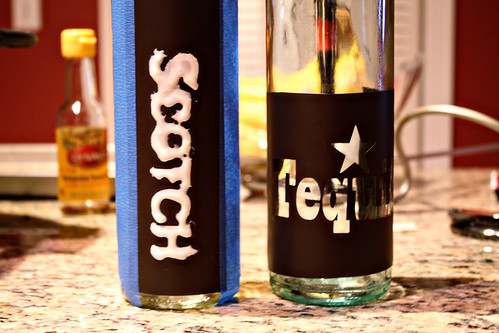
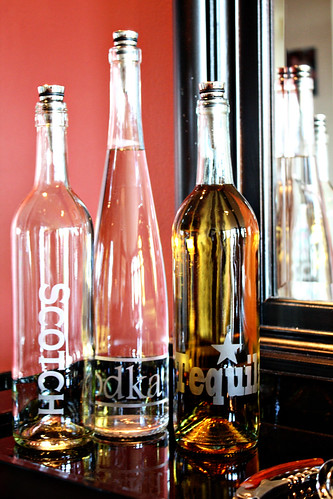
I started by creating in the Silhouette software how I wanted each label to look: Vodka, Scotch, Tequila. I wanted them all to be a little unique, but still appear as a set. Once I had it all arranged, I ran the vinyl through the cutter to get my outlines for the etching cream.

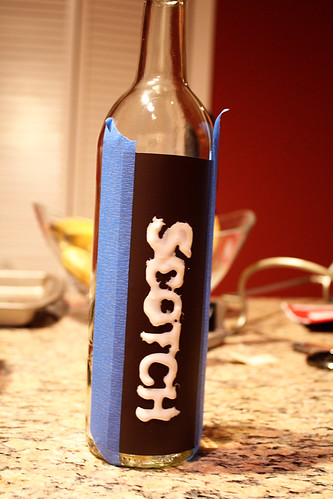
I adhered the vinyl to each bottle (all three thoroughly cleaned) and applied the etching cream.

edited Glass etching liquor bottles (1)


edited Glass etching liquor bottles (2)


I applied two applications of 8 minutes each, and washed off after each application **Note – do not wash this off in a ceramic sink. I don’t have a ceramic sink so I can’t speak from experience, but I hear it’s bad.

This was so easy to do, and the results are fantastic! They look both unique and professional, and no one would’ve guessed I made them in my kitchen one Sunday night with old wine bottles. If you have a cutting machine, you have to give it a try!

edited Glass etching liquor bottles (4)

edited Glass etching liquor bottles (3)

edited Glass etching liquor bottles (6)

edited Glass etching liquor bottles (7)