Monday, May 30, 2011

Silhouette Tutorial: Make the Font You Want

When I was making my plant labels for all my potted veggies, I was playing around, trying to find just the perfect font for my basil.

There's a fun font called Zebra (you can download it for free here) that I love, and that's what I was leaning toward using. But the "s" just wasn't exciting enough. So I used the Silhouette software to make it exactly how I wanted!

For this tutorial, I'm going to first show you the finished product, and keep it in the bottom corner of the screen so you can see how we get from beginning to end.

So to start us off, here are my finished pots:

basil


Now let's begin!

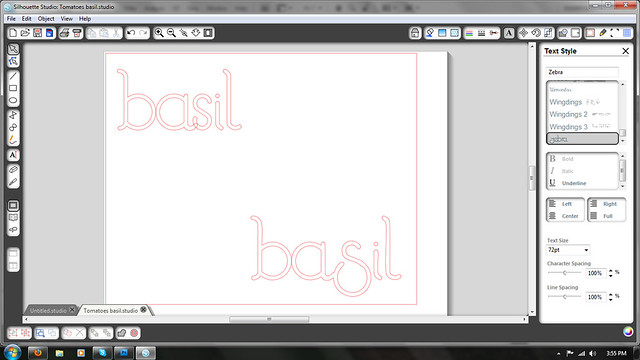
Basil 1


The top left word is the word "basil" typed in Zebra font with no editing. The bottom left word is our end-goal. I'll leave it there throughout the tutorial so you can keep your eye on the final product.

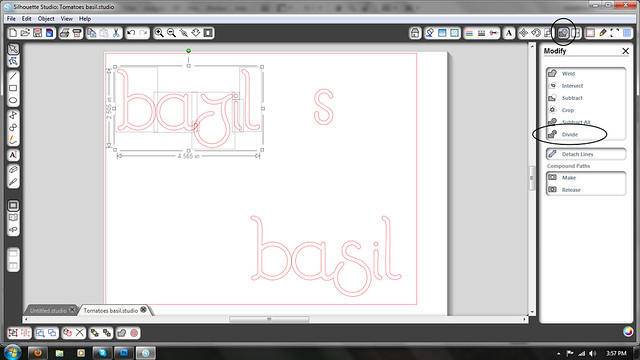
Basil 2


I have now misspelled basil to say "bazil." The reason I did this is because I love the big fat curve of the letter z, and want that as the base for my letter s.

Basil 3


Now click the Modify icon in the upper right toolbar, and click Divide. This will separate all the letters in "bazil." While you're at it, type an s off to the side. We'll use this for the top of our modified letter s.

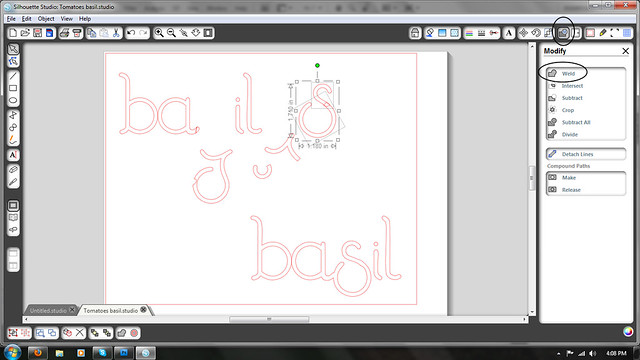
Basil 4


You'll now pull down the letter z away from the word "bazil." You'll see because it overlapped with the a, there is a notch cut out of the z. That's why we can't use this. So type another free-standing z off to the side, near the s.

Then use the Knife tool (on the left vertical toolbar) to cut the top off the s, and the bottom off the z. Separate the pieces.

Basil 5


Now move the top of the s and the bottom of the z together and overlap to conjoin them. Then click the Modify tool, and select Weld. Welding will create one continuous letter. Since the new s looks a little crooked, grab the rotater at the top of the conjoined letter and rotate it counter-clockwise slightly to straighten it out.

Basil 6


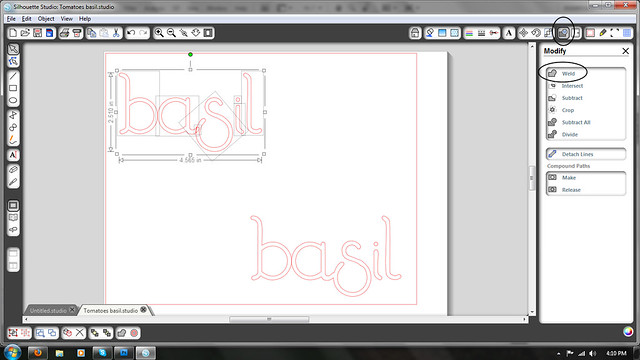
Now just delete the notched z, and the remaining parts of the cut-up s and z, and slide the new s into place.

Finally, select all of the word, click Modify and Weld, and you have a perfect new label with the font you want!

Basil 7 silhouette finished


I then applied it directly to my basil pots, and they look great on my porch. And the font is so much more fun now!

basil

Thursday, May 26, 2011

Life-Changing Homemade Marshmallows

I've been avoiding it for over a year now, but it's time.

It's time that I share my secret recipe with you.

The recipe that makes people go "oh my."

The recipe that makes people go "how did you...?"

That's right. It's time for the marshmallows.

My brother shared this marshmallow recipe a few years ago, and I thought he was crazy for making his own marshmallows. But being such a sugar addict, I was pretty intrigued. Once I made them for myself, there was no turning back. So be careful, if you make these, you'll never buy the pre-bagged jet puffed ones again.


Basic Vanilla Marshmallows
source

4 gelatin envelopes
3/4 cup water
1 Tbs vanilla extract

3 cups sugar
3/4 cup water
1 1/4 cup corn syrup (Karo)
1/2 tsp salt

Coat a 9x13 and 8x8 pan with vegetable oil or non-stick spray.

Fit a stand mixer with the whisk attachment. In the mixer bowl combine the 3/4 cup of water with vanilla extract. Sprinkle the gelatin over the liquid to bloom (soften).

Marshmallows 1


Add the sugar, salt, corn syrup, and remaining 3/4 cup water to a heavy saucepan. Bring to a boil with the lid on and without stirring. When this mixture is at a boil, remove the lid and continue to cook without stirring until it reaches the soft-ball stage (234-240 F).

With the mixer at medium speed, pour all of the hot syrup slowly down the side of the bowl into the awaiting gelatin mixture. If you have a splatter shield for your mixer, I highly suggest you use it. This is going to whip for a long time and it will definitely splatter, and molten sugar is very hard to clean off counters and cabinets!

When all of the syrup is added, bring the mixer up to full speed. Whip until the mixture is very fluffy and stiff, about 8-10 minutes. Yes, you read that right!

Marshmallows 2


Pour the marshmallow fluff into the oiled pans and pat the bottom to get all bubbles to surface. Allow the mixture to sit, uncovered at room temp for 10 to 12 hours. Place in on a high surface if you have a kitty that loves to lick sugar.

Marshmallows 3


Sift confectioners sugar generously over the rested marshmallow slab. Turn the slab out onto a cutting board dusted with more confectioners sugar.

Marshmallows 4


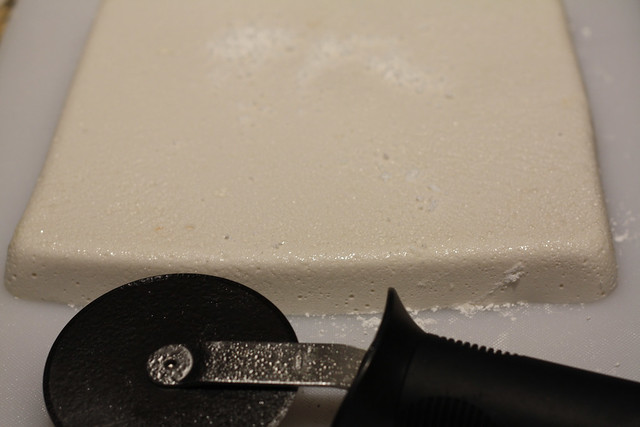
Slice with a pizza cutter into desired shapes. Dip all cut edges in sugar and shake off excess powder.

Marshmallows 5


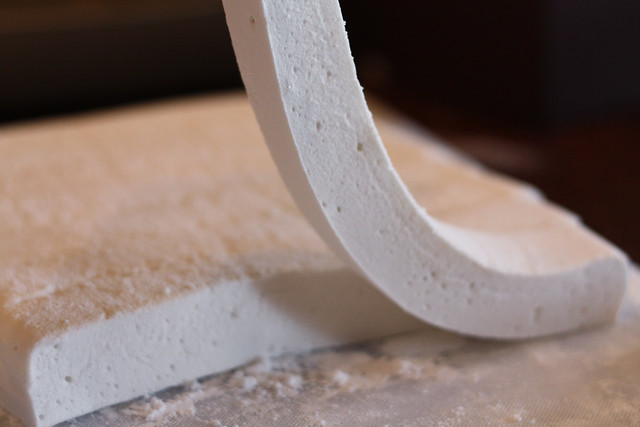
These marshmallows are the softest, most pillowy squares of sugary heaven you will ever taste. And you will never be the same.

Marshmallows 6 (2)


Marshmallows will keep several weeks at room temp in a ziplock, but I'll be shocked if you make it that long without eating them all!

Monday, May 23, 2011

{sponsor love} Sadie of Randomosity

I'd love to introduce you all to a lovely sponsor of mine, Sadie! She blogs over at Randomosity, a super cute blog with lots of fun projects, recipes, and more!

Sadie of Randomosity


Tell us about yourself!

Hi and thanks for having me. :) My name is Sadie. I'm a Mary Kay beauty consultant (marykay.com/sadielankford). I'm a wife and mother to our three beautiful daughters - Jenelle, Gracelynn, and Sapphire - and I work from home so I can be closer to them. I enjoy crafting of almost any type - except sewing. I cannot, for the life of me, master sewing.


Introduce us to your blog - what do you like to share with your readers?

Though my life is pretty rigid and scheduled, my blog is everything but. My blog, Randomosity, has crafts, recipes, and just about everything else under the sun. I like to call it organized chaos. I can never just pick one topic and stick to it, so each day of the week has a different theme and I change them often - but you can always find great recipes and tutorials no matter how much I switch it up! Those are my favs.

Randomosity Pizza Cupcakes


What made you decide to start blogging?

I've been blogging off and on for about 5 years now, but I finally got serious about it a few months ago. I love to teach and inspire, and that is what I use my blog for.


What are some of your favorite projects and recipes?

My favorite post ever is probably my couponing binder. Next, would be one of my e-books (Loopy Bows and Tutus).


If you could have any famous blogger become a follower of yours, who would it be and why?

Martha Stewart, because I love all of her awesome ideas!

BUTTON125


Make sure you hop on over and check her out! And don't forget to say hi!

Thursday, May 19, 2011

Plants and Pots

I finally got around to Home Depot the other weekend to pick up some vegetable plants for my deck. I picked out some great herbs and veggies, and threw in some pots as well. Since I was starting from scratch and didn't want to break the bank, I bought some plain plastic pots for all the plants.

Of course, when I got home, I knew they were just way too plain for my taste.

I thought about using a little Mod Podge to spruce them up, but I didn't have any papers that would go well with the army-green color of the plastic.

Then in a fabulous *a ha!* moment, I turned to my Silhouette!

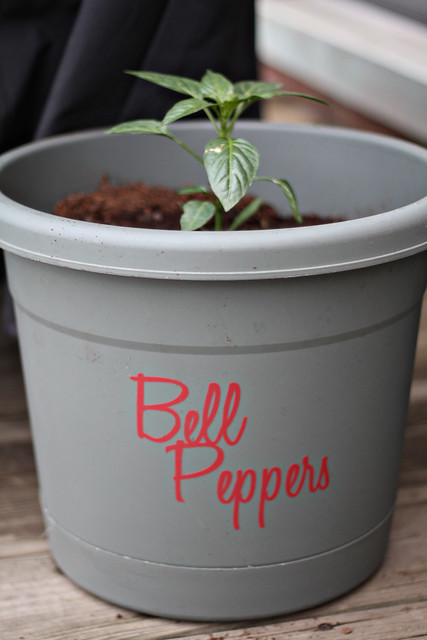
Instead of using the silly little plant markers in the soil, I decided to cut out some adhesive vinyl to stick on the sides of the pots. By using the adhesive vinyl, I can also remove them at the end of the summer and that way I can relabel again next year!

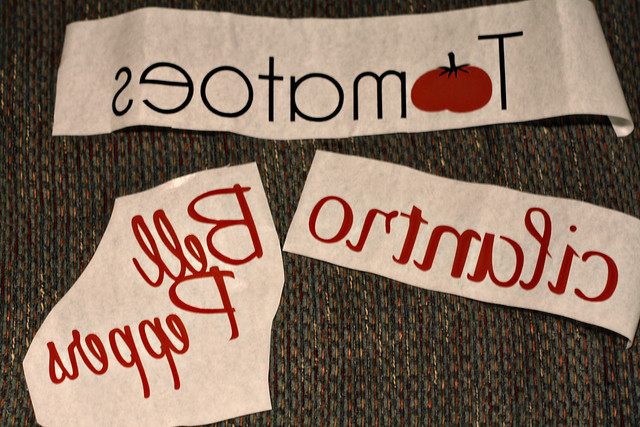
So I designed and cut out my labels. For my step-by-step instructions on using the transfer paper, go here.

Silhouette labels


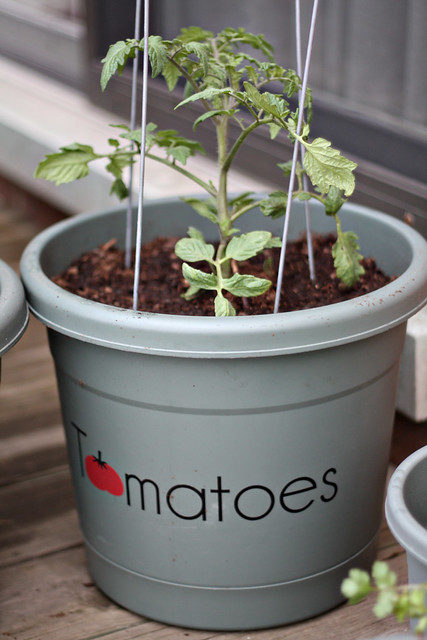
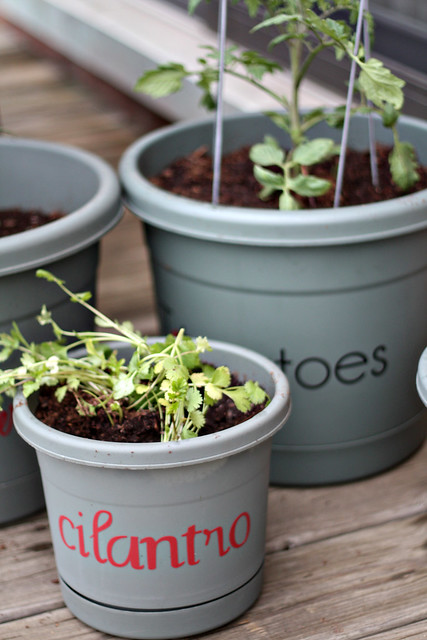
I actually cut out the word "T matoes" in black, and the actual tomato in red, then combined them on the transfer paper so they would be applied together.

Then I stuck them all on, peeled off the transfer paper, and ta da!

Tomatoes


Bell Peppers


Cilantro


Perfect labels, and easy to remove and change for whatever I decide to grow next year!

Now here's hoping these little guys actually survive!

Monday, May 16, 2011

Peanut Butter Marshmallow Bars

The other night, Chris and I had a major craving for some peanut butter rice krispie bars. My mom made the best pb bars, chewy and crunchy and gooey. And while I do have the recipe, I did not have the ingredients. Specifically, I didn't have rice krispies, and we were out of Karo syrup from the last time I made marshmallows.

But I did still have those marshmallows.

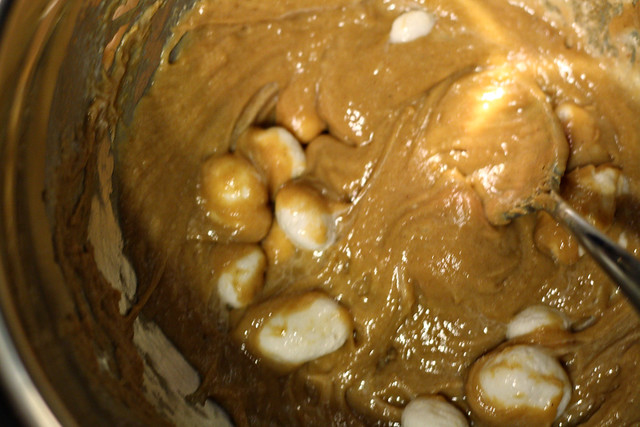
So in a very un-scientific manner, we decided to throw some peanut butter and marshmallows together...

Peanut Butter Marshmallow Bars 1


We cooked it over low heat, constantly stirring to get the marshmallows to melt and blend in with the peanut butter.

Peanut Butter Marshmallow Bars 2


Then we mixed in the next best cereal we had, Multi-Grain Cheerios. We spread it all out in a greased pan (we didn't make enough to fill up the whole pan, but it worked out ok).

Peanut Butter Marshmallow Bars 3


I have to tell you, I was so surprised at how tasty these were! Gooey because of the marshmallows, crunchy from the cereal, and a little extra healthiness from the Multi-Grain Cheerios, these satisfied our craving perfectly!

It just goes to show, if you don't have the right ingredients, just play around with the recipe using ingredients you do have!

Friday, May 13, 2011

Giveaway Winner + Blogger Drama


source


First of all, thanks to everyone who entered the Fabric.com giveaway from my awesome sponsors, Craft Buds!

Unfortunately, Blogger has been having some massive issues for the past twenty four hours, and every comment entry during that time seems to have *vanished* into thin air.


The Good News

Blogger sends every comment to my email! So never fear, every person who commented before the deadline was taken into consideration.

And with that, away we go!

The winner is...


Comment number 8, Brit Fritner!

Thanks for everyone for participating, and so sorry for all the Blogger drama!

Wednesday, May 11, 2011

Curried Lentil Stew with Poached Egg

Last week was a rainy, dreary, rainy, cold, and-did-I-mention rainy, week in Chicago. This type of weather always leaves me craving something hot and hearty, with plenty of spice.

One of my favorite rainy day meals is curried lentil stew. It's filling without being heavy, and brings so much warmth and spice that it's easy to forget the weather. I like to put a poached egg on top to add some protein and richness, but it also goes well with a little added meat (great use for leftover chicken!).


Curried Lentil Stew with Poached Egg

1 cup dry lentils
2 cups water
1 cup chicken stock
1 can whole tomatoes
1/2 yellow onion, chopped
3 stalks celery, chopped
2 carrots, chopped
3 cloves garlic, minced
2-3 tbs yellow curry powder
Salt and Pepper, to taste

1 egg
Seasoned salt

Combine the lentils, water, and stock into a large pot. Bring to a boil.

Rough chop the whole tomatoes, and reserve the remaining liquid in the can separately.

Add all vegetable ingredients to the pot, and turn down to a simmer. Add 1/2 the juice from the can of tomatoes. Cover and cook for 15 minutes.

Remove lid, add curry powder and salt and pepper. Cook uncovered to reduce the liquid. Taste and adjust spices as necessary. Also add liquid if the stew becomes too thick.

In a separate pan, poach an egg. I generally put 1 inch of water in a shallow pan, crack an egg in a ramekin, and place the ramekin in the pot and bring to a boil, covered. 2 minutes for just the whites to be cooked, 3 minutes for a semi-firm yolk.

When the lentils are cooked and the liquid is partially reduced, serve in a large bowl. Top with the poached egg, and sprinkle with a touch of seasoned salt.

Curried Lentil Stew

Monday, May 9, 2011

Sponsor Highlight + Giveaway :: Craft Buds!

I'm so excited to introduce you to today two great crafty ladies, Mary and Lindsay, of Craft Buds!

Craft Buds


Tell us about yourselves!

Hello FW&MP readers, it’s great to meet all of you! I’m Mary and I’m a stay at home mom to an amazing little boy and wife to a great husband. Besides blogging I do freelance graphic design work and I enjoy sewing, crafting, gardening, and baking.

And I'm Lindsay, a friend of Mary's in the real world and blogland! My husband and I will celebrate our 5-year anniversary this year, and we are still trying to figure out where to go on vacation. Any suggestions? I love to travel, sew, and meet new people.


Tell us about your blog, Craft Buds! How did it start?

Mary: We were both running separate blog sites and started talking about the possibilities of a combined site. We had both been posting sewing/crafting tutorials so we decided to combine those with interviews, business tips, featured bloggers, giveaways, a master giveaway list, linky parties and more! Craft Buds was launched in March of this year. We chose the name because we hope to help people grow their blogs and online businesses as they find inspiration and information at our site. “Buds” also fits since it’s a collaboration between friends. Lindsay is a professional editor and I’m a professional graphic designer so combine that with our blogging, crafting and sewing hobbies and we make a great team.

Craft Buds


What are some of your favorite projects and recipes from your blog?

Mary: One of my favorite projects is the numbered bean bags. They’re great for kids to play with and they’re educational too. I also like the tote bag tutorial because I use this bag all the time. Lindsay’s Twitter for Crafters article is another favorite because it taught me a lot I didn’t know about Twitter!


Lindsay: And my favorite tutorial is Mary's hooded sweatshirt to cowl neck tutorial. It's so clever! I also loved what fabric designer Jennifer Paganelli had to share with our readers about starting a handmade business. And Mary's Bunny No-Bakes are adorably appetizing.


Where do you see your blog going in the future?

Mary: Eventually we’d like to sell e-books and patterns while continuing to offer tutorials, free patterns, business tips and all the other regular Craft Buds features.

Lindsay: Also, we just really want to be a resource for people with creative dreams, who just need that extra push to get going. I love the connectivity between creative bloggers, and the ability to help each other out.


If you could have one famous blogger follow your blog, who would it be? (I know mine would be Pioneer Woman!)

Mary: That’s a tough one! MADE by Dana is one of my favorites for crafting/sewing. The Sweet Adventures of SugarBelle is a favorite for baking with her incredible cookie creations.

Lindsay: I'd be pretty pleased if Martha Stewart was a Craft Bud. :)


Did somebody say, Giveaway?!

Craft Buds is happy to give away one $20 gift certificate to Fabric.com (selling general crafts supplies, too!) to one lucky FW&MP reader. The giveaway is open worldwide (international shipping available from Fabric.com).

To enter:

{you must be a FW&MP follower}


Check out the tutorials at Craft Buds and leave a comment here with your favorite!

For extra entries:

2. Follow the Craft Buds blog via Google Friend Connect, RSS or e-mail subscription.
3. Like Craft Buds on Facebook
4. Tweet, blog, or share about this giveaway on Facebook (include link -- one entry for each)

Feel free to copy the below tweet:

Did you check out the great giveaway running from @foodwinemodpodg and @CraftBuds?? Winner gets a fabric.com gift card! http://bit.ly/mD30Oe

This giveaway closes at midnight (cst) on Thursday, May 12.

Thanks Mary and Lindsay, you rock!

Thursday, May 5, 2011

A Cinco de Mayo Feast

Happy Cinco de Mayo!

Hope you enjoy celebrating the day with a nice cerveza or margarita, and of course some good Mexican food. And if you don't want to brave the drunken college students at your local Mexican restaurant, just stay home and cook!

Since Cinco de Mayo is a celebration, I won't let you get away with making ground beef tacos with seasoning mix. So even though this recipe is a little more in-depth than your normal Thursday night dinner, it definitely will be tasty and impressive.


Spicy Pork Tenderloin with Jalapeno-Cilantro Sauce
I make all this stuff up, don't you expect that by now?

Grab a pork tenderloin. I used two because Costco packages them in pairs and it's impossible to unfreeze just one of them since they're buddies in the vacuum-sealed package. Give them a very liberal rub down with the following spices:

- Dry chipotle powder (very, very spicy, so be careful if you don't like heat!)
- Garlic powder
- Ancho chile powder (a sweet, smoky chile powder, not spicy)
- Sweet smoked paprika
- Cumin
- Salt
- White or black pepper

If you don't have these exact spices, no worries. Just find something in your cabinet that matches the flavor profiles we're going for here. The chipotle powder brings the heat, so if you don't have it, find something that can substitute -- maybe some cayenne. Ancho chile powder brings a sweet, smoky heat. Smoked paprika brings even more smokiness. Basically, look in your cabinet and find spicy, smoky, and sweet flavors!

There is only one spice that is an absolute must in Mexican cooking: cumin. Cumin is the main flavor we all recognize from those taco mix packets, as well as throughout so many Mexican dishes. Cumin is also essential in Indian cooking, so if this spice is not already in your spice cabinet, I highly recommend you add it, ASAP!

Mix the spices and heavily coat the tenderloins. Stick them in the fridge for about an hour so they can blend and seep into the meat.
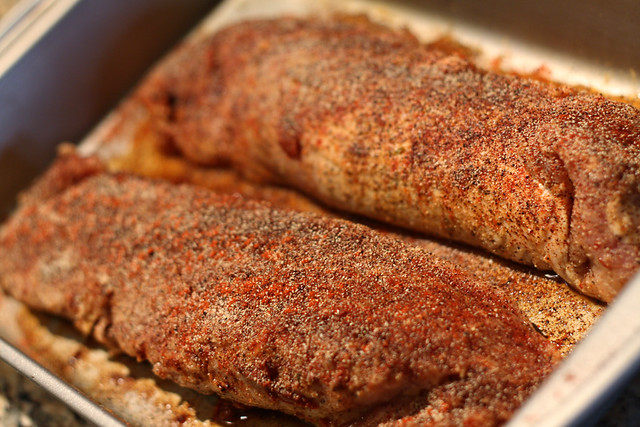
006 Spice rubbed pork


Now, on to the jalapeno-cilantro sauce!

- 1 bunch cilantro
- 3-5 fresh jalapenos
- 1/2 red onion
- 2 tbs olive oil
- 2 tbs water
- A pinch of salt, pepper, and smoked paprika (optional)

For this sauce, you'll need some sort of open flame. A gas stove works great, but feel free to head outside to the grill if the weather is nice!

Using tongs, roast the jalapenos until they are blackened all over.
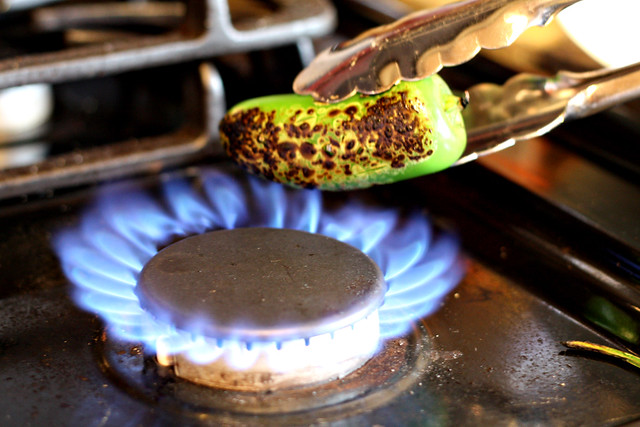
001 Roasted jalepenos


You want all of the skin completely blackened. Once it's fully roasted, put it in a bowl and cover immediately with plastic wrap. Do this for all of the jalapenos until they are all roasted and in the bowl together.
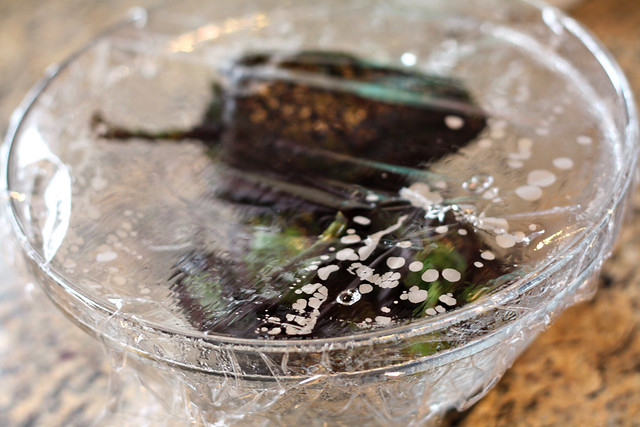
002 Roasted jalepenos


The reason for covering the peppers in a bowl is so that the warm steam permeates the scorched skin and softens it. Let them sit in the bowl for about 10 minutes.

Then, uncover and scrape the blackened skin off with a spoon or other utensil. The more blackened they are, the easier it will be to scrape off the skin.
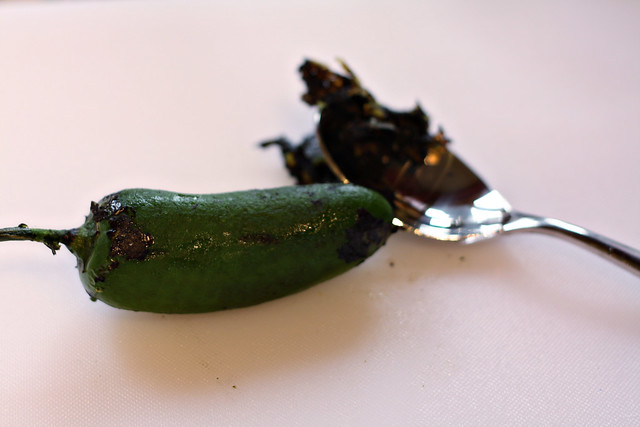
003 Roasted jalepenos


Now you're left with a soft, skinless, roasted pepper!

Skin all the peppers this way. Then cut them into large pieces, and be sure to remove the seeds and membrane. The seeds and membrane harbor the most heat, and unless you want to burn your mouth off with this sauce, it's best to leave them out.

Put the roasted jalapenos and all other ingredients together in a food processor.
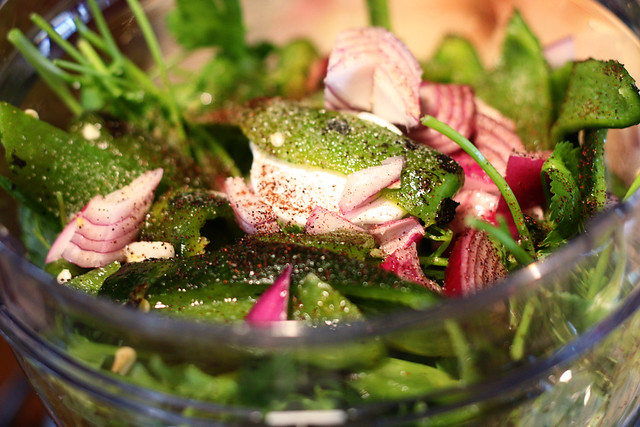
004 Cilantro jalepeno sauce


If the sauce is too thick, add a little more water and/or oil.

Pour it all into a container and place it in the fridge to let the flavors meld.
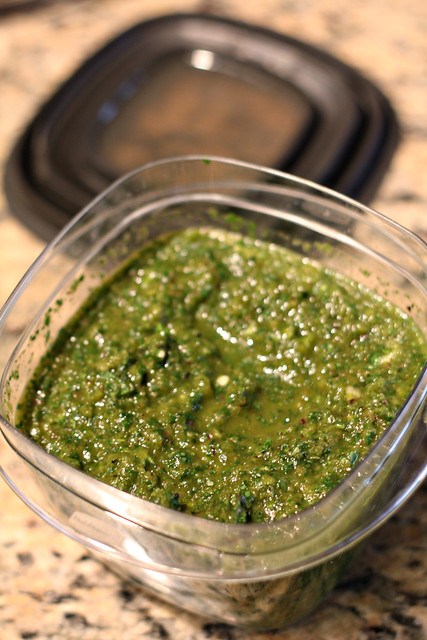
005 Cilantro Jalepeno Sauce


When you're ready to start cooking, pull the pork and sauce out of the fridge approximately 30 minutes before grilling. Allowing the meat to warm up a little will keep it from seizing up and getting tough.

When the grill is hot, cook the pork tenderloins. It's important to note that although it's often assumed that pork has to be cooked completely through, in fact it's best cooked with a slight amount of pink in the center. I'm not talking rare or even medium rare, more like medium well. If you're a meat thermometer fan, cook it to around 150 degrees. Once it's ready, bring it in and cover with foil for approximately ten minutes.

Slice the pork and top with the jalapeno-cilantro sauce. Serve alongside your favorite Mexican sides such as some grilled veggies (seasoned with cumin, salt, and pepper) and Mexican rice.
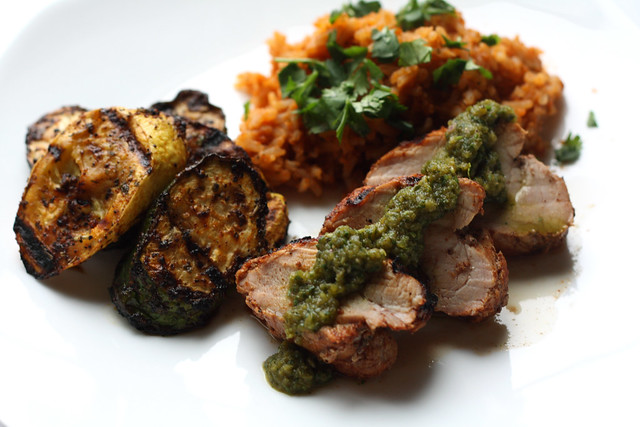
007 Full meal pork and cilantro jalepeno sauce


¡Delicioso!

Tuesday, May 3, 2011

Decorating with Wine Corks

This weekend, I was in the mood to be a little crafty but didn't have any grand project ideas. But do you know what I did have?

Wine corks.

A ton of 'em.

If you've seen the wine label collage I've done, you know that we really love wine. And with a ton of wine labels, comes a ton of wine corks.

I've saved all the wine corks in hopes that someday I'll find some inspiration to use them in some capacity, but for now they just fill up our vases and glass bowls as decoration.

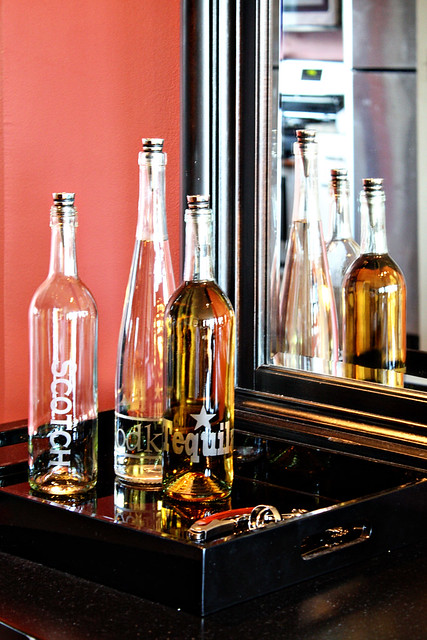
This weekend I decided to use just a handful of them to add a little character to our bar tray. If you recall, I repurposed these wine bottles into glass-etched liquor bottles:

edited Glass etching liquor bottles (6)


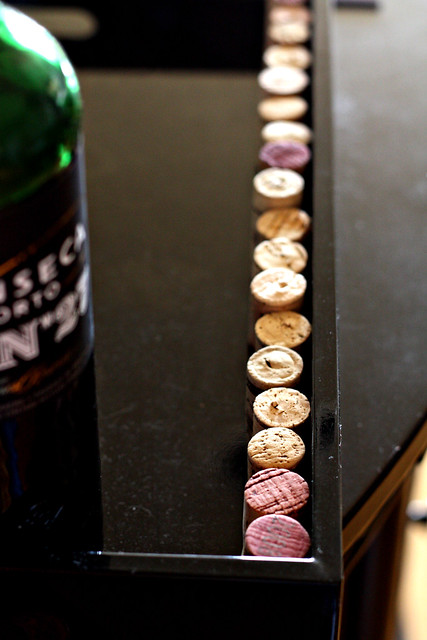
I decided that black tray on our black chest looked a little bland. So, to further tie in the wine theme we've got going, I decided to add some wine corks. Initially, I lined them up along the inside rim like so:

Wine corks 1


The only problem with this method is that the bottoms of corks are not perfectly flat, so they all kept falling over.

So I grabbed my glue gun!

Wine corks 2


Now, I didn't want this to be a permanent addition to the tray, so I just wanted to glue them together in order so that they could stand, but not glue them directly to the tray itself. My first thought was to glue them all together. However, as I started to glue, I realized that the longer I made the wall of corks, the more likely it would be to break. Hot glue worked well but because corks are so smooth, it wouldn't be too difficult to break the wall of corks. That's why I decided to just do rows of 5-6 corks each. These rows had enough reinforcement from the 5-6 in order to stay standing, but weren't so long that they would break apart.

Wine corks 3


I also decided to do some corks with the red wine-stained side up, sporadically to give them a little more charm.

Then I lined the four pieces of wine corks up in a row at the back of the wine tray, and they look great!

Wine corks 4


They stand up just fine, and provide a nice backdrop for the liquor bottles on the black tray. And best of all, they continue the wine theme without being over-the-top!