Monday, January 6, 2014

Thai Red Curry

Hands down, my favorite Thai dish is red curry.  Salty, sweet, with just enough heat, I think it's a great way to spice up the average weeknight.  After a lot of tweaking and plenty of mediocre curries, we've finally got the recipe just right that yields a great curry time after time.  And best of all, it ends up being pretty quick!

You'll notice that I use prepared red curry paste as part of this recipe.  Though I'm very much a from-scratch type of girl, I did some research and quickly learned that making my own curry paste was not an easy thing to tackle.  

Thai Red Curry

Thai Red Curry
serves 4-6

Ingredients:
1 tablespoon avocado oil or olive oil
1 small chopped onion
1 teaspoon fresh finely chopped ginger
2 cloves garlic, diced
2.5 tablespoons jarred red curry paste (Thai Kitchen brand is the most accessible)
1 can regular coconut milk
1 can light coconut milk
1 cup chicken stock
2 tablespoons brown sugar
2 tablespoons fish sauce
2 tablespoons red chile-garlic paste (adjust to your heat preference)
1-2 pounds raw meat of choice, cubed or sliced (optional - omit for a vegetarian or Meatless Monday meal)
1-2 tablespoons cornstarch
Assorted vegetables, cut to your preference, such as bell peppers, carrots, snap peas, etc
1/2 cup rough chopped basil (Thai basil, if available)

Directions:
Heat oil in a large wok or skillet.  When hot, add chopped onion and ginger, and stir until onions soften, about 2-3 minutes.  Add the diced garlic and the red curry paste.  If you're using heartier vegetables that need time to soften, such as carrots, add them now.  Stir fry 1-2 minutes.

Add the light and regular coconut milks to the wok.  Stir to incorporate the red curry paste.  Add chicken stock, and bring to a very light simmer (do not boil).

Stir in the brown sugar, fish sauce, and chile-garlic paste.  Keeping the mixture at a low simmer, add the raw meat and cook for 6-8 minutes, or until meat is fully cooked.

Sift the cornstarch lightly into the curry, stirring constantly to ensure the cornstarch gets fully incorporated into the sauce without clumping.

Add any remaining vegetables that have a quick cook time or should remain slightly crunchy ("tender-crisp"), such as bell peppers or pea pods.  Also add the basil.  Simmer for another 3-5 minutes.

Serve with freshly cooked rice, and enjoy!

Tuesday, October 29, 2013

Eat Your Greens: Broccoli Slaw

Many of you who follow me on Instagram surely know that the past few months have been just a wee bit crazy for me.  At the beginning of August, we moved from our beloved Chicago to start a new adventure in Denver.  It's been great getting settled into a new home (it's a house! with a yard! and we had to buy a car!), but my job is still back in Chicago, so I've been splitting time between here and there.  With one foot in Denver and one foot in Chicago, grocery shopping and cooking anything even mildly interesting has sadly fallen to the bottom of our priority list.

But this past weekend, we were actually both home in Denver, we didn't have any visitors, and we actually had time to catch our breath.  And of course, all we wanted to do was cook.

Saturday night we just wanted comfort food - it was cold outside, and we snuggled up on the couch catching up on our huge DVR backlog while a yummy coq au vin was cooking in the oven.  Exactly what we needed.

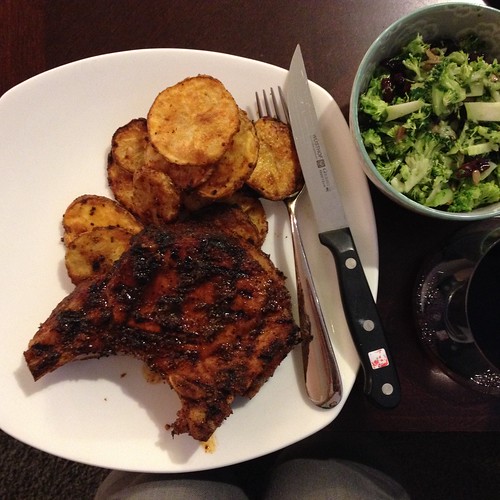
Then Sunday night, we opted for grilling.  Chris brined two thick-cut bone-in pork chops, and then coated them in a sweet and smoky mesquite dry rub.  We grilled them up, and decided on crispy oven potatoes for a side.  Since the rub on the pork had a slightly bbq/southern flavor profile, I decided we needed something acidic to cut through all the fat and smokiness.

In came the most perfect and perfectly simple broccoli slaw.

Riffing off of an idea in my head combined with some input from various recipes I looked up for the purposes of dressing ratio, the result was crunchy, bright, acidic, and the perfect compliment to an awesome meal.  And best of all, it uses the entire head of broccoli, including the stalk.

I had a full bowl of it, and ate every last bite.


Broccoli Slaw

1 head of broccoli (including stalk)
1/4 cup rice wine vinegar
1 tablespoon dijon mustard
2 tablespoons sugar
1/2 teaspoon salt
1/4 teaspoon celery salt
Dried cranberries
Sunflower seeds

Cut off the top florets from the broccoli, and chop them finely.  Transfer to bowl.

Grate the stalk of the broccoli on a box grater (the largest holes you have).  If you don't have a box grater, chop up the broccoli stalk into small matchsticks.  Add to bowl.

In a separate bowl, whisk together the vinegar, mustard, sugar, salt, and celery salt.

Pour the dressing over the broccoli - be careful not to over-dress.  Add dried cranberries and sunflower seeds to your liking.


Tuesday, August 27, 2013

Simple Crusty Homemade Bread

As someone who doesn't love to bake, I must say that baking bread seemed pretty scary to me.  I always assumed I had to knead it just right, for just the amount of time, have exactly the right mixture of ingredients, and then if I did all that and the stars aligned and I practiced with a few dozen loaves, I might finally get a good loaf of bread.

While that may be true for some types of bread, I've discovered a pretty fool-proof bread that consistently turns out absolutely wonderful.  And best of all, it's no-knead.  Fair warning, you will need to mix it up a day before you plan to make the bread, but it's pretty easy to remember to mix 4 ingredients briefly and let it sit on the counter for a day just to have amazing homemade bread.

Crusty Homemade Bread
There are many versions of this bread out there.  I use a little bit more yeast than some just because I like a light, airy bread.  Feel free to adapt to your liking.

3 cups flour
3/4 tsp yeast
1 3/4 tsp salt
1 1/2 cup water

Mix the dry ingredients together to incorporate.  Add the water, and mix with a silicone spatula until the mixture becomes sticky throughout.  It'll look very sticky and scraggly, and that's what we're going for.  Cover with plastic wrap, set on the counter and let sit for 18-24 hours.

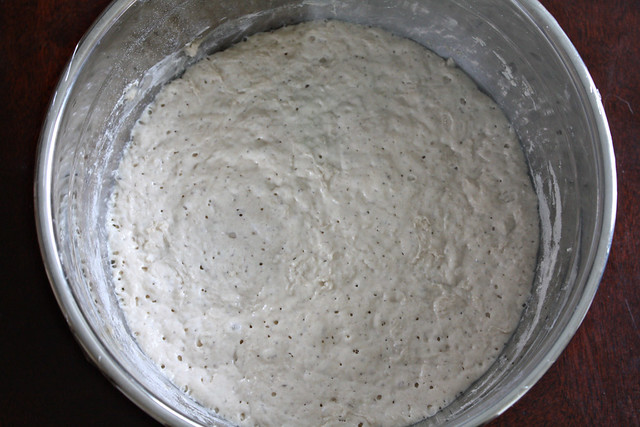
Bread Dough Day 1


The next day, it will look like this:

Bread Dough Day 2


When you're ready to bake the bread, place a dutch oven (or a large stock pot) with lid in oven and heat to 450 degrees, and leave in there for 30 minutes to fully heat the dutch oven.

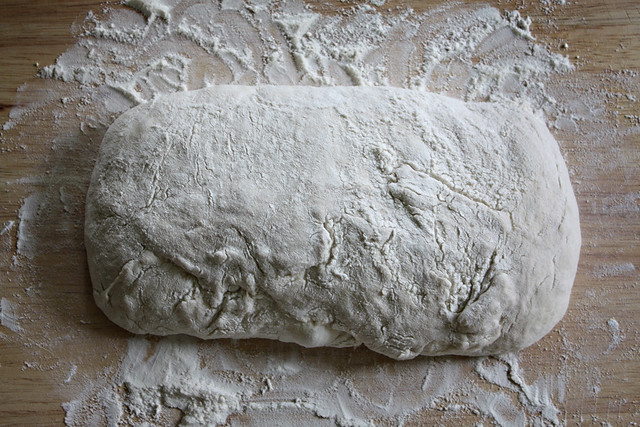
While the dutch oven is heating, remove dough from bowl onto a heavily floured surface.  Sprinkle flour over top (you may need a decent amount, this is super sticky) and shape into a ball or oval (depending on size/shape of your dutch oven).  Cover loosely with more plastic wrap and let rest for 30 min.

Bread Dough Loaf


After the heating and resting 30 min is up, remove dutch oven from oven, remove lid, and drop dough (it will be tricky to pick up, make sure you flour your hands) into the pot.  There is no need to grease the pot, just a dry pot is fine.  Put the lid on and stick it in the oven for 30 min.

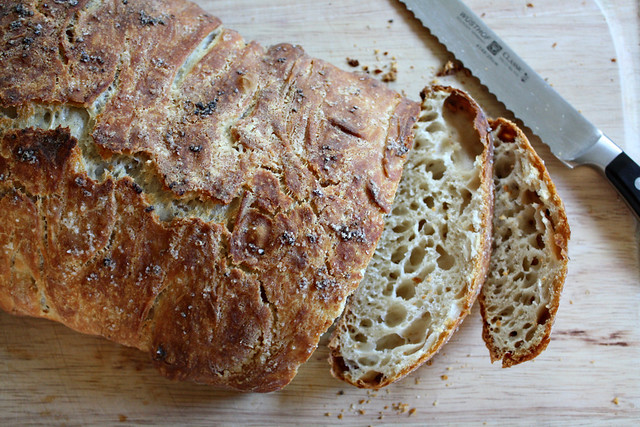
When 30 min is up, remove the lid and leave in the oven for another 10-15 min.  If it's a round loaf it will need more like 15 min, if it's oblong it may only need 10-12.  Then remove it from the oven, take the bread out (I use tongs) and place on a cooling rack.  Enjoy!


Bread Dough Sliced

Monday, July 22, 2013

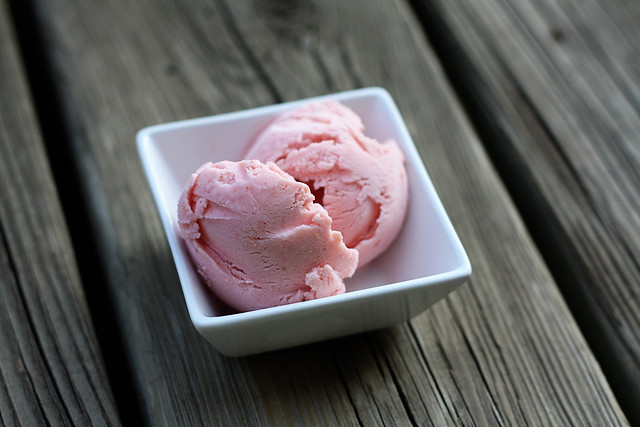
Strawberry Lemon Ice Cream

It's the best time of year to make homemade ice cream, and with such amazing produce this time of year, fresh strawberries make some of the best ice cream there is.  With a hint of lemon, this ice cream was super creamy and delicious, perfect for summer!


Strawberry Lemon Ice Cream by FWMP


Strawberry Lemon Ice Cream
adapted from Epicurious

1 3/4 cups heavy cream
3 (3- by 1-inch) strips fresh lemon zest
1/8 teaspoon salt
2 large eggs
1/2 cup sugar
1 lb strawberries (3 cups), trimmed and quartered
1 tsp grated fresh lemon zest
1 tablespoon fresh lemon juice
1/4 cup sugar

Combine cream, zest strips, and salt in a heavy saucepan and bring just to a light simmer. Remove from heat and discard zest.

Whisk eggs with 1/2 cup sugar in a bowl, then add hot cream in a slow stream, whisking. Pour back into the saucepan and cook over moderately low heat, whisking constantly, until slightly thickened and a candy thermometer registers 170°F (do not let boil or you will have creamy scrambled eggs!).

Immediately pour custard through a fine sieve into a metal bowl, scraping along the inside of the sieve to strain all the liquid.  Discard any solids that remain. Cool to room temperature, stirring occasionally. Chill, covered, at least until cold, about 2 hours, and up to 1 day.  (I did this step the day before)

While custard is chilling, chop the strawberries and sprinkle the remaining 1/4 cup sugar over in a bowl, stirring occasionally so the strawberries release some juice.  When you're ready to make the ice cream and the cream mixture has fully chilled, purée strawberries with sugar syrup with grated lemon zest and fresh lemon juice in a blender until smooth. Stir purée into custard.

Freeze in ice-cream maker, then transfer to an airtight container and put in freezer to harden, about 3-4 hours.

-----------------------------------------------------

Don't forget to update your reader to follow me on BlogLovin'