Monday, April 15, 2013

Felt Fox and Raccoon Garland

Can you believe it's April already?  I sure can't.  This has already been quite the year, and I haven't even reached the craziest part of this year yet.  But more on that another time.

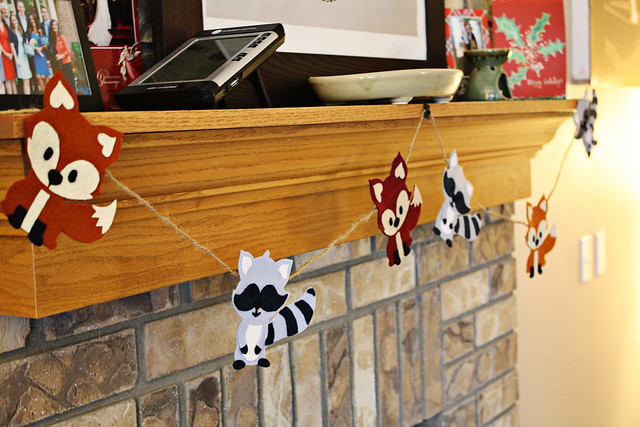
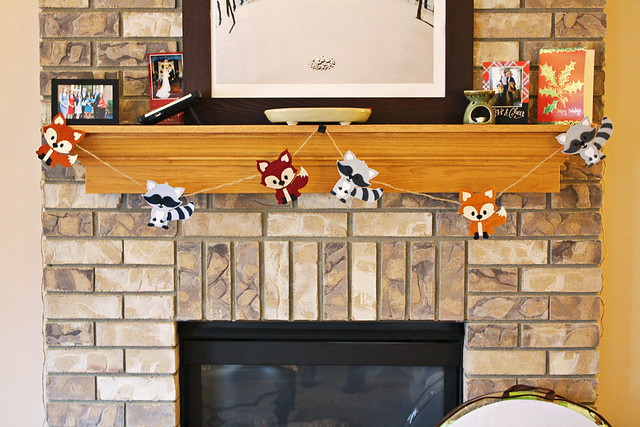
This past weekend, I was so fortunate to be able to head up to Wisconsin for my wonderful friend's baby shower.  She's due next month, so I couldn't wait to see her and her beautiful belly.  She's having a baby boy, and has decided on having a woodland creatures theme in the baby's room.  Although I bought a gift for the shower, I knew I also wanted to do a little something handmade.  The week before the shower, my friend and I were swapping baby room decor finds on Etsy, all centering around foxes and raccoons.  Finally it hit me - I could make her a felt animal garland!

With a quick 5 minute search, I was able to find an adorable fox graphic and raccoon graphic that I knew had to be my starting point.  I did a quick screen shot, zoomed in on each animal, and printed it.  The blown-up image then served as a background to trace each animal and its features.  I cut out all the pieces from a sheet of paper, which I then used as the pattern for three felt foxes and three felt raccoons.  I glued all the pieces together (using Mod Podge, of course!), and once they dried, I glued a strip of jute across the back.  I also found that I needed to give their oversized tails a little reinforcement, so a toothpick was glued on the back of the tail to keep it from flopping over.

The garland turned out so cute, I even surprised myself!  I'm glad that I decided to use different color felt for each animal, giving them all their own personality.  It worked as great decor for the shower, and will be adorable in his nursery.


fox raccoon garland 1


fox raccoon garland 2


Follow my blog with Bloglovin

Friday, December 14, 2012

Tartine's Currant Scones and Lemon Cream

IMG_3780

The weekend of Thanksgiving, we had 5 family members visiting us in chilly Chicago.  Thus, there was a lot of cooking, eating, and drinking.  I was in a menu-planning flurry the week before the big holiday, not just for the Thanksgiving meal, but also for every other meal that weekend.  And it was that planning week that one of my favorite blogs, Alexandra's Kitchen, posted the recipe for Tartine Bakery's Current Scones and Lemon Cream.  

Upon reading the recipe and looking through the pictures, I was hooked.  I sent it to my husband's sister to get her thoughts, and she immediately responded that we must make them that weekend. 
 
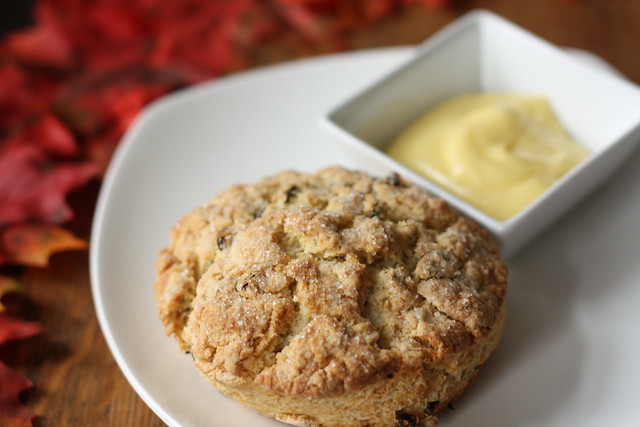
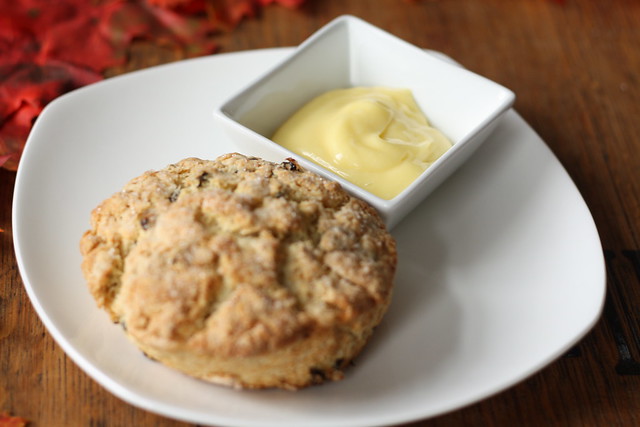
So Saturday morning of Thanksgiving weekend, she and I made the scones for everyone, and boy were they delicious.  Warm and both soft and crunchy, bright pops of currants, just delicious.

But oh, that lemon cream.

IMG_3784

I would like to bathe in that lemon cream.  In fact, I'm pretty sure I could find an excuse to eat that with almost anything.  Posted originally on Food52 (my new obsession), this lemon cream is so bright, so rich, so creamy.  The lemon flavor is so robust, the first bite catches you off guard.  And after that first bite, it's hard to stop.  You'll find yourself wanting to lick the dish, to get every last bit of goodness.

Since I didn't deviate from the recipe at all, I'm going to point you over to Alexandra's Kitchen for the full rundown, paired with her beautiful photography.

Alexandra's Kitchen: Tartine Bakery's Currant Scones with Lemon Cream

Friday, December 7, 2012

The Best Thing I Ever Made

You know that show on The Food Network "The Best Thing I Ever Ate?"  Well, they also have a cooking version, "The Best Thing I Ever Made."  And if I was ever invited to contribute to that show, I would make this pasta.

I'm being completely serious, this is the best thing I've ever made, it is so incredibly, outrageously delicious.

It's blowing my mind just thinking of it.

If there's one thing I can say about this pasta, is do not skip any part of this recipe.  I know you'll be tempted to just omit the breadcrumbs, or maybe you don't have any lemons for zesting lying around.  Then wait to make the pasta.  Wait until you have the time, and the ingredients, and the love, to make this pasta the thing of beauty that it is.


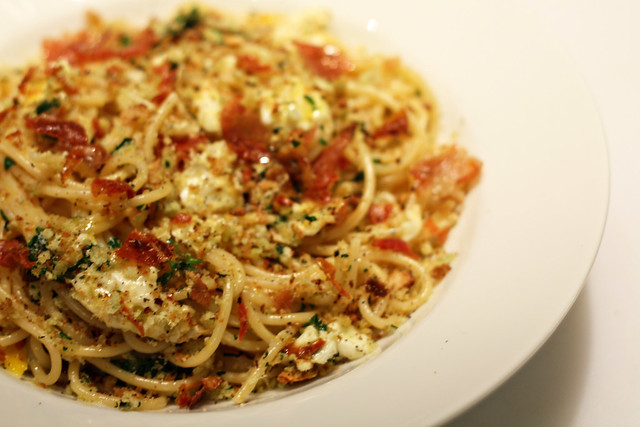
Spaghetti with Soft Eggs and Speck
adapted from Food52
*note: this recipe makes one serving.  Why?  Well, the original recipe author was a military wife who often had to make meals for one while her husband was deployed, and in my case, my husband won't eat eggs or pecorino romano so I made this on a night when he was out of town.  I suggest you increase the recipe accordingly.

Pangritata (a word not in my vocabulary previously, this is the seasoned breadcrumbs part of the recipe)

2 tablespoons olive oil
1/3 cup fresh or stale coarse breadcrumbs (I pulsed an old part of a baguette in the food processor)
2 teaspoons minced fresh Italian parsley
zest from half a lemon

Heat 2 T olive oil in a large skillet over medium-high heat.  Add the breadcrumbs and sauté until beginning to brown, about 3 to 4 minutes.  Add the parsley and the lemon zest, and toast for another minute until the mixture is crispy and golden brown.  Set aside.


Spaghetti with Soft Eggs and Speck

4 ounces spaghetti
1 tablespoon olive oil
1 tablespoon unsalted butter
3 cloves garlic, minced
2 large eggs
2 tablespoons chopped Italian parsley
4 paper-thin slices of speck (speck is a smoked prosciutto)
freshly ground black pepper, to taste
1/4 cup grated Pecorino Romano cheese

Lay out the slices of speck on a baking sheet and either toast them in a toaster oven or in a broiler.  Because the slices are so thin, they will cook very, very quickly, so keep an eye on them to make sure they crisp but don't burn.  This will likely take 1 minute, maybe 2 if you're starting from a cool toaster oven.  Remove and set aside to cool.

Bring a large pot of well-salted water to a boil and cook pasta to al dente according to directions on box.

After adding the pasta to the boiling water, wipe out the skillet from the pangritata, add 1 T olive oil and 1 T butter and melt together over medium heat.  When the oil/butter mixture is hot, add the garlic and immediately break the eggs into the skillet.  If need be, lower the heat a bit. You want the garlic to cook without burning and the egg whites to set, but the yolks to remain runny.

Reserve 1/2 cup of the starchy cooking liquid from the pasta before draining when al dente.

Add pasta back to the pot, pour the eggs and all the fat from the skillet onto the pasta, add the parsley and half the cheese, and toss well, breaking up the eggs as you do. If it is looking a little dry, add some of the reserved cooking liquid (for mine, I ended up adding about 2 T).

Break up the toasted speck (it will be thin and crisp) and toss with the pasta.

Plate the pasta and eggs, season well with freshly ground black pepper and a pinch of salt, sprinkle with the remaining grated cheese and then top with the pangritata.

Eat immediately, with a nice glass of wine.

Final egg pasta

Friday, November 30, 2012

Homemade Ricotta

The concept of making my own cheese always made me uneasy.  Cheese is aged in dark caves in France, not made on my kitchen counter!  However, recently I've seen a few references to "house-made ricotta" on restaurant menus, and even heard a chef reference how she always makes her own ricotta at home.

When I was planning my Thanksgiving weekend food extravaganza, I suddenly seemed inspired to at least look into making my own creamy delicious ricotta, if it was really as easy as it sounded.  And you know what I found?  It's is easier than it sounds.  In fact, I'm still blown away that I made something so creamy and delicious with such little effort.


IMG_3771

Rich Homemade Ricotta
recipe from Smitten Kitchen

Ingredients:

3 cups whole milk
1 cup heavy cream
1/2 teaspoon coarse sea salt
3 tablespoons freshly squeezed lemon juice

Equipment:

Candy or deep-fry thermometer
Cheesecloth
Large mesh strainer
(I ended up buying the cheesecloth and strainers online through Amazon as linked to above).


Pour the milk, cream and salt into a 3-quart nonreactive saucepan. Attach a candy or deep-fry thermometer. Heat the milk to 190°F, stirring it frequently to keep it from scorching on the bottom. Remove from heat and add the lemon juice, then stir it once or twice, gently and slowly. Let the pot sit undisturbed for 5 minutes.

Line a large mesh strainer with 3 layers of cheesecloth and place it over a large bowl (to catch the whey). Pour the curds and whey into the mesh strainer and let the curds strain for two hours.  Discard the whey (liquid in the bowl), or, if you’re one of those crafty people who use it for other things, of course, save it.

Eat the ricotta right away or transfer it to an airtight container and refrigerate until ready to use.

-------------------------------------------------------------

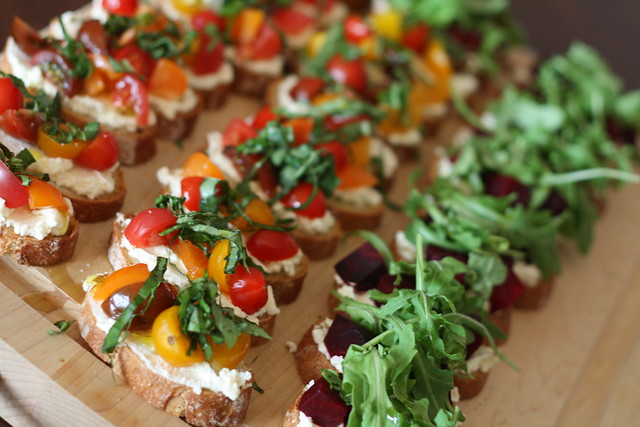
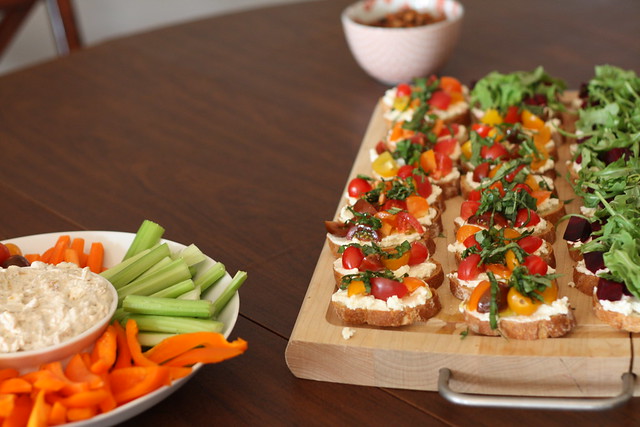
For my Thanksgiving appetizers, I decided to make two types of crostinis: ricotta with roasted beets and arugula, and ricotta with tomatoes and basil.  In both cases, I toasted some fresh baguette slices, then rubbed them with garlic cloves before spreading the ricotta on top.  With the roasted beet crostinis, I roasted the beets ahead of time, diced and chilled them in the fridge, and then assembled and finished with a sprinkle of black pepper and a light drizzle of olive oil.  For the tomato crositinis, I simply halved some beautiful multi-colored small tomatoes and finished with a pinch of coarse sea salt and of course another drizzle of olive oil.

What I loved about this ricotta recipe, compared with others I looked up, is that it uses lemon juice instead of other acids like vinegar.  You could definitely taste a very, very faint touch of lemon, which I thought really took the flavor to a whole different level.

Give it a try!

IMG_3777
Served with Caramelized Onion Dip (and veggies) and Crunchy Roasted Chickpeas.