Showing posts with label Crafts. Show all posts

Sunday, May 4, 2014

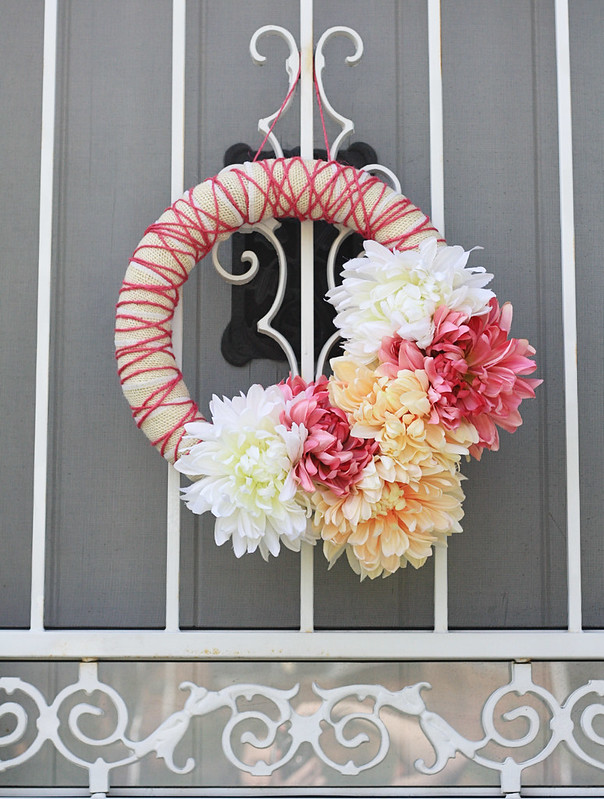
Spring Wreath

I think with the mid-80's temperature today, I can safely say (knock on wood) that we are officially into spring and done with the snow.  We planted some flowers and a few herbs in the front and back of the house, but today I decided it was time to brighten up the front door a bit too.

I had this wreath hanging there since we took down the Christmas decorations, and it is still a beautiful late winter wreath that I love to hang up every year.  But with the sun shining and the temperature rising, I wanted to make a new wreath that would better complement the beautiful flowers and budding trees everywhere.

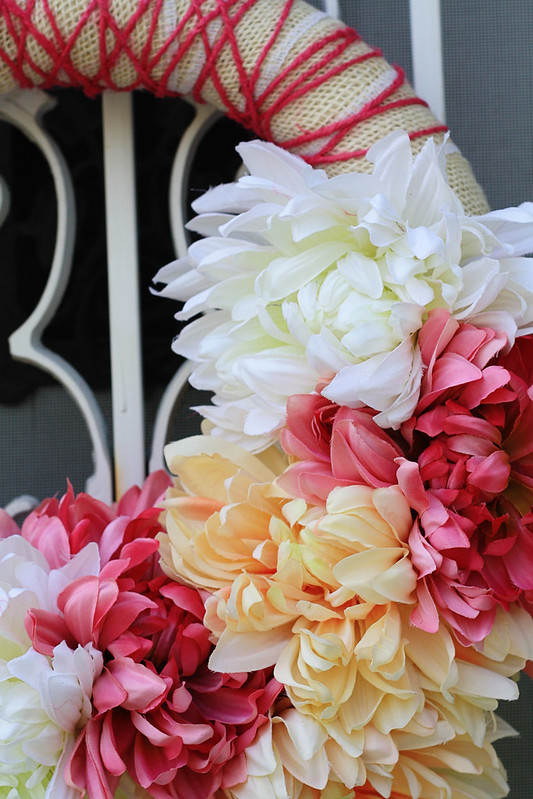
One thing I love doing is going into a craft store with only an idea of what I want to make, but no prior expectations of what materials to use.  The beautiful thing about craft stores is you can walk around and just get inspired.  Walking through the flower section, I saw these spectacular big spring flowers that just jumped out at me.


I wandered around until I found some nice cream burlap to wrap around the wreath mold, and I was going to just leave it at that.  Nice and clean and pretty.  But then on the way up to the register, I ran into the perfect pink twine that I knew would make a great finishing touch, haphazardly wrapped around the wreath on top of the cream burlap.

A little bit of hot glue and a couple of straight pins later, and I have a beautiful front door addition to my little house for the spring.  Quick and easy, and I love it!


Tuesday, September 6, 2011

The No-Cost Cat Bed

This was a fantastically productive weekend. We ran a ton of much-needed errands, and then came home and tackled some major projects. First, we cleared out our entire pantry, added new shelving, and put it all back in. It looks better than I could have imagined!

Then, we attacked our bedroom. We completely shuffled everything in the room around, including the outrageously heavy armoire that we were actually incapable of lifting to move. It was an impressive series of lifting and falling and lifting and bouncing the top off the bed to get it to the other side of the room, but now we're completely maximizing the space and it looks awesome.

And since we were on a roll, we decided to make Simon a little cat bed. He always sleeps on the top of our bookcase in the living room, but it's so hard and he has a tendency to nearly fall off when he's in deep sleep.

With the intention of using only scraps and other things we had lying around, we got to work on the new no-cost cat bed.

First, we needed a frame for the shape of the bed. Luckily, when we cleared out the pantry, we found ourselves the proud owners of some useless wood doors.

IMG_1800


Conveniently, they were exactly the width of the bookcase!

So I employed my very handy husband to cut a base and four sides out of the scrap door.

IMG_1802


(please ignore the tears in the screen... courtesy of Simon trying to claw through to get at the birds... wait, why did we make him a custom bed?)

Anyway, back to the project. I added some leftover batting from when I made my new comforter to the base.

box in progress


I then cut apart a soft old blanket for the base, and used trusty Sheila the staple gun to staple down the fabric. I used leftover fabric from my new pillows to then cover the sides so that it would fit in in the living room. Finally, I nailed the sides on and it was done!

edited finished box


It looks great on our bookcase, and ties in so nicely with the pillows. And not to mention, Simon loves it!

edited box on bookcase

Tuesday, August 16, 2011

New Pillows

I feel like a home is never finished, and I always find new ways to put my stamp on each room. Especially since we currently rent our place, decorating can be a little limited. Without the ability to paint or change the hideous light fixture hanging above the kitchen table, I have to rely on changes that I do have control over!

We recently got new couches from West Elm, and I absolutely love them. Gray microfiber, classic look, I know we'll enjoy them for a very long time.

The only thing is that they didn't come with pillows. But you know me, I had no problem with that since of course I had some fabulous fabric in the back of my mind that I wanted to use!

Every time I walk into The Needle Shop in Bucktown, I find more and more amazing fabrics that I just adore. I also love that they have an Etsy store, so I can peruse even before walking into the store!

Anyway, back to my pillows. I got my fabulous fabric this past weekend, and came home to whip up my pillows. I just love how they turned out!

New pillows 1


New pillows 2


I love how they go so well with the gray couches but also bring a wonderful pop of color and whimsy!

Tuesday, June 14, 2011

New Comforter: Repurposed Duvet

As you know, my third anniversary with my husband was last week. And in the past three years of marital bliss, I have to confess that our bed looked like this:

01 Old Bedroom Bedding


And in case you can't quite see in the above picture, here is a close up of that comforter:

02 Old Bedspread hearts flowers yarn ties


Pretty faded daisies, tulips, hearts, and ribbons. And let's not forget the super-awesome yarn ties. Don't get me wrong, this comforter has a very special place in my heart. My grandma made this comforter for me when I got my first big girl bed at the young age of 5, and it is to this day the most comforting comforter ever. However, not the most appropriate for a married couple. Also, it's made for a full size bed, and we have a queen.

Now taking a step back, we did actually get some bedding when we got married three years ago. We registered for a nice down comforter and and charcoal gray duvet and skirt/sham set. Since we were moving to Chicago and assumed it was cold all the time, the down comforter made sense to us. Fast forward a couple months, we got to Chicago, and guess what?

Down comforters are hot.

Really, really hot.

We lasted about 3 months with it before giving up all together, and the down comforter has lived in the closet ever since.

I recently started looking for some new bedding, but just couldn't find anything I really liked. I also kept comparing everything to the charcoal duvet set I already had, since I really liked the shade and feel of the fabric. Finally, one day it hit me: just make the duvet cover into a comforter!

And that's exactly what I did.

03 Duvet fabric charcoal striped


I started by taking out all the seams and laying it out on the floor. Of course, you know me, I couldn't just stick some batting in it and call it a day. I had to make it my own!

After heaps of scraps and plenty of measuring, cutting, and sewing, it started to take its new form.

04 Comforter stripe


I sewed a stripe down the center using this pretty Joel Dewberry Damask fabric.

05 Completed Comforter


I then stuffed it with two layers of extra-loft batting, queen size. I lightly tacked it in a couple places to keep it from shifting (sorry Grandma, no yarn ties!), and my new comforter was complete!

...Ok, in reality this took me a ton of hours spread out over two days. Sewing something this large takes a lot of time and measurement, and being creative with the stripe just adds to the time! Not to mention, I also got a little creative with the underside...

06 Completed Comforter Damask yellow gray


I decided it would be fun to sew the underside using a yellow fabric to pull out the yellow in the damask, and continue the stripe down the center. I love how I can make my bed now two different ways to get two different looks!

Friday, June 10, 2011

Anniversary Wine Album

It's no secret that Chris and I like wine, and I do plenty of crafts with the debris. From glass etched wine bottles to wine corks to my massive wine label collage, we have a serious wine theme going in our home.

So given the emphasis we have on wine, it's not surprising that we still save some wine labels for their sentimental value. Specifically, we save the labels from our anniversary wine bottles.

The label from our first anniversary is front and center in our wine label collage, so unfortunately it will be immortalized in the collage forever. However, starting with our second anniversary, I saved the label and stuck it in a photo album I had lying around.

IMG_1293


A nice black page, written with the date and year with a silver pen, very classy. The only problem was that the outside didn't quite share the same level of class.

IMG_1285


I stuck it away, always holding in the back of my mind the intention to give it a makeover. It wasn't until I pulled it out this year for our 3rd anniversary label that I finally determined it was time!

I used Mod Podge to cover the album in a pretty pearl and silver swirly paper. I then created a label using my Silhouette (mostly because I don't have a printer), outlined in a square of solid silver paper.

IMG_1294


I then covered the back in the solid silver, to create a slight contrast to the front of the album.

IMG_1310


Finally I gave the whole thing a nice topcoat of glossy Mod Podge.

IMG_1324


I love the way it turned out, and I can't wait to slowly fill up the pages with a label for each year!

final anniversary wine label album

Monday, May 30, 2011

Silhouette Tutorial: Make the Font You Want

When I was making my plant labels for all my potted veggies, I was playing around, trying to find just the perfect font for my basil.

There's a fun font called Zebra (you can download it for free here) that I love, and that's what I was leaning toward using. But the "s" just wasn't exciting enough. So I used the Silhouette software to make it exactly how I wanted!

For this tutorial, I'm going to first show you the finished product, and keep it in the bottom corner of the screen so you can see how we get from beginning to end.

So to start us off, here are my finished pots:

basil


Now let's begin!

Basil 1


The top left word is the word "basil" typed in Zebra font with no editing. The bottom left word is our end-goal. I'll leave it there throughout the tutorial so you can keep your eye on the final product.

Basil 2


I have now misspelled basil to say "bazil." The reason I did this is because I love the big fat curve of the letter z, and want that as the base for my letter s.

Basil 3


Now click the Modify icon in the upper right toolbar, and click Divide. This will separate all the letters in "bazil." While you're at it, type an s off to the side. We'll use this for the top of our modified letter s.

Basil 4


You'll now pull down the letter z away from the word "bazil." You'll see because it overlapped with the a, there is a notch cut out of the z. That's why we can't use this. So type another free-standing z off to the side, near the s.

Then use the Knife tool (on the left vertical toolbar) to cut the top off the s, and the bottom off the z. Separate the pieces.

Basil 5


Now move the top of the s and the bottom of the z together and overlap to conjoin them. Then click the Modify tool, and select Weld. Welding will create one continuous letter. Since the new s looks a little crooked, grab the rotater at the top of the conjoined letter and rotate it counter-clockwise slightly to straighten it out.

Basil 6


Now just delete the notched z, and the remaining parts of the cut-up s and z, and slide the new s into place.

Finally, select all of the word, click Modify and Weld, and you have a perfect new label with the font you want!

Basil 7 silhouette finished


I then applied it directly to my basil pots, and they look great on my porch. And the font is so much more fun now!

basil

Thursday, May 19, 2011

Plants and Pots

I finally got around to Home Depot the other weekend to pick up some vegetable plants for my deck. I picked out some great herbs and veggies, and threw in some pots as well. Since I was starting from scratch and didn't want to break the bank, I bought some plain plastic pots for all the plants.

Of course, when I got home, I knew they were just way too plain for my taste.

I thought about using a little Mod Podge to spruce them up, but I didn't have any papers that would go well with the army-green color of the plastic.

Then in a fabulous *a ha!* moment, I turned to my Silhouette!

Instead of using the silly little plant markers in the soil, I decided to cut out some adhesive vinyl to stick on the sides of the pots. By using the adhesive vinyl, I can also remove them at the end of the summer and that way I can relabel again next year!

So I designed and cut out my labels. For my step-by-step instructions on using the transfer paper, go here.

Silhouette labels


I actually cut out the word "T matoes" in black, and the actual tomato in red, then combined them on the transfer paper so they would be applied together.

Then I stuck them all on, peeled off the transfer paper, and ta da!

Tomatoes


Bell Peppers


Cilantro


Perfect labels, and easy to remove and change for whatever I decide to grow next year!

Now here's hoping these little guys actually survive!

Tuesday, May 3, 2011

Decorating with Wine Corks

This weekend, I was in the mood to be a little crafty but didn't have any grand project ideas. But do you know what I did have?

Wine corks.

A ton of 'em.

If you've seen the wine label collage I've done, you know that we really love wine. And with a ton of wine labels, comes a ton of wine corks.

I've saved all the wine corks in hopes that someday I'll find some inspiration to use them in some capacity, but for now they just fill up our vases and glass bowls as decoration.

This weekend I decided to use just a handful of them to add a little character to our bar tray. If you recall, I repurposed these wine bottles into glass-etched liquor bottles:

edited Glass etching liquor bottles (6)


I decided that black tray on our black chest looked a little bland. So, to further tie in the wine theme we've got going, I decided to add some wine corks. Initially, I lined them up along the inside rim like so:

Wine corks 1


The only problem with this method is that the bottoms of corks are not perfectly flat, so they all kept falling over.

So I grabbed my glue gun!

Wine corks 2


Now, I didn't want this to be a permanent addition to the tray, so I just wanted to glue them together in order so that they could stand, but not glue them directly to the tray itself. My first thought was to glue them all together. However, as I started to glue, I realized that the longer I made the wall of corks, the more likely it would be to break. Hot glue worked well but because corks are so smooth, it wouldn't be too difficult to break the wall of corks. That's why I decided to just do rows of 5-6 corks each. These rows had enough reinforcement from the 5-6 in order to stay standing, but weren't so long that they would break apart.

Wine corks 3


I also decided to do some corks with the red wine-stained side up, sporadically to give them a little more charm.

Then I lined the four pieces of wine corks up in a row at the back of the wine tray, and they look great!

Wine corks 4


They stand up just fine, and provide a nice backdrop for the liquor bottles on the black tray. And best of all, they continue the wine theme without being over-the-top!

Tuesday, April 5, 2011

Recycled Business Cards, DIY Style

I'm so excited to go to Creative Estates this weekend. So many fun bloggers and handmade shop owners will be there, and I can't wait to finally meet them all in person!

In addition to all the lovely ladies I already "know" through blogs/twitter/etc, I'm sure I'll meet plenty of new faces. That's why I decided I really should have business cards for my blog. Sure, I don't really sell anything, but it's nice when I tell people about my blog to be able to hand them something with the URL. Otherwise I have to trust that they'll go look me up on their own accord, which is just too much effort.

Anyway, I thought about ordering cards, but I'm not much on the computer-design savvy side of life. Also, I really like making things myself, and have seen lots of cute designs that people have made out of old cereal boxes, hand-cut cardboard, and more.

Then I remembered that I had a big stack of business cards that were pretty much worthless. My company recently changed its name and location, so literally the only thing valid on my old business cards was my name. And the best part? The back was completely blank!

custom stamp felt


So I ordered a custom stamp. This stamp was listed on Etsy as a wedding stamp, but I made it work for my blog! I also grabbed some felt. I thought it would be a great way to cover up the old job side of the business card.

business cards mod podged on felt


I stamped each business card, then grabbed my trusty Mod Podge. I brushed some Mod Podge on the backs of each business card (previously the front!) and stuck it down directly onto the felt. I rubbed it down well so that it would soak into the felt and really adhere.

diy recycled business cards


Then I simply cut them all out, and there you have it! Repurposed, recycled, DIY, handmade business cards!

And they're fun and colorful to boot :)

handmade business cards diy


I can't wait to hand them out to the crafty ladies at Creative Estates!


Don't forget about the fun Wine Accessories giveaway going on right now with The Elephant's Trunk! Enter here!

Tuesday, March 29, 2011

Mod Podged Paper Mache Letters

Alright, now that I did the teaser post for the Chicago Craft Social and also the post recapping the day, time to actually share the project with you!

Paper mache letters are great because they're lightweight and hollow, are three-dimensional, and can either stand on their own or stick to a wall with just a little tacky putty.

Not to mention, you can paint them, Mod Podge them, glitterize them, or basically whatever you want!

I got my paper mache letters at Paper Source.

Paper Mache Letters 1


I decided to get a lower case c and k (me and the hubs) and an upper case P (last name). I also picked up some pretty cream and silver papers while I was there!

Now here's where the Mod Podging comes in. For these letters, I wanted them entirely covered as seamlessly as possible. And as you know when working with paper and curves and corners, that's pretty difficult.

I started by cutting a rectangle just bigger than my letter. I brushed Mod Podge directly onto the paper mache letter, then flipped it upside down and pushed it down onto the paper. I then used my fingers to work out all the bubbles, and trimmed around the letter so there was approximately 1/2 inch around the whole thing. Then, at every curve, corner, and crevice, I cut a slit in the paper.

Paper Mache Letters 2


The more slits, the better. This way, when you Mod Podge the sides down, they will lay perfectly and the front will be seamless.

Paper Mache Letters technique


Once you've done the front, cut a long strip of paper to go around the sides and cover all the slits and folded over parts from the front piece. Make sure this piece is wider than the side, because just like the front, you will adhere it and cut slits all in the edges to make it fold over the back. This way, when it's on the wall, it will look like it perfectly wraps around the whole letter.

Letter k


Once it's dry, add another coat of Mod Podge to the top to seal it all. Then hang on the wall with a little tacky putty, and enjoy!

Letters all

Sunday, March 27, 2011

Chicago Craft Social

Yesterday I had the pleasure of leading a craft table at the Chicago Craft Social, and let me tell you, I had a blast!!

I hosted a table sponsored by Plaid (thanks Mod Podge Amy!) where we used Mod Podge, paint, glitter, fabric, and paper to decorate paper mache letters for our homes. If you remember, I did a little teaser post here.

Well, let me tell you: there were some incredibly crafty women there! I had such a fun time helping people learn to use Mod Podge while watching their creativity unfold.

First of all, I have to mention the venue. The Social was held at Catalyst Ranch in the West Loop of Chicago, and I have to say, this is the coolest venue I have ever seen. Super eclectic, funky, and colorful, it was the perfect spot for crafting!

blog 3 catalyst ranch chicago

blog 4 catalyst ranch chicago

blog 5 catalyst ranch chicago

blog 6 catalyst ranch chicago


My table was all set up and ready with a sign, paper mache letters, and all the paint, Mod Podge, and brushes I could ever need!

blog 1 paper mache letters

blog 2 craft social


Once the doors opened, there was a flood of women of all ages filling every seat in the place. And let me tell you, the women I had at my table were amazing! Some used fabric...

blog 7 craft social


Some used paint...

blog 8 craft social


And one girl even found an old Charlie Brown book in the scrap pile and used the characters to create a Peanuts R!

blog 12 craft social


And the finished products were just so cute.

blog 9 craft social

blog 11 craft social

blog 10 craft social

blog 13 craft social


Everyone had a fantastic time, and I was so happy I could be a part of it!

Another great part was catching up with great crafty friends, like Candie Cooper!

blog 15 candie cooper craft social


And of course, the woman who founded it all and is just a pleasure to work with, Amanda Edwards. She followed her dream of hosting a huge Chicago-wide crafting social event, and now each one is bigger and more amazing than the one before it!

blog 16 craft social


Thanks so much to everyone who came out and enjoyed the day with me! It was a blast!