Monday, August 1, 2016

Buffalo Caramel Corn

Buffalo Caramel Corn


Back in February of this year, we were invited to a Super Bowl party with some friends, and their invite said to bring some drinks and a snack to share.  I was tired of the usual chips and dips that I knew everyone else would bring, so I started searching for something else.  That's when a search for the term "buffalo" brought me to this recipe.  I decided to give it a try.

Turns out it's one of the most delicious and addicting snacks I've ever made in my life.  Everyone at the party was raving about it and couldn't stop eating it.  They all kept asking for the recipe.  It was a hit!

We made another batch last weekend because we were craving a sweet, spicy, salty snack, and it did not disappoint.  We ate the whole batch that weekend, just the two of us!

Buffalo Caramel Corn
adapted from Bon Appetit

Nonstick cooking spray
1/2 cup popcorn kernels
3/4 cup sugar
1/4 cup Frank's Red Hot Buffalo Sauce
3 tbs butter, cut into pieces
1 tsp salt
1/2 tsp baking soda
1/4 tsp cayenne pepper

Pop the fresh popcorn on the stove using your preferred stovetop popping method.  If you've never tried popping your own kernels, start here.

Preheat oven to 300 degrees. Line a rimmed baking sheet with parchment paper. Lightly coat parchment and a large bowl with nonstick spray; add popcorn to bowl. Set baking sheet aside.

Bring sugar and ¼ cup water to a boil in a medium saucepan over medium-high heat, stirring to dissolve sugar. Boil, swirling pan occasionally, until caramel is a deep amber color, 10–12 minutes.

Remove from heat; stir in buffalo sauce and butter (mixture will bubble vigorously). Return to a boil and cook another 3 minutes. Remove from heat; stir in salt, baking soda, and cayenne. Working quickly (and carefully—caramel will be very hot), pour caramel mixture over popcorn and toss to coat.

Spread out popcorn on prepared baking sheet and bake, tossing once, until dry, 15–20 minutes. Let cool.

Best if eaten same-day, but can be stored in an airtight container for a few days.  As if it could last that long!

Buffalo Caramel Corn

Tuesday, February 2, 2016

Silky Lemon Orzo

Sometimes the simplest recipes can blow you away.  This orzo recipe is just that - it's so perfect given how uncomplicated it is.  And moreover, I knew I had to put it on the blog ASAP since so many orzo recipes are cooked very, very differently.

For a little background, the other night we were cooking steak and I was combing my cupboard to figure out side dishes.  I noticed we had some orzo, which I probably haven't cooked with in a year or more, but I decided to use it since I was getting tired of our usual sides.  I googled the orzo to water ratio, and to my surprise, the vast majority of the recipes call for you to cook orzo in a large pot of boiling water, then strain it, then use the cooked orzo in whatever preparation you're looking for.

But in my mind, I really felt like I wanted to cook it more like rice than like pasta.  I wanted the orzo to soak up all the water and keep all the starch that is often lost when tossing out pasta water.

I found a lone recipe that finally gave me what I wanted (1 cup orzo to 2.5 cups water, but we'll get to that in a bit) - but the recipe itself was incredibly basic.  It was just orzo, water, butter.  Since we were having steaks, I decided I wanted more acid in a side dish to compliment the fat of the steak.  And so using only the orzo:water ratio as a guide, I made the dish using the flavors I was looking for.

My husband and I both took a bite and realized it was something truly special.

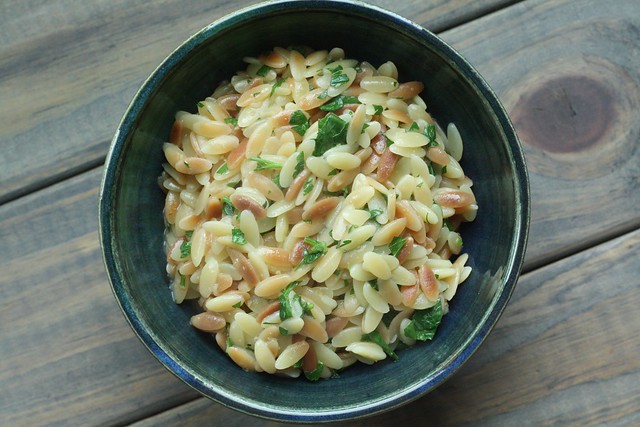
By cooking the orzo with a specific ratio of water to pasta, all the starch that usually transfers into the pasta water is retained and creates this incredibly silky, almost creamy, texture on the dish.  The lemon was just enough, but not too much, to bring some brightness to the pasta, and the chicken stock I used brought just enough salt and depth of flavor.  And finally, using fresh herbs to finish really brought the whole dish together.

Needless to say, we absolutely could not get enough.  The pasta was al dente, the mouthfeel of the starchy "sauce" that remained after cooking was incredible, and the flavor was a perfect balance.  This is going to be a mainstay in our household going forward for sure.


Silky Lemon Orzo


Silky Lemon Orzo

1 tbs olive oil
1 cup orzo
2.5 cups chicken broth
Pepper to taste
Juice from 1/2 lemon
1/4 cup chopped fresh Italian parsley
1 tsp chopped fresh thyme

Heat the olive oil in a small stockpot on medium-high heat.  Add the orzo and stir continuously, toasting the orzo until about 50% of the "grains" have browned.

Remove from heat and carefully add the chicken broth.  Return to heat and bring to a boil.  Boil on medium heat for 10 minutes, uncovered, stirring occasionally.  Stir in pepper and lemon juice.  Cover and remove from heat and let sit undisturbed for 7 minutes.

Uncover and add the fresh herbs and stir until all the herbs are incorporated and they begin to brighten/wilt a little from the heat.

Serve immediately and enjoy!

Monday, September 21, 2015

Yogurt-marinated chicken

We recently decided to branch out of our usual chicken marinades, and try a yogurt-based marinade.  I was familiar with this type of marinade, and certainly know that the yogurt can be great at tenderizing the chicken.

When searching for recipes, I found myself drawn to those that had good herb impact and lots of flavor from more than just the yogurt.  As always, I drew inspiration from a few different recipes, and made it my own.

We have done it with chicken tenders and with chicken thighs, and I must say, I was a huge fan of the thighs!  They get so tender and even when grilled and charred, they retained wonderful flavor and texture without toughening up.  That said, the chicken tenders were great as well, and I think you could use this marinade on just about any type of cut!

Yogurt-Marinated Chicken

1 17.5oz (500g) tub of full fat Greek yogurt (I used Fage)
1 small bunch cilantro, including stems
1/2 large onion, quartered
1/2 cup olive oil
6 garlic cloves
Juice of half a lemon
1 1-inch knob of ginger, peeled
1 tbs garam masala
2 tsp turmeric powder
2 tsp salt
1 tsp pepper

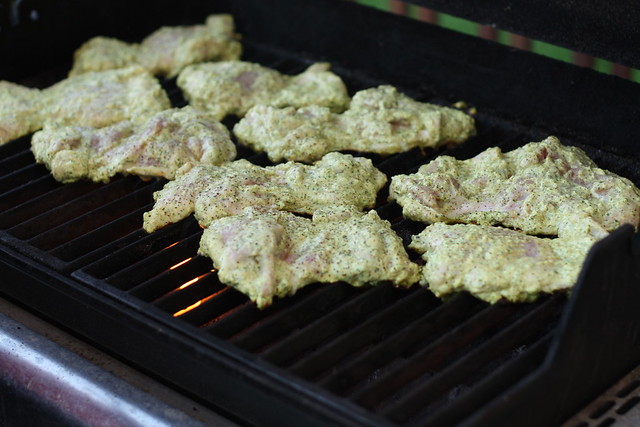
Throw everything in a food processor or blender and puree it all into a creamy marinade.  Pour over chicken cuts of your choice and cover and chill in the fridge for 12-24 hours.

When you're ready to begin cooking, take the chicken out of the fridge and let warm up for 15 minuts on the counter.  Then, using your hands, take each chicken piece out of the marinade and scrape off some of the excess marinade to avoid unnecessary mess and burning.

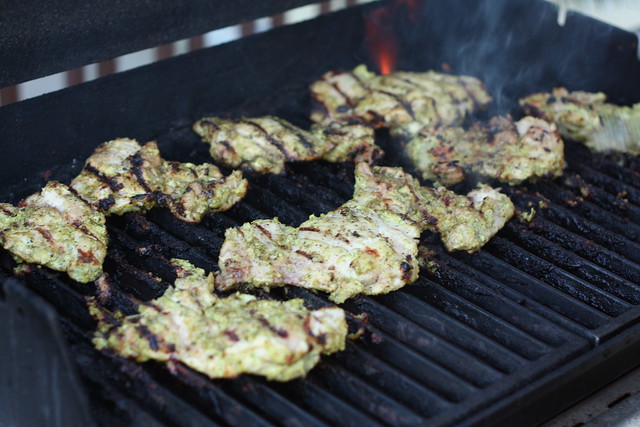
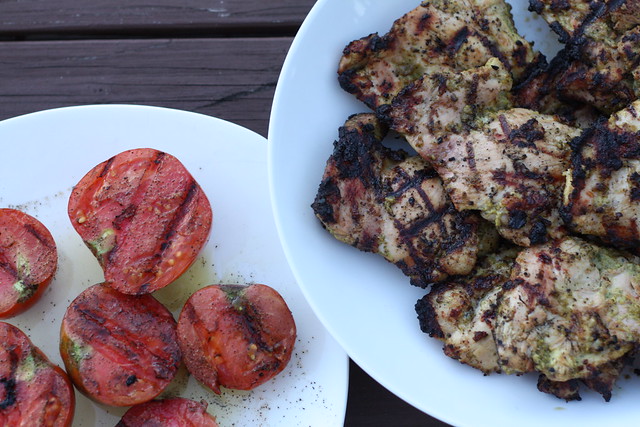
Grill the chicken on a grill on medium-high heat.  Turn the chicken a few times and cook through.  Ideally, get a little bit of char on the chicken to enhance the grilled flavor.  Serve with sides of your choice - I loved some fresh grilled tomatoes and turmeric-spiced rice.


IMG_8430

IMG_8471

IMG_8507

Tuesday, April 7, 2015

Popovers

Popovers

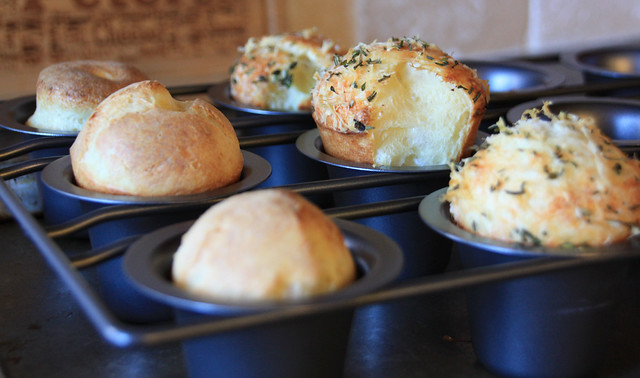
This past weekend, my parents were in town visiting for Easter, and we decided to make some popovers.  I went through a brief popover phase a few years ago, but then they fell out of my rotation.  I had a hankering for them again recently, and remembered how I used to make them in muffin tins, but always wanted to try them properly in a popover pan.  I quickly ordered one off of Amazon, and I must say it makes a big difference!

We decided to make two versions - one plain, and one topped with parmesan and fresh thyme.  The plain popovers are great with some jam, and the savory popovers are perfect with just a little butter.


Basic Popovers

1 1/2 cups whole milk
1/2 cup heavy cream
4 eggs
2 cups flour
1/2 tsp salt

Pre-heat the oven to 450 degrees.  Put the popover pan in the oven (if it sits awkwardly on the rack, set it on a baking sheet) to warm the pan with the oven.

Whisk the eggs in a large bowl and set aside.

Warm the milk, cream, and salt slowly on the stove until the temperature reaches approximately 125 degrees.

Slowly pour the milk mixture into the eggs while continuing to whisk.  Don't incorporate too quickly or the eggs will begin to scramble.

Sift the 2 cups of flour into the egg/milk mixture, and gently incorporate just until there are no large lumps left.  Do not over-whisk or the popovers will be dense and flat.

Remove the popover pan from the oven.  At this point, I used a good non-stick popover pan, so I didn't need to grease/butter the cups.  However if you don't have a non-stick, definitely generously butter or spray your cups.  Then use a small pitcher or a turkey baster (I'm telling you, this works!) to fill each cup half-full with batter, and no more.  Work quickly to avoid the pan cooling too much.

If you are topping the popovers with any savory items such as cheese and herbs, add them now to the top of the batter in each cup.

Bake at 450 degrees for 15 minutes, then turn down to 350 and bake for another ~10 minutes, or until the outside is brown.  Make sure not to open the oven during the cooking process, or the popovers will begin to deflate.  

Remove the pan from the oven and serve popovers immediately.